Immersive 3D Desktop
Turn Everything into Stunning 3D
Transform your digital world with Immersive 3D, a revolutionary technology that combines advanced AI with VITURE's proprietary 3D algorithms to create stunning immersive environments. Whether you're a professional seeking enhanced productivity, an entertainment enthusiast, or a dedicated gamer, Immersive 3D delivers an unparalleled visual experience that changes how you interact with digital content.
Immersive 3D utilizes state-of-the-art AI processing to convert standard 2D content into rich, depth-enhanced 3D visuals in real-time. The technology analyzes each frame, identifying depth cues and spatial relationships to create a natural, immersive 3D effect that maintains visual quality while minimizing latency.
Download
Immersive 3D for Mac
Download the lastest Immersive 3D for Mac.
Click here to view the Immersive 3D for Mac release notes and full update history.
Immersive 3D for Windows
Download the lastest Immersive 3D for Windows.
Click here to view the Immersive 3D for Windows release notes and full update history.
Requirements
Mac
- Processor: All Apple Silicon devices (M-series chipsets). We recommend M2 or newer for a better experience.
- Operating System: macOS Sequoia or Sonoma 14.2+.
- Supports devices without built-in displays, such as Mac Mini and Mac Studio.
Windows
- Processor: Intel or AMD x64 processors. We recommend Intel® Core™ Ultra 200V Series and Intel® Core™ Ultra Series 3 Processors for a better experience.
- Memory: 32 GB RAM and more
- GPU:
- Movie Playback: NVIDIA RTX 2050 or higher recommended for smooth 1080p@60fps performance
- Gaming:
- Minimum: NVIDIA RTX 4080 Laptop – supports medium settings at 1080p@60fps.
- Recommended: NVIDIA RTX 4080 Desktop – supports high settings at 1080p to 1440p@60fps
- Operating System:
- Minimum: Windows 10 1803
- Recommended: Windows 11 24H2
Connect Your XR Glasses
- Connect your XR Glasses according to your model:
- Magnetic Connector: Attach the magnetic connector to the XR Glasses.
- USB-C Connector: Plug the USB-C connector directly into the XR Glasses.
- Plug the USB-C cable into a port that supports DisplayPort Alt Mode.
- On Mac: a port with the Thunderbolt symbol ensures compatibility.
- On Windows: if your computer lacks a USB-C port with DisplayPort Alt Mode, you'll need a DP + USB-A to USB-C adapter or an HDMI + USB-A to USB-C adapter to create a full-featured USB-C connection.
- The app will automatically detect the XR Glasses and proceed.
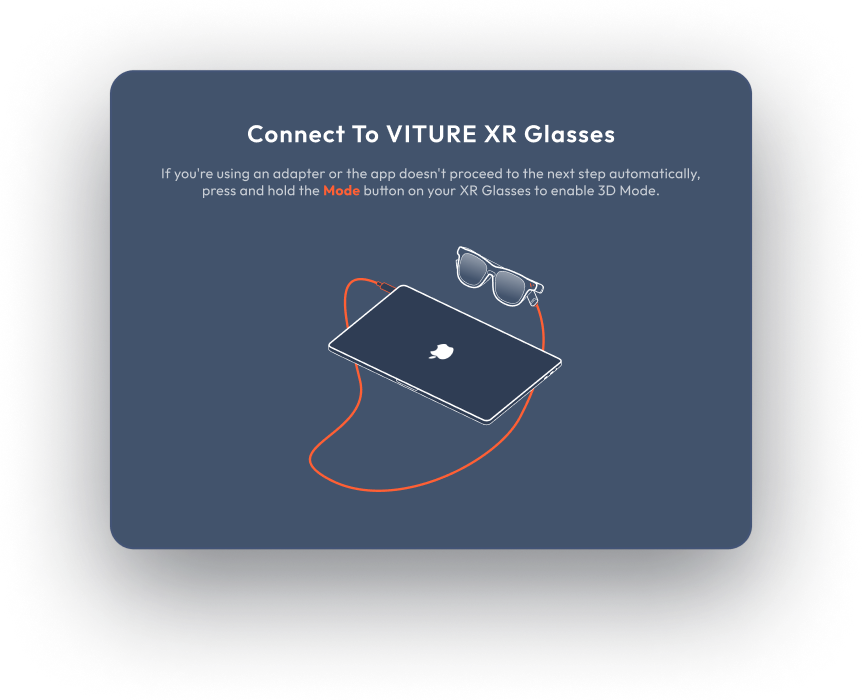
First time on Mac
Grant Screen Recording Permission
To display virtual screens on XR Glasses, grant Screen Recording permission:
- Open System Settings (Apple menu > System Settings).
- Click "Security & Privacy > Privacy > Screen Recording.
- Check the box next to "Immersive 3D." Unlock changes with your admin password if needed.
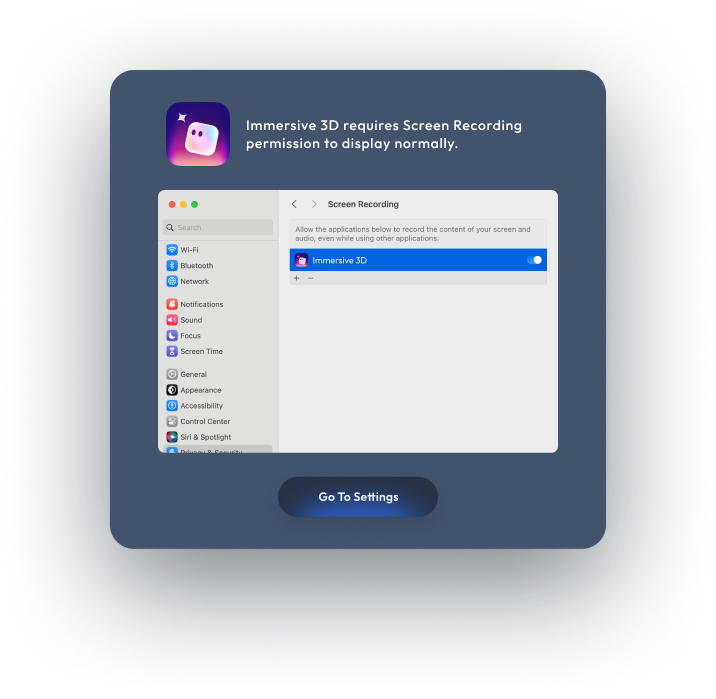
Settings
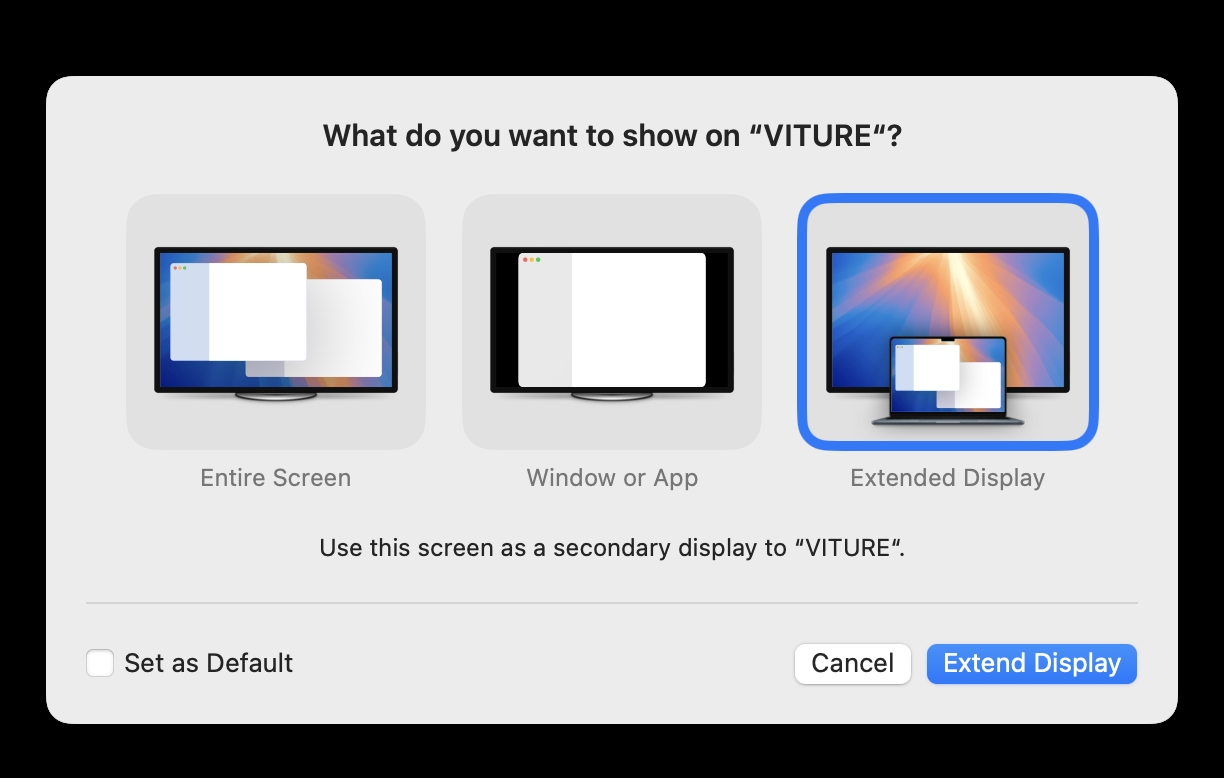
When connecting XR Glasses for the first time on Mac, a dialog may appear. Select "Extended Display" and check "Set as Default" in the bottom-left corner. This dialog may appear twice during the initial setup; follow the same steps each time.
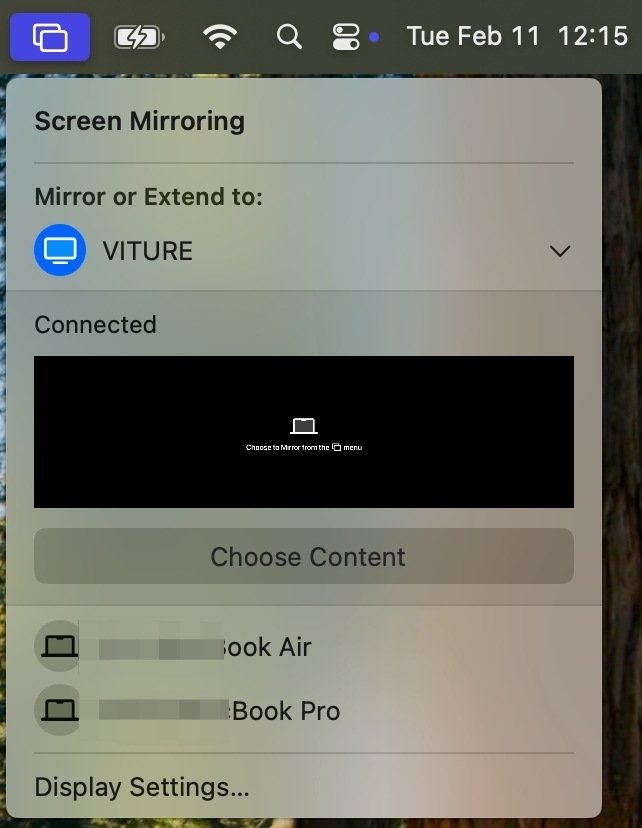
If the dialog above does not appear and the display on the XR Glasses shows a black screen with the text "Choose to mirror from the menu" (as shown in the image below), this typically occurs when enabling 3D Mode or switching to 120Hz. In this case, click the menu bar and select "VITURE" as the Extended Display.
Select Display Layouts
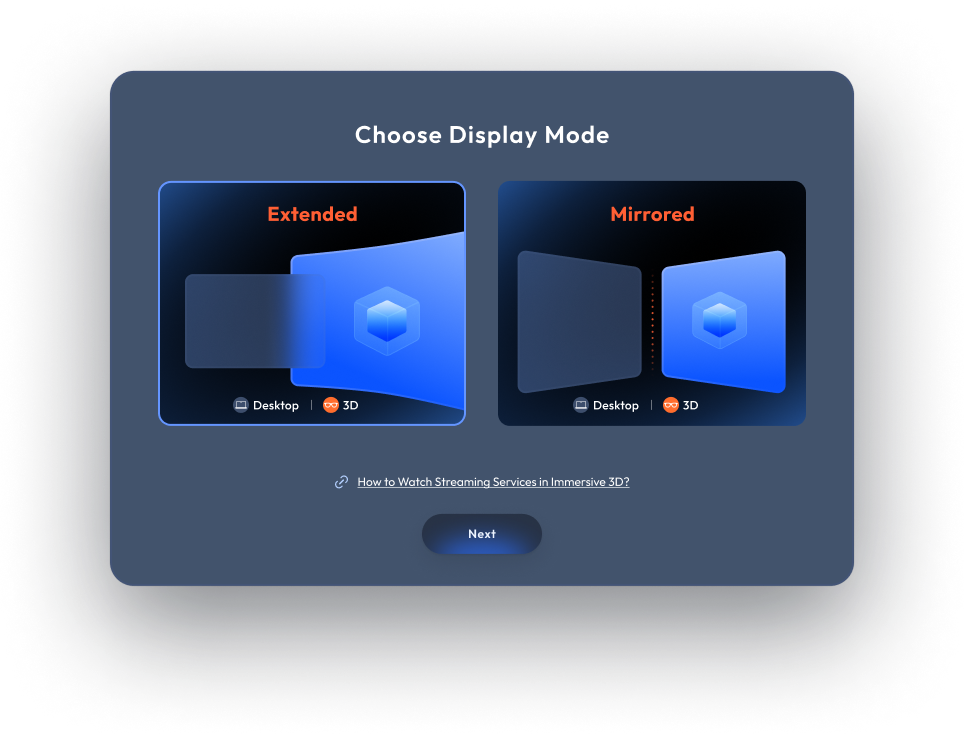
Once connected, you will be presented with two display layout options on the launch page. Select your preferred layout:
- Extended Mode
- Enjoy a dedicated 4K virtual 3D display while maintaining your primary screen, ideal for privacy-focused work.
- Mirrored Mode
- Mirrors the built-in display in real-time as a 3D display.
Render Modes on Windows
Considering the diverse range of Windows PCs, we provide two render modes to optimize the Immersive 3D experience:
- Quality Mode: Recommended for high-end GPUs, such as Nvidia RTX 4060 Laptop or higher. Provides high-precision AI 3D conversion, enhancing the clarity of edges and contours of objects with different depths.
- Performance Mode: Optimized for gaming laptops and mid-range GPUs. Offers slightly reduced edge precision while significantly boosting frame rates for smoother performance.
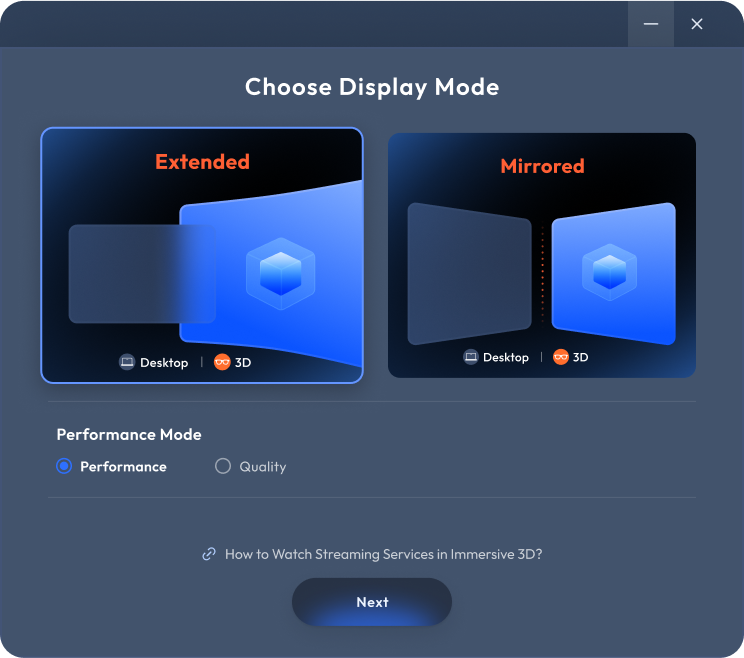
Note: In upcoming releases, we will remove this option for PCs using Nvidia GPUs, as Nvidia GPUs offer superior CUDA processing performance, making Quality Mode and Performance Mode indistinguishable. As a result, users with Nvidia GPUs will no longer see this option. We recommend updating your driver to the latest version for the best performance.
Launch the App
After selecting your display layout, click "Launch" to start Immersive 3D. The XR Glasses will automatically switch to 3D Mode.
If 3D Mode fails to activate, reconnecting the XR Glasses typically resolves the issue.
If you are using an adapter instead of connecting the XR Glasses directly to a USB-C port with DisplayPort Alt Mode on Windows, you must enable 3D Mode manually by pressing and holding the Mode button.
Watch Streaming Services in Immersive 3D
To enjoy streaming services like Netflix or Disney+ in Immersive 3D, follow these steps to configure your browser:
- Use a compatible browser such as Chrome, Edge, or Firefox.
- Open the browser and access the settings menu (for Chrome: three dots in the top-right corner; for Edge: next to the search bar).
- Navigate to Settings and go to System or equivalent settings.
- Disable Use hardware acceleration when available or Use recommended performance settings, if these options are available.
- Restart the browser to apply changes.
- Enjoy your favorite content in Immersive 3D.
Play Games in Immersive 3D for Windows
Since Immersive 3D utilizes GPU resources, running it alongside games requires additional processing power. For a smooth experience, particularly with AAA games at 60 FPS, we recommend using an NVIDIA RTX 4080 or higher. (Refer to reliable GPU benchmark rankings for performance comparisons.)
Performance Testing Results:
- GPU: NVIDIA RTX 4080
- Game: Black Myth: Wukong (High Graphics preset, Ray Tracing off)
- Immersive 3D Render Mode: Performance Mode
- GPU Usage: about 90%
- Result: Smooth gameplay at 60 FPS
Customize the Preferences
Immersive 3D offers a variety of customization options without requiring you to quit the app. Access the system tray / app menu to modify settings.
Switch Display Mode
Easily switch between Extended Mode and Mirrored Mode.
During the switch, the screen may flash or briefly go black. This is normal, and the process will complete in a few seconds.
Switch Render Mode on Windows
Toggle between Quality Mode and Performance Mode.
Similar to display mode switching, brief flashing or black screens may occur. Please wait for the process to finish.
Disable Built-In Display
Choose this option to turn off your device’s built-in display, allowing operation exclusively on the XR Glasses' display, perfect for privacy-focused work.
Note: For gaming laptops with both an integrated and discrete GPU, the performance of Immersive 3D is limited due to system constraints. To achieve a smooth 60 FPS experience, please disable the built-in display.
Depth Levels
Immersive 3D offers three depth levels to tailor your 3D experience:
- Enhanced: Delivers the maximum 3D effect for full immersion.
- Standard: Provides a balanced 3D intensity for general use.
- Soft: Offers a subtle depth enhancement for prolonged viewing comfort.
Immersive Modes
Special modes are available to optimize performance and quality for specific use cases:
- Movie Mode: Ideal for video content, processes each frame in real time to vividly recreate cinematic 3D visuals.
- Game Mode: Tailored for gaming, minimizes latency while maintaining high 3D quality for a seamless experience.
XR Glasses Integration
Immersive 3D includes convenient options for managing your XR Glasses:
- Adjust brightness and volume directly from the app menu, mirroring the hardware buttons on the glasses.
- Update the XR Glasses’ firmware via the app by clicking "Update XR Glasses".
Supported Languages
Immersive 3D supports:
- English
- Japanese
- Simplified Chinese
- Traditional Chinese
- Thai
The display language defaults to English but will switch to your system language if it's supported.
Send Feedback, Check for App Updates, and Quit the App
- Use the Send Feedback option to share your experience or report issues.
- Check for the latest app updates to ensure you’re running the most optimized version.
- Select Quit Immersive 3D from the menu when you’re ready to close the application.
Install Virtual Display Driver
For Snapdragon X Series Windows ARM64 Devices. To use Immersive 3D in Extended mode, a virtual display driver is required. If you're only using Mirrored mode (and don't need to disable the built-in screen), simply install the app—no driver setup needed.
We’ve integrated the open-source SudoVDA virtual display driver into the Immersive 3D installer, However, on ARM-based laptops (e.g. Snapdragon X series), a few system settings must be adjusted before installation.
Installation Steps:
- Disable BitLocker (if enabled): Open the Start menu and search for Device encryption settings. If Device Encryption is visible, toggle it off. This may take several minutes. If the setting is not found, BitLocker is not enabled—skip this step.
- Disable Secure Boot: Restart your computer and press F2 repeatedly during startup to enter BIOS. Then locate Secure Boot and disable it.
- Enable Windows Test Mode: Open PowerShell or CMD as Administrator, run the command:
bcdedit /set testsigning on. - Restart Your Computer: After rebooting, you should see “Test Mode” in the bottom-right corner of the desktop.
- Install the Driver*: Run the Immersive 3D installer. After installation, open Device Manager. Under Display adapters, confirm that SudoMarker appears.
If SudoMarker is listed, the driver was installed successfully. If not, verify that Test Mode was enabled before installation.
Notes:
- The driver only needs to be installed once per device (unless manually removed).
- It will not be overwritten by future software updates.
Content Compatibility
Immersive 3D ensures extensive compatibility with various content and platforms:
- Streaming Services: Fully supports non-DRM platforms like YouTube and browser-based services including Netflix, Amazon Prime Video, Disney+, Max, Hulu, ESPN, Paramount+, Peacock, and Crunchyroll.
- Applications: Universal application support.
- Gaming: Extensive support for games, with a few considerations:
- For games using anti-cheat systems, switch to Mirrored Mode to avoid compatibility issues.
- Cloud Gaming: Seamless compatibility with Xbox Cloud Gaming and GeForce NOW.
- Remote Play: Supports services like Xbox Remote Play for gaming on external systems.
Note: Please disable browser GPU acceleration to bypass DRM limitations. Detailed instructions are provided below.
Performance Specifications
Immersive 3D has been tested across various hardware configurations. Performance may vary depending on device specifications, usage duration, and power consumption.
Mac
- M1 chips: Real-time 3D rendering at 30 FPS.
- M4 chips: Real-time 3D rendering up to 60 FPS for smoother visuals.
Windows
- Quality Mode: On Nvidia RTX 4060 Laptop GPUs, displays real-time 3D in 1080p at 35 FPS or 1440p at 30 FPS.
- Performance Mode: Using Extended Mode while playing Black Myth: Wukong, Nvidia RTX 4060 Laptop GPUs achieve 1080p at 40 FPS, delivering smooth gameplay.