The Beast XR Glasses
VITURE Beast XR Glasses
Introducing VITURE Beast — Born Stable. See Immersion.
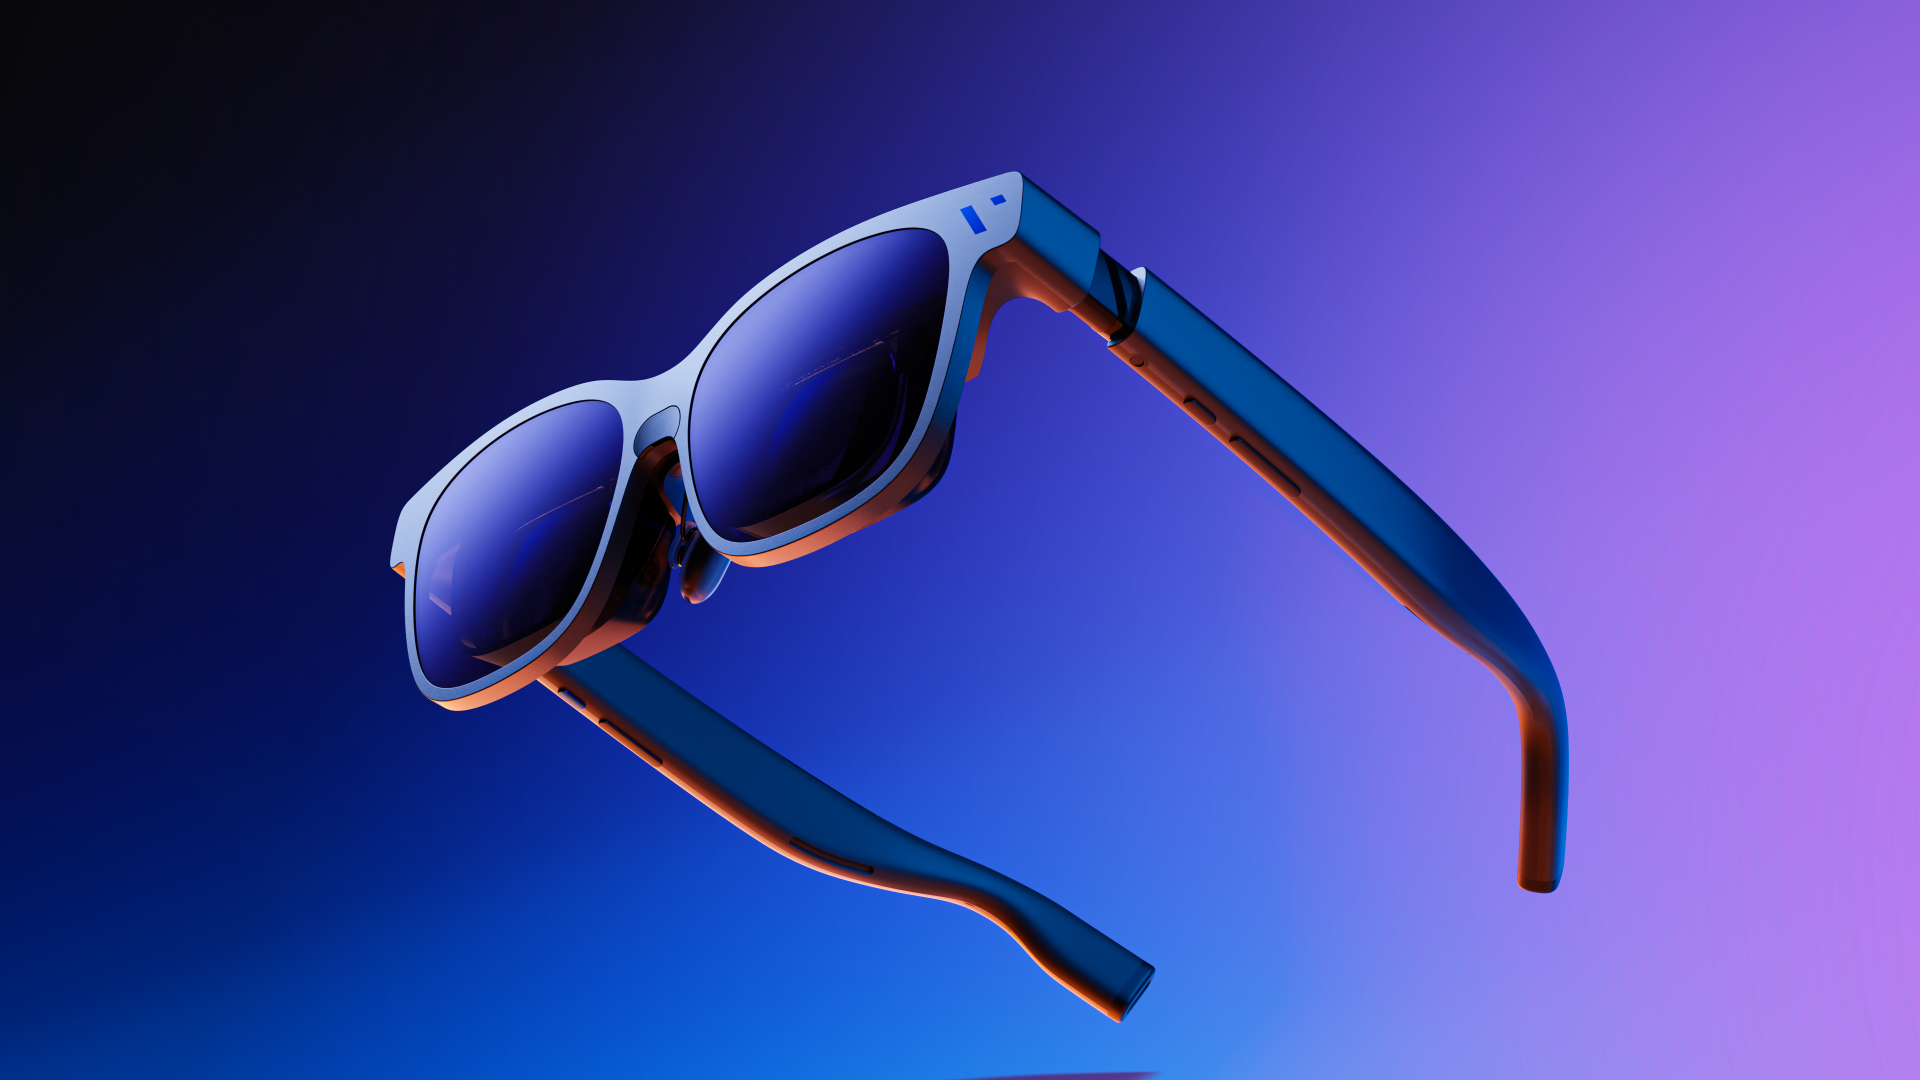
A new class of personal visual interface engineered for pro-level immersion. At its core is a dedicated XR computing engine delivering ultra-low latency, fluid 3DoF motion tracking, and dynamic screen flexibility. This built-in hardware creates a rock-steady floating anchor in physical space, allowing you to instantly switch between Anchor Mode, Smooth Follow, UltraWide, and Side viewing modes — all at any scale.
Unmatched Visual Power
The Beast delivers our largest, sharpest, and brightest display to date. By combining Sony's latest Micro-OLED technology with VITURE's proprietary optical system, Beast unlocks an expansive 58° FOV, producing a breathtaking 174-inch cinematic canvas at 4 meters. Experience industry-leading clarity, superior audio performance, universal device compatibility, and a lightweight form factor built for comfort and performance anywhere.
9+ Level Electrochromic Film for Smooth Transitions
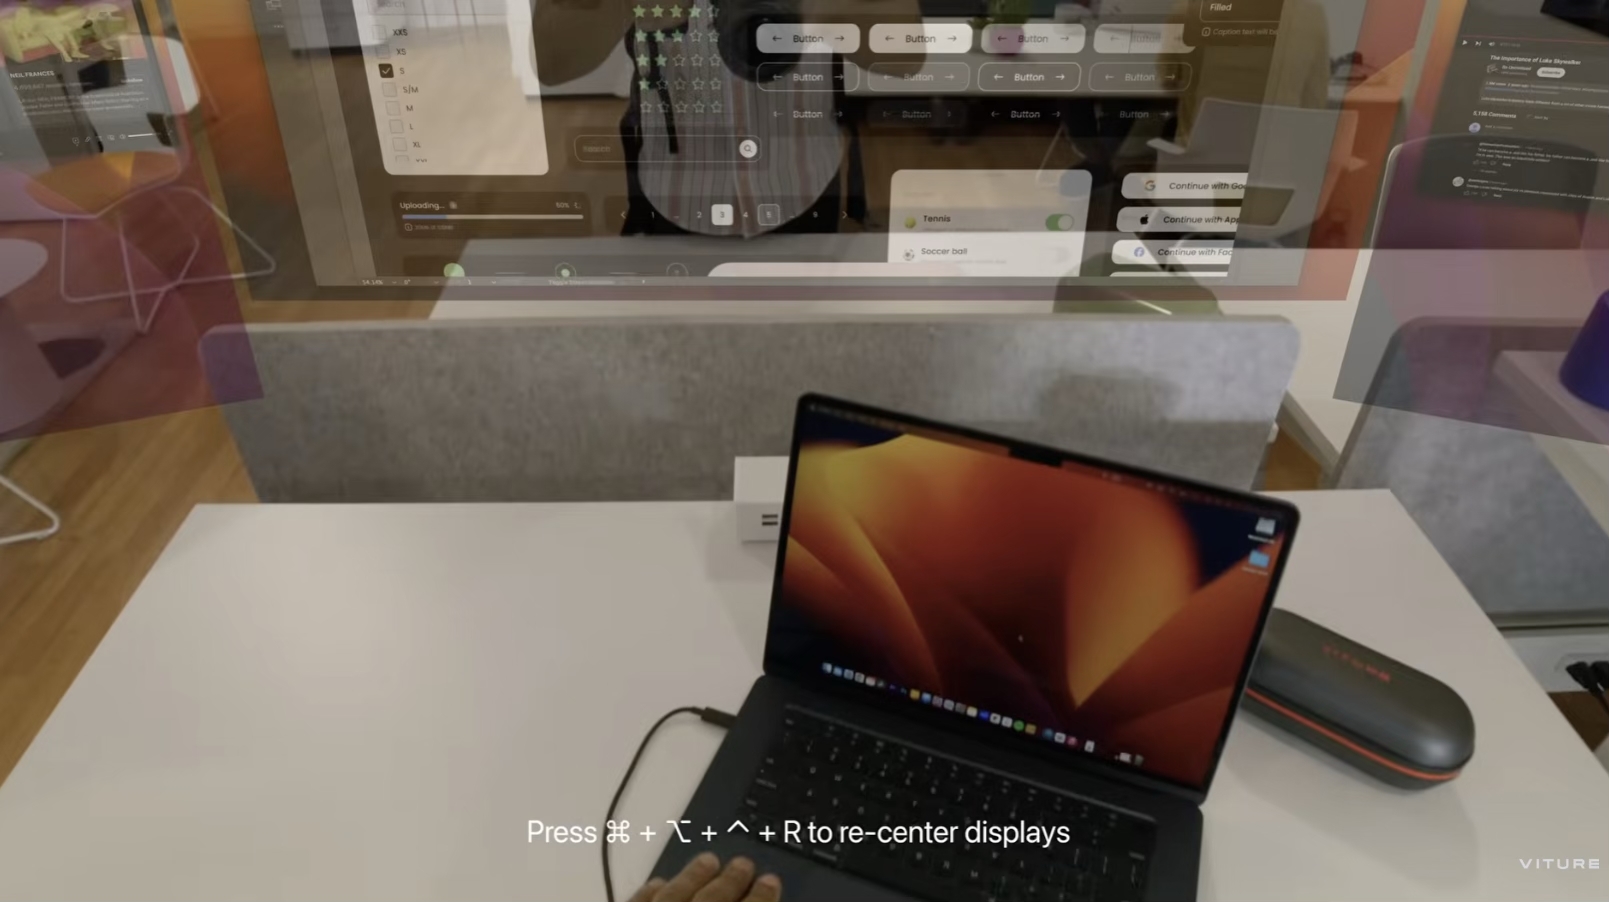
Pushing VITURE's breakthroughs to the next level, The Beast integrates a 9-level electrochromic dimming system along with automatic electrochromic transitions (industry-first since SpaceWalker), allowing the display to seamlessly transition between dimming and transparency, smoothly, and entirely built into the glasses themselves.
Total Versatility
Gaming
A true next-generation ecosystem for gamers. The industry-leading FOV creates a deeply enveloping sense of presence, delivering atmospheric immersion like never before.
Streaming & 3D
Built-in 3DoF enhances standard media, while VITURE's exclusive Immersive 3D technology converts 2D content into natural spatial depth in real time, bringing cinematic experiences to life.
Productivity
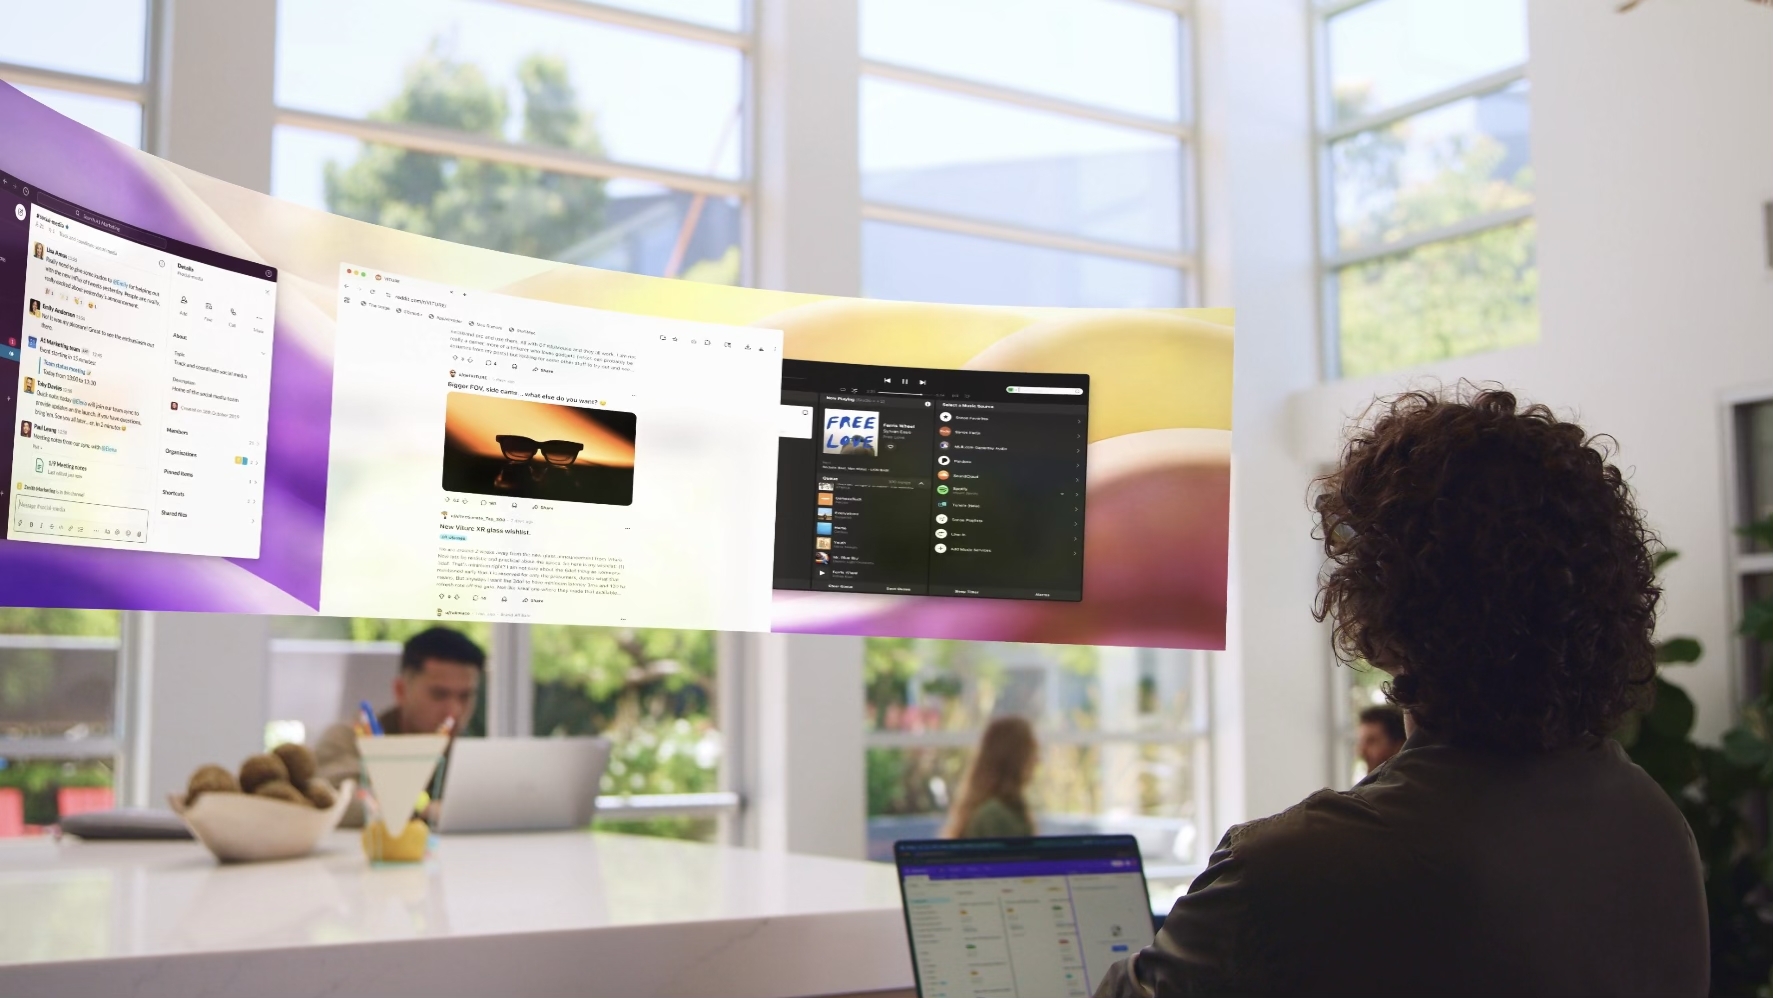
Unlock limitless multitasking with the 32:9 UltraWide Mode for Mac and Windows. Combined with VITURE's SpaceWalker platform and ultra-low-latency built-in 3DoF capabilities, The Beast also transforms productivity into a fluid, multi-screen workspace wherever you are.
Capabilities
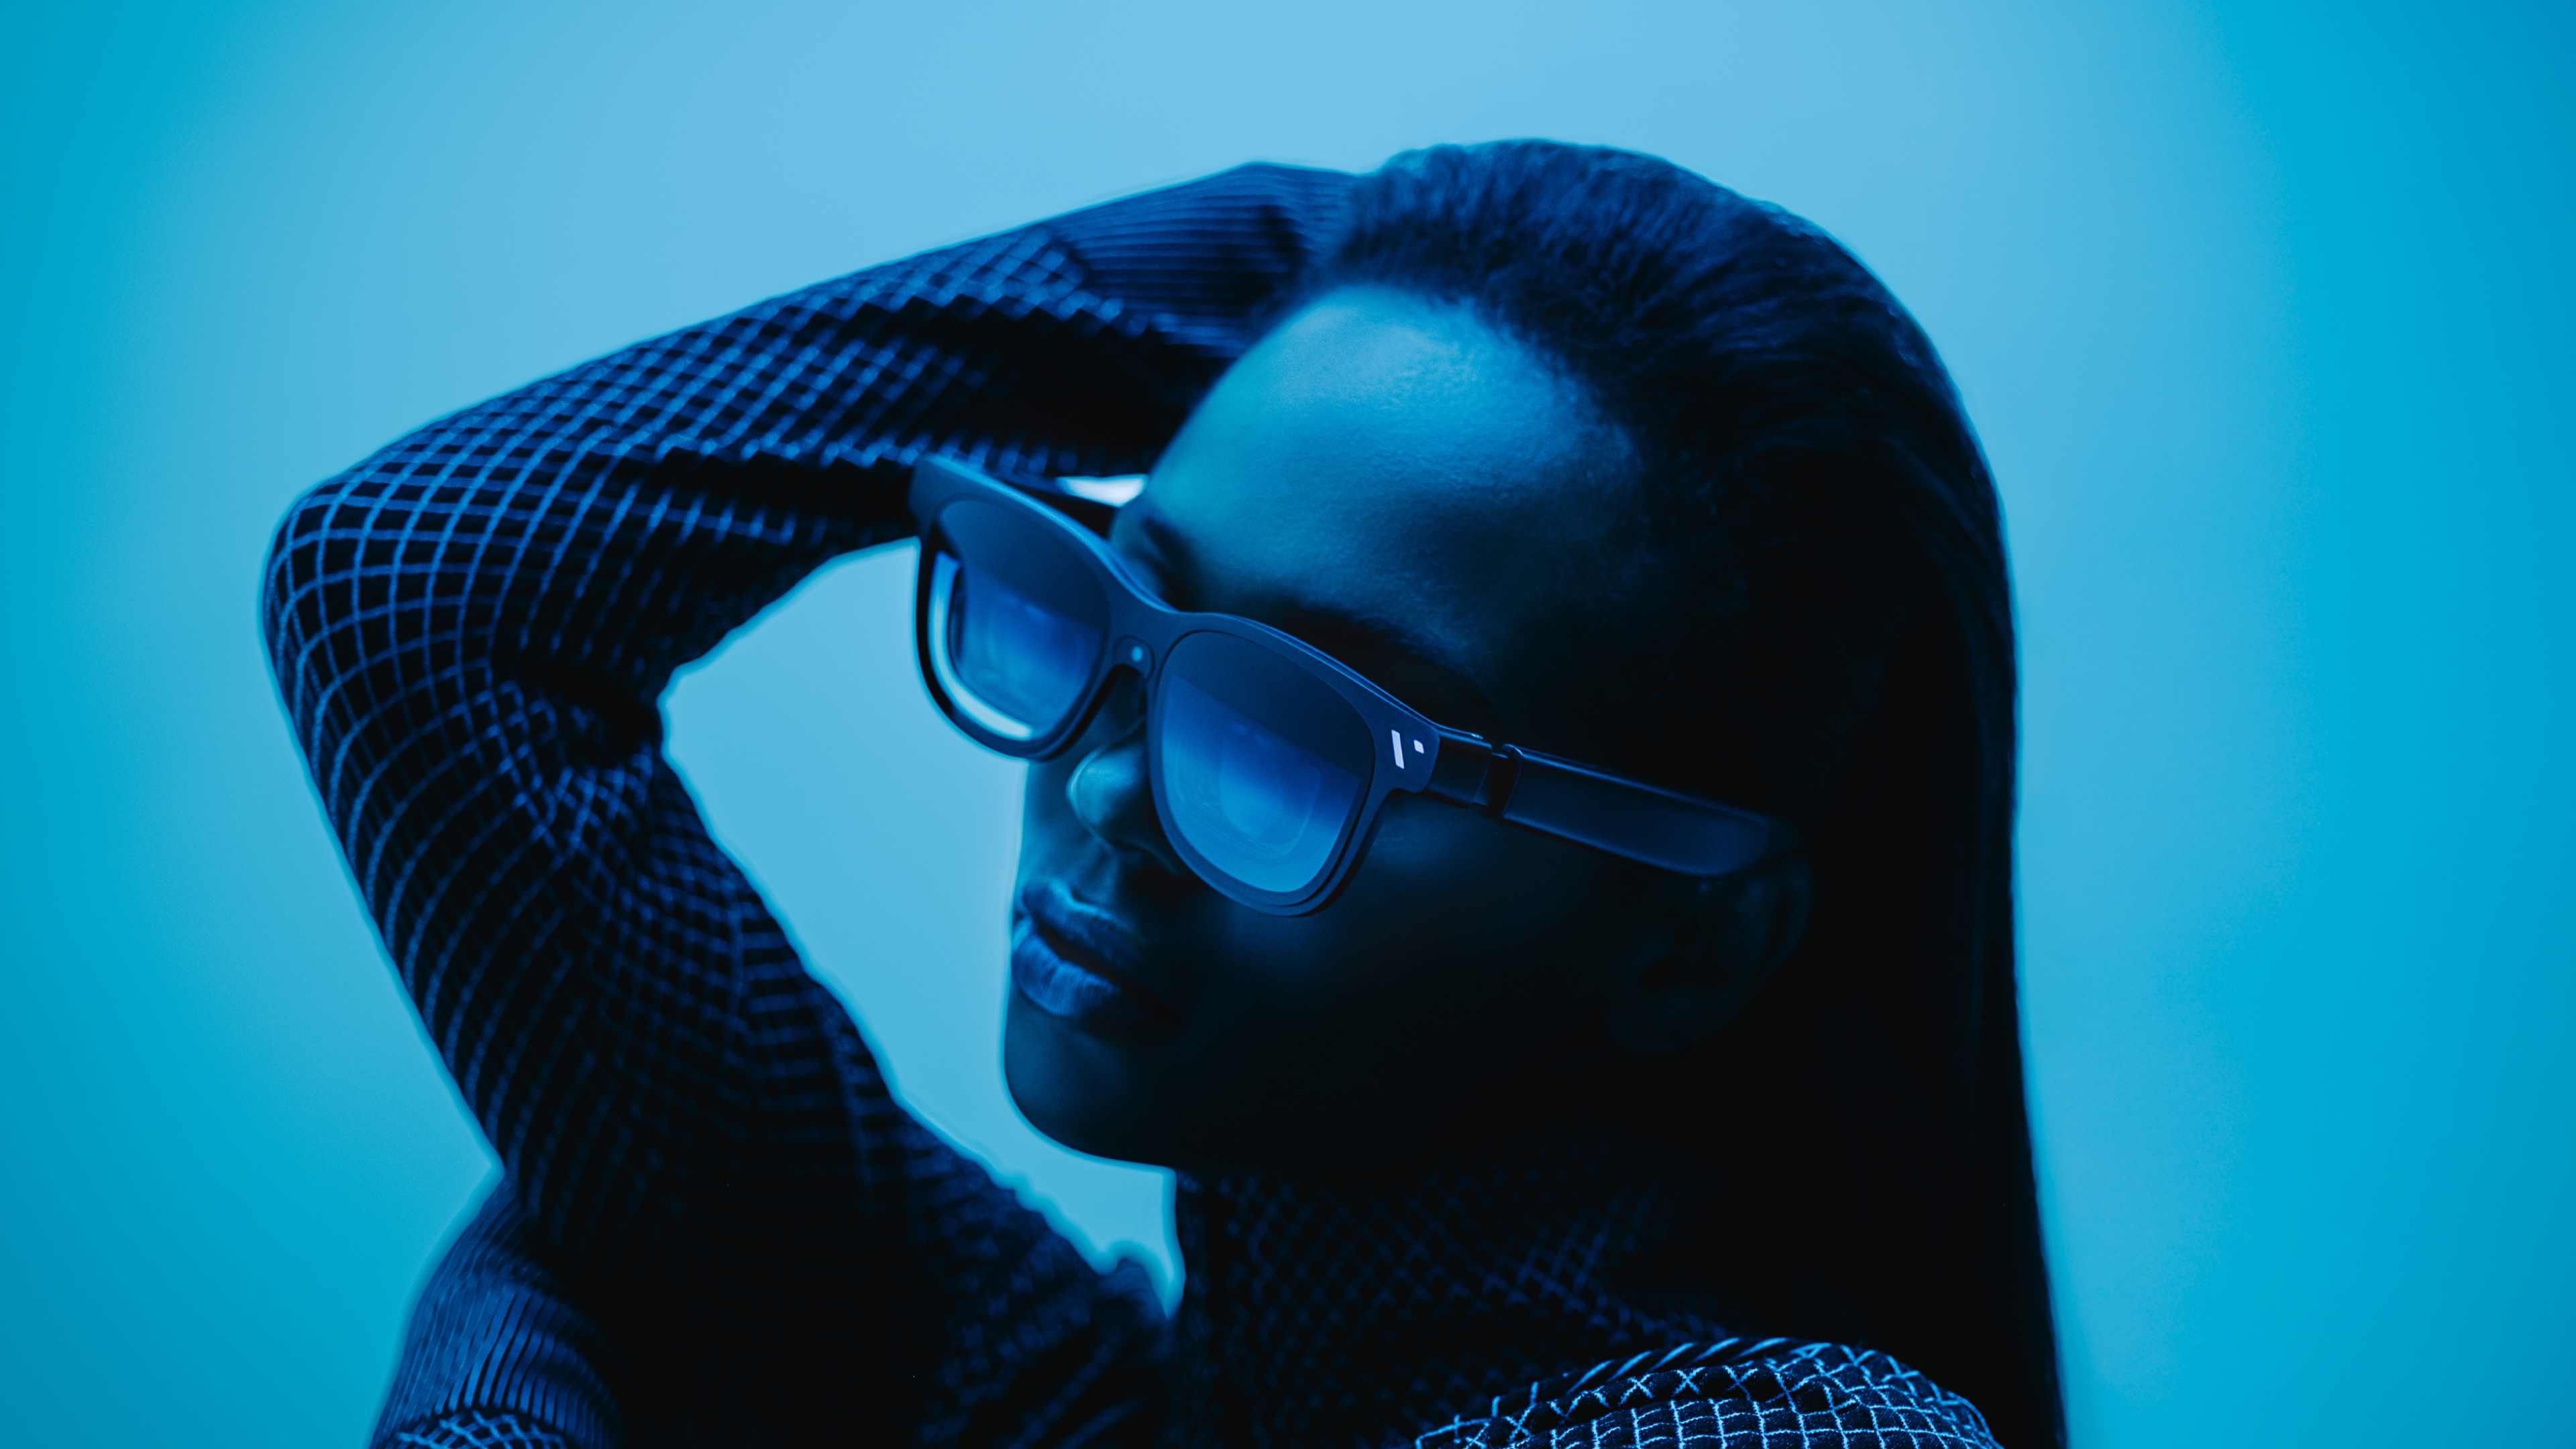
Born Stable. See Immersion
Anchor Display
Built-in Ultra-Low Latency Anchor Mode
Native XR computing power delivers ultra-low latency and fluid 3DoF motion tracking, enabling true screen flexibility — including distance, size, Smooth Follow, UltraWide, and Side Mode — all processed directly on the glasses.
VisionPair™ 3DoF
Maintains optimal brightness, clarity, and visual stability for a premium XR experience — exclusive to VITURE.
174" 120Hz Ultra-Sharp Display
Immersive, high-fidelity visuals on a massive cinematic canvas.
Sony Micro-OLED + VITURE Optical Engine
Sony's latest Micro-OLED combined with VITURE's proprietary optical design delivers industry-leading sharpness with up to 1250 nits peak brightness, a hallmark of VITURE display excellence.
Dynamic Screen Scaling
Instantly toggle between UltraWide, Smooth Follow, and Side Mode perspectives.
Spatial Audio
HARMAN AudioEFX
Next-level, high-fidelity spatial sound designed with HARMAN. Advanced acoustic shielding and reverse-audio cancellation technology enhance immersion and privacy.
Vision Lenses
Dynamic Tint Control
Advanced 9+ level electrochromic dimming for instant immersion — elevating VITURE's first breakthrough to a new level.
Precision IPD Alignment
Dual frame sizing ensures ideal IPD and long-term visual comfort.
Prescription-Ready Design
Supports insert lenses for personalized vision correction.
VITURE Signature Craftsmanship
Aerospace-Grade Metal Frame
Ultra-lightweight magnesium alloy frame with a refined matte finish.
Signature Aesthetic
A redesigned frame achieves premium refinement with expressive personal styling.
Adaptable Comfort
Flexible, tilt-adjustable temples ensure secure comfort for extended sessions.
Travel-Ready Portability
Elite engineering in a compact, durable form.
Intuitive Control
Universal Connectivity
Works with any USB-C device with display output (HDMI supported via adapter).
Intuitive OSD Menu
On-screen controls with customizable shortcuts. (See On-Screen Display for details.)
Integrated RGB Camera
Supports mixed-reality capture and basic 6DoF sensing (enabled via software update post-launch).
Ultimate Ecosystem Power
Powered by years of software innovation, VITURE Beast unlocks its full potential through SpaceWalker:
- Multi-window support on mobile, including iPhone — no adapter required
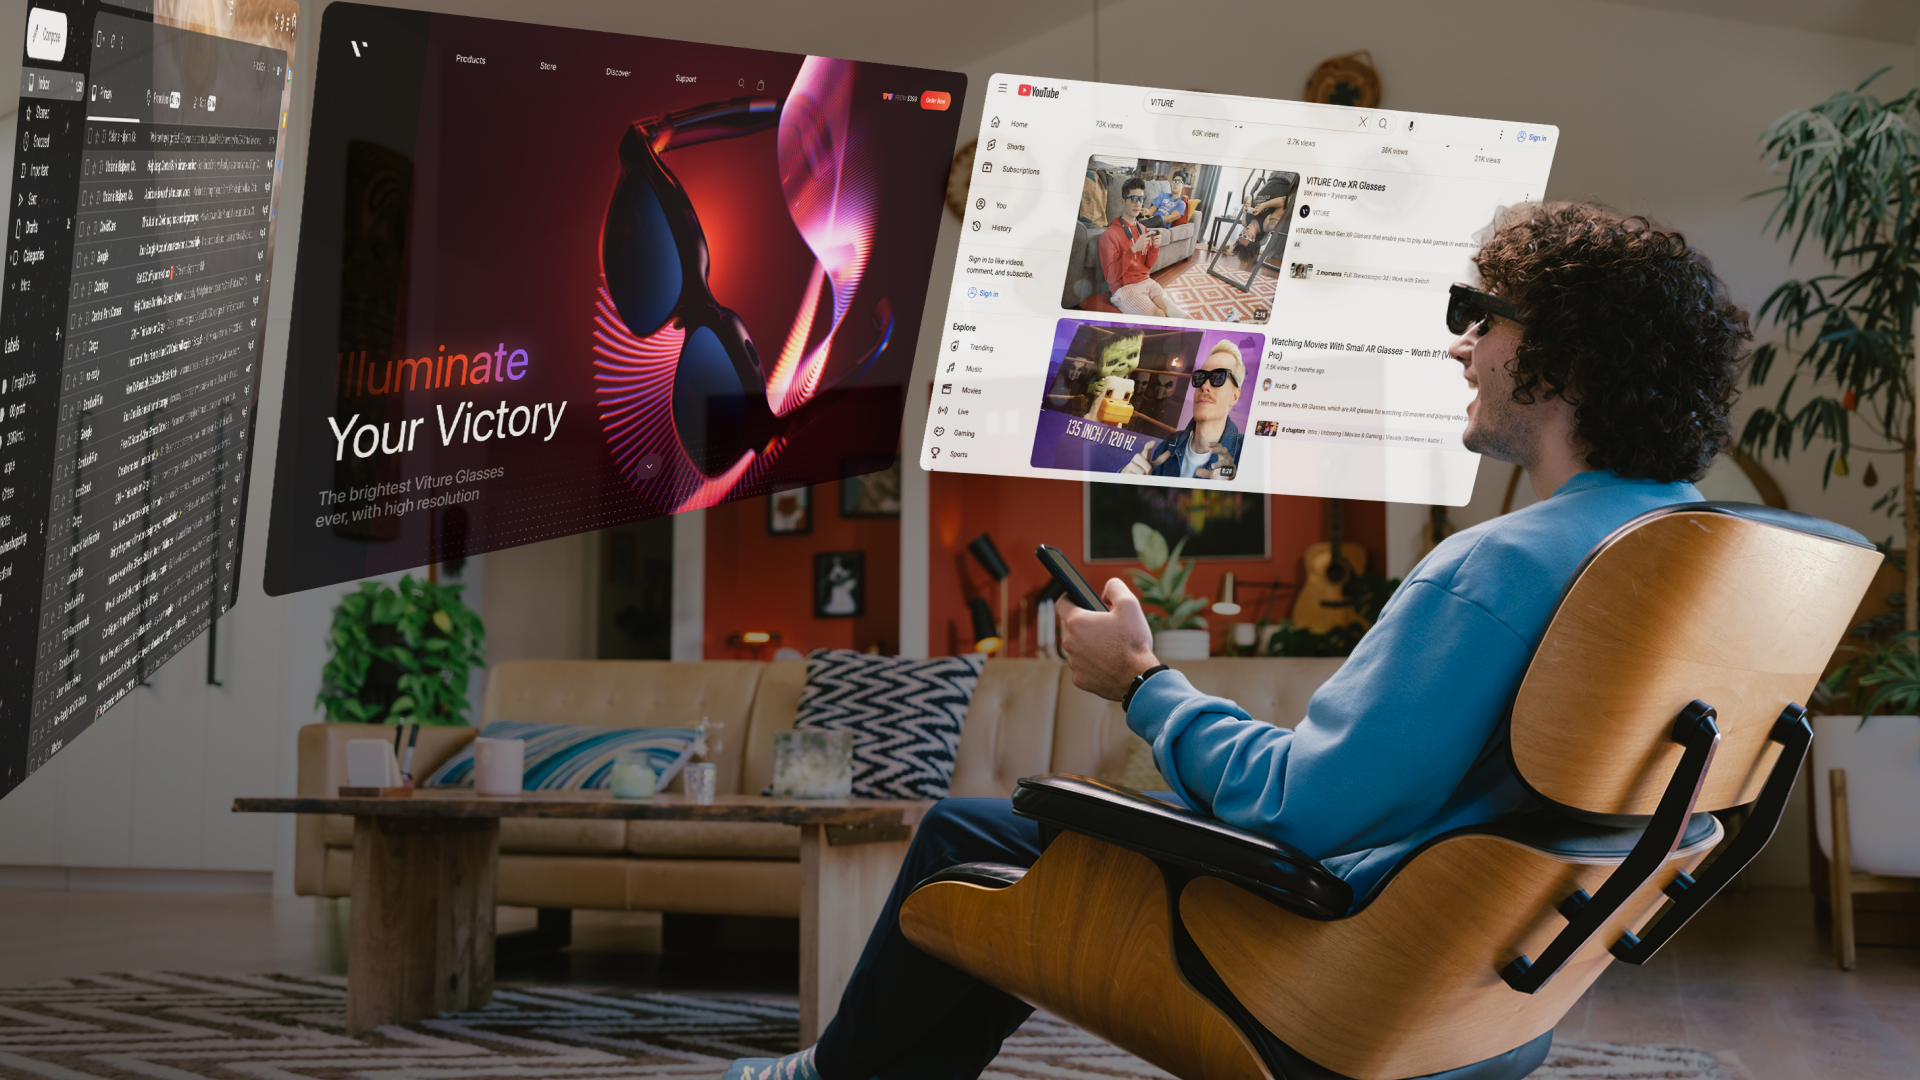
- Spatial Side Mode, even with phone closed (perfect for workouts and mobility)
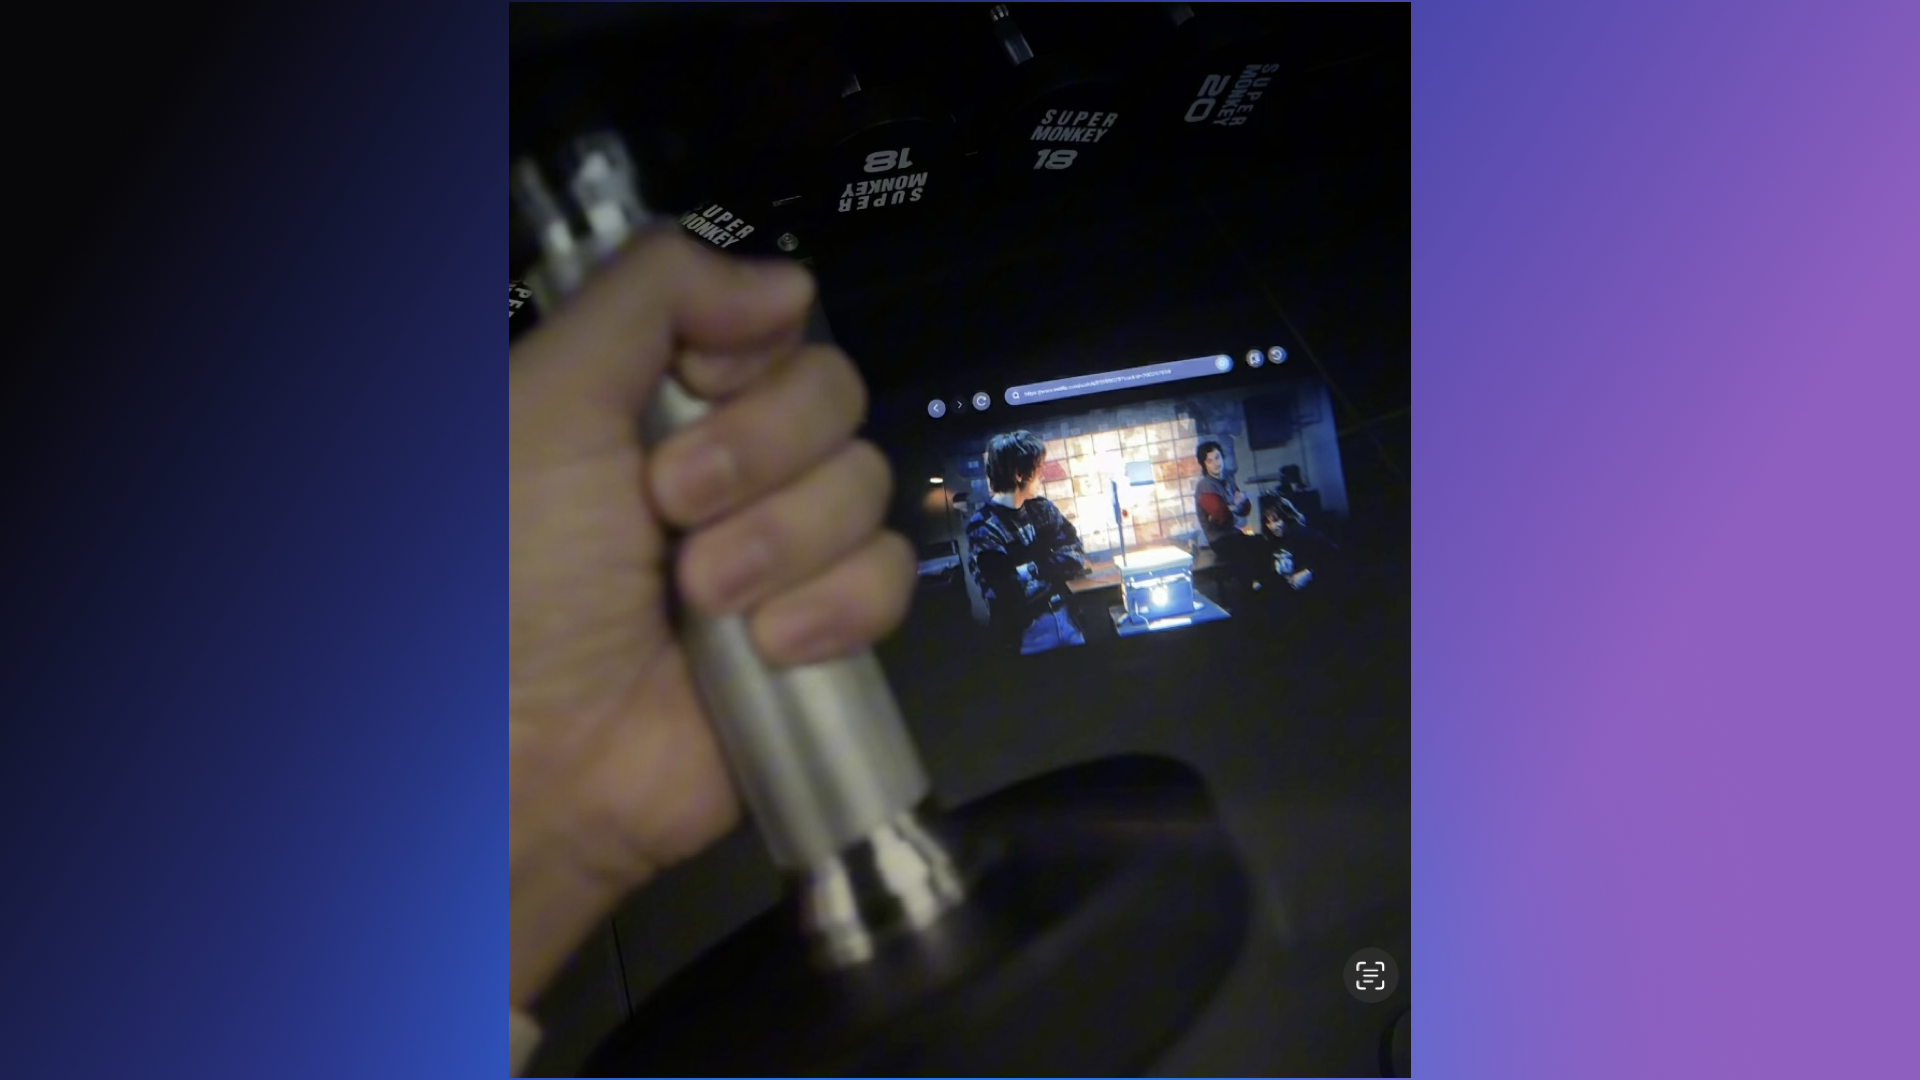
- Ultra-low-latency multi-screen workflows on Mac and Windows
- Full Immersive 3D support is already live across all the platforms, with even more exciting updates on the way — including full Immersive 3D within SpaceWalker for iOS and native Immersive 3D support for Android apps.
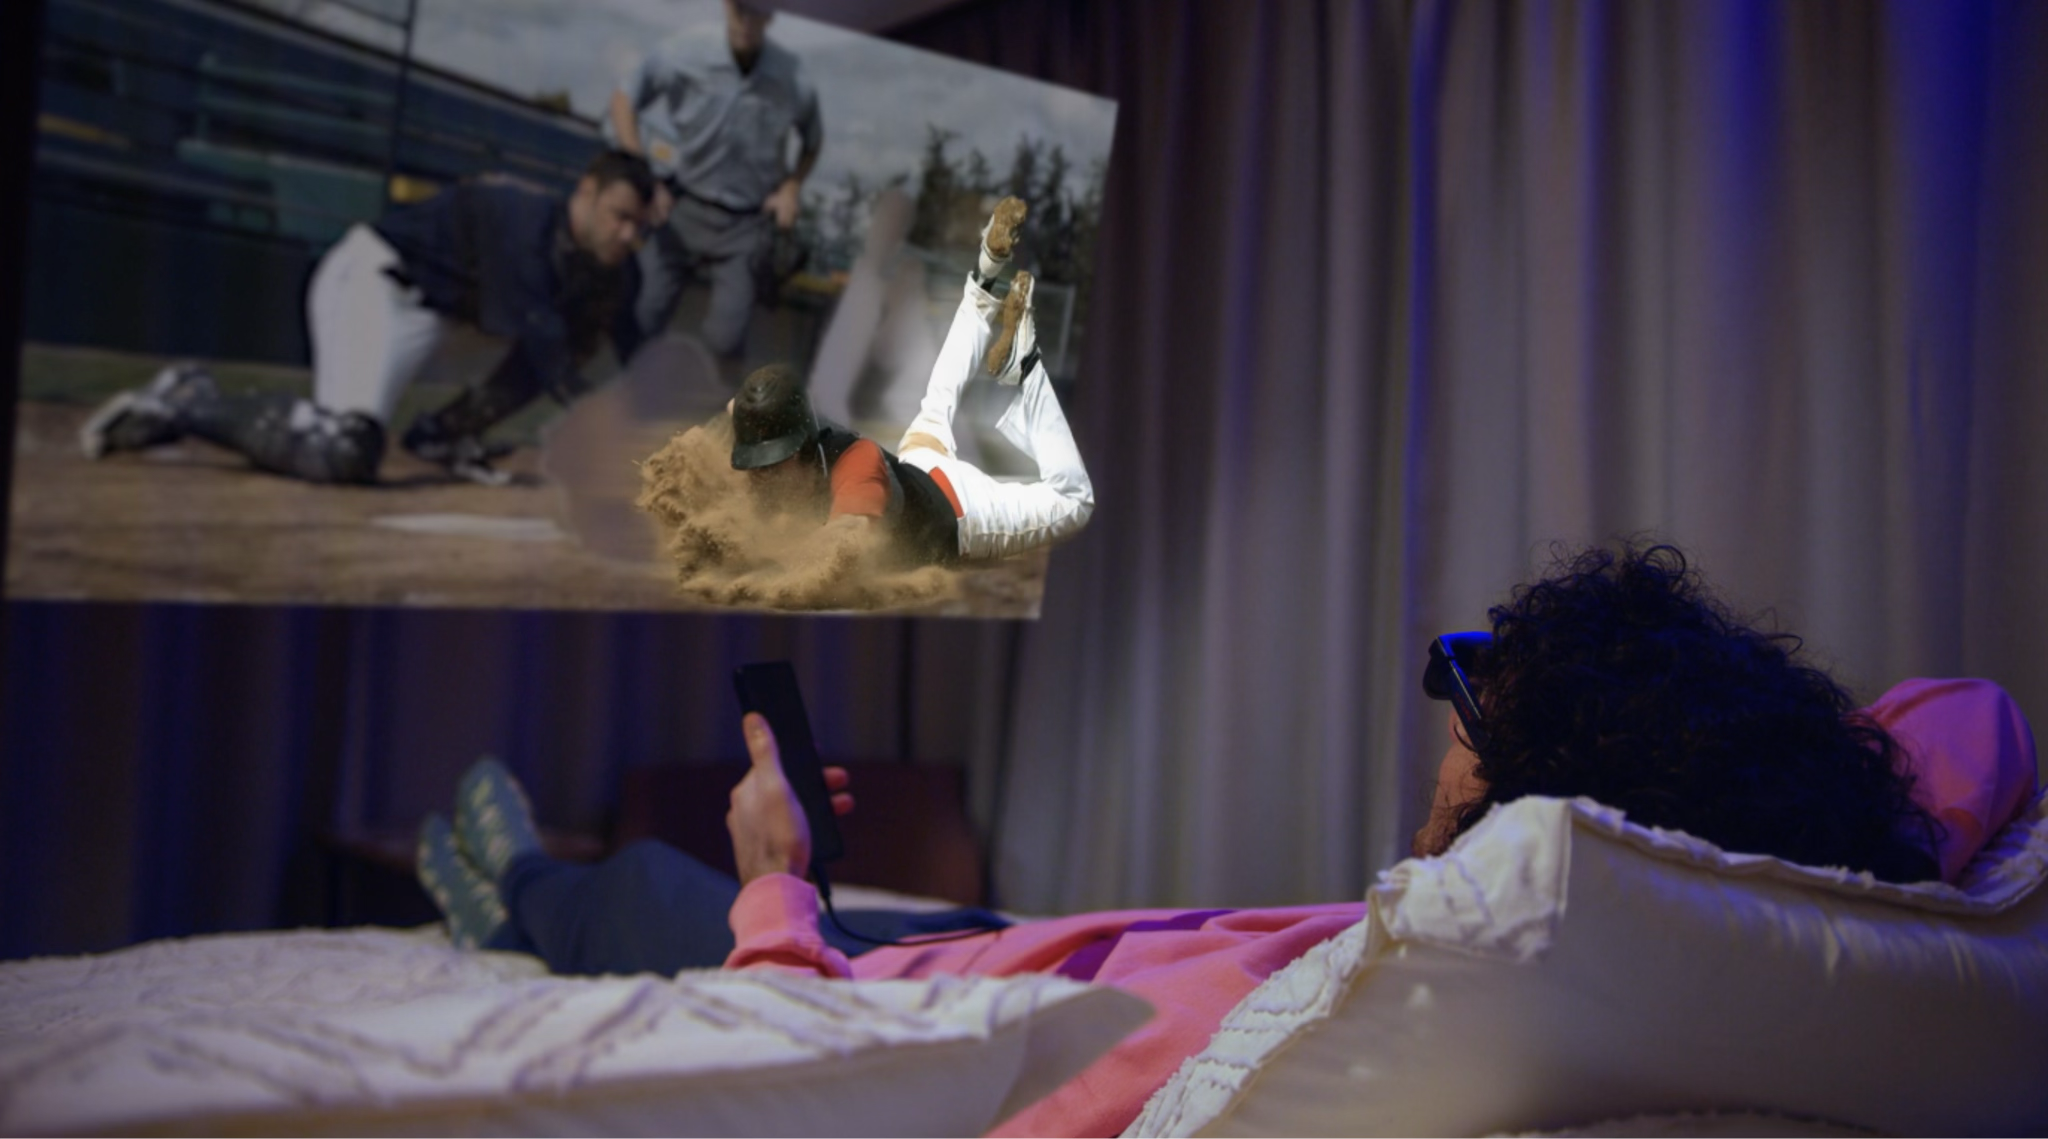
Immersive 3D is a widely acclaimed real-time 2D-to-3D conversion feature beloved by VITURE users worldwide.
What's Included
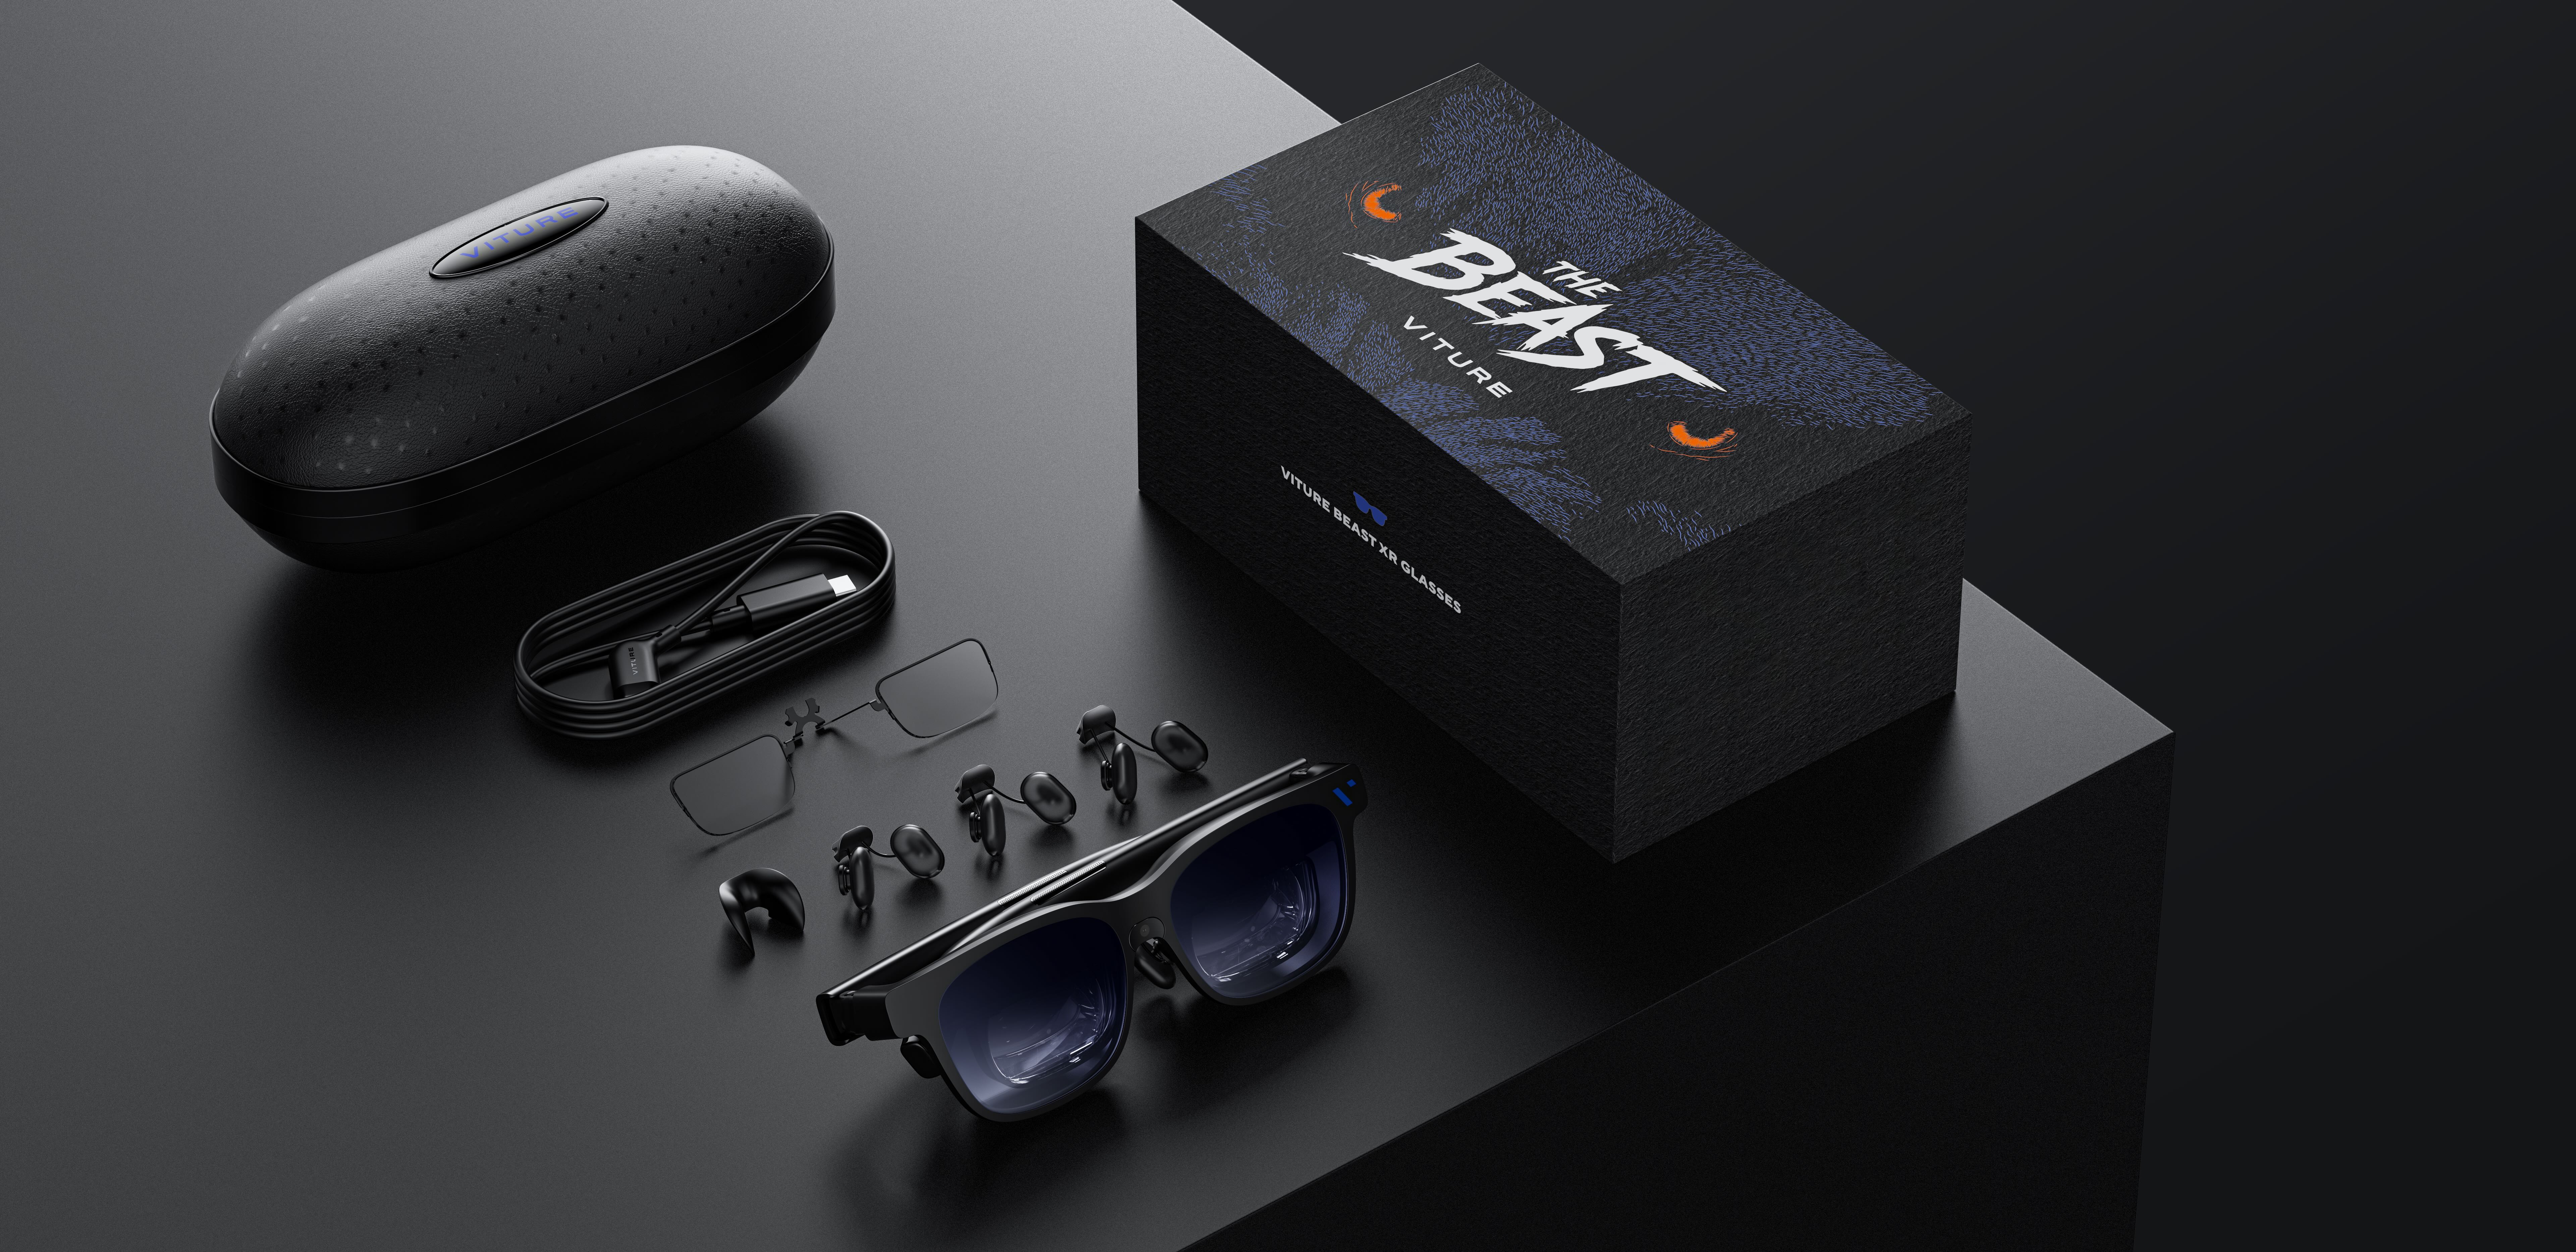
- VITURE Beast XR Glasses (Regular or Large)
- Prescription Lens Frame
- Swappable Nose Pads
- USB-C to USB-C Cable
- Glasses Case
- Glasses Cloth
- Quick Start Guide
- Safety Guideline
Demo Videos
Connect to iPhone & Mac
The Beast in the Gym
Buttons
Key Button Controls
Please note that some functions operate differently from our previous products: for example, enabling 3D now requires double-clicking the right button. We recommend spending a moment getting familiar with the new button layout and features first.
| Button | Action Type | Function |
|---|---|---|
| R1 | Single-tap | Switch Anchor Mode / Smooth Follow / 0DoF |
| Double-tap | Switch 2D / 3D | |
| Long-press | Recenter | |
| L1 | Single-tap | Switch between brightness and volume adjustment |
| Double-tap | Switch Default / Side Mode | |
| Long-press | Open menu | |
| In-menu Single-tap | Select | |
| In-menu Double-tap | Back | |
| L+ | Long-press | Change display mode (Default / UltraWide / 3D / Side Mode) |
| L- | Long-press | Turn off screen |
Complete Button Controls
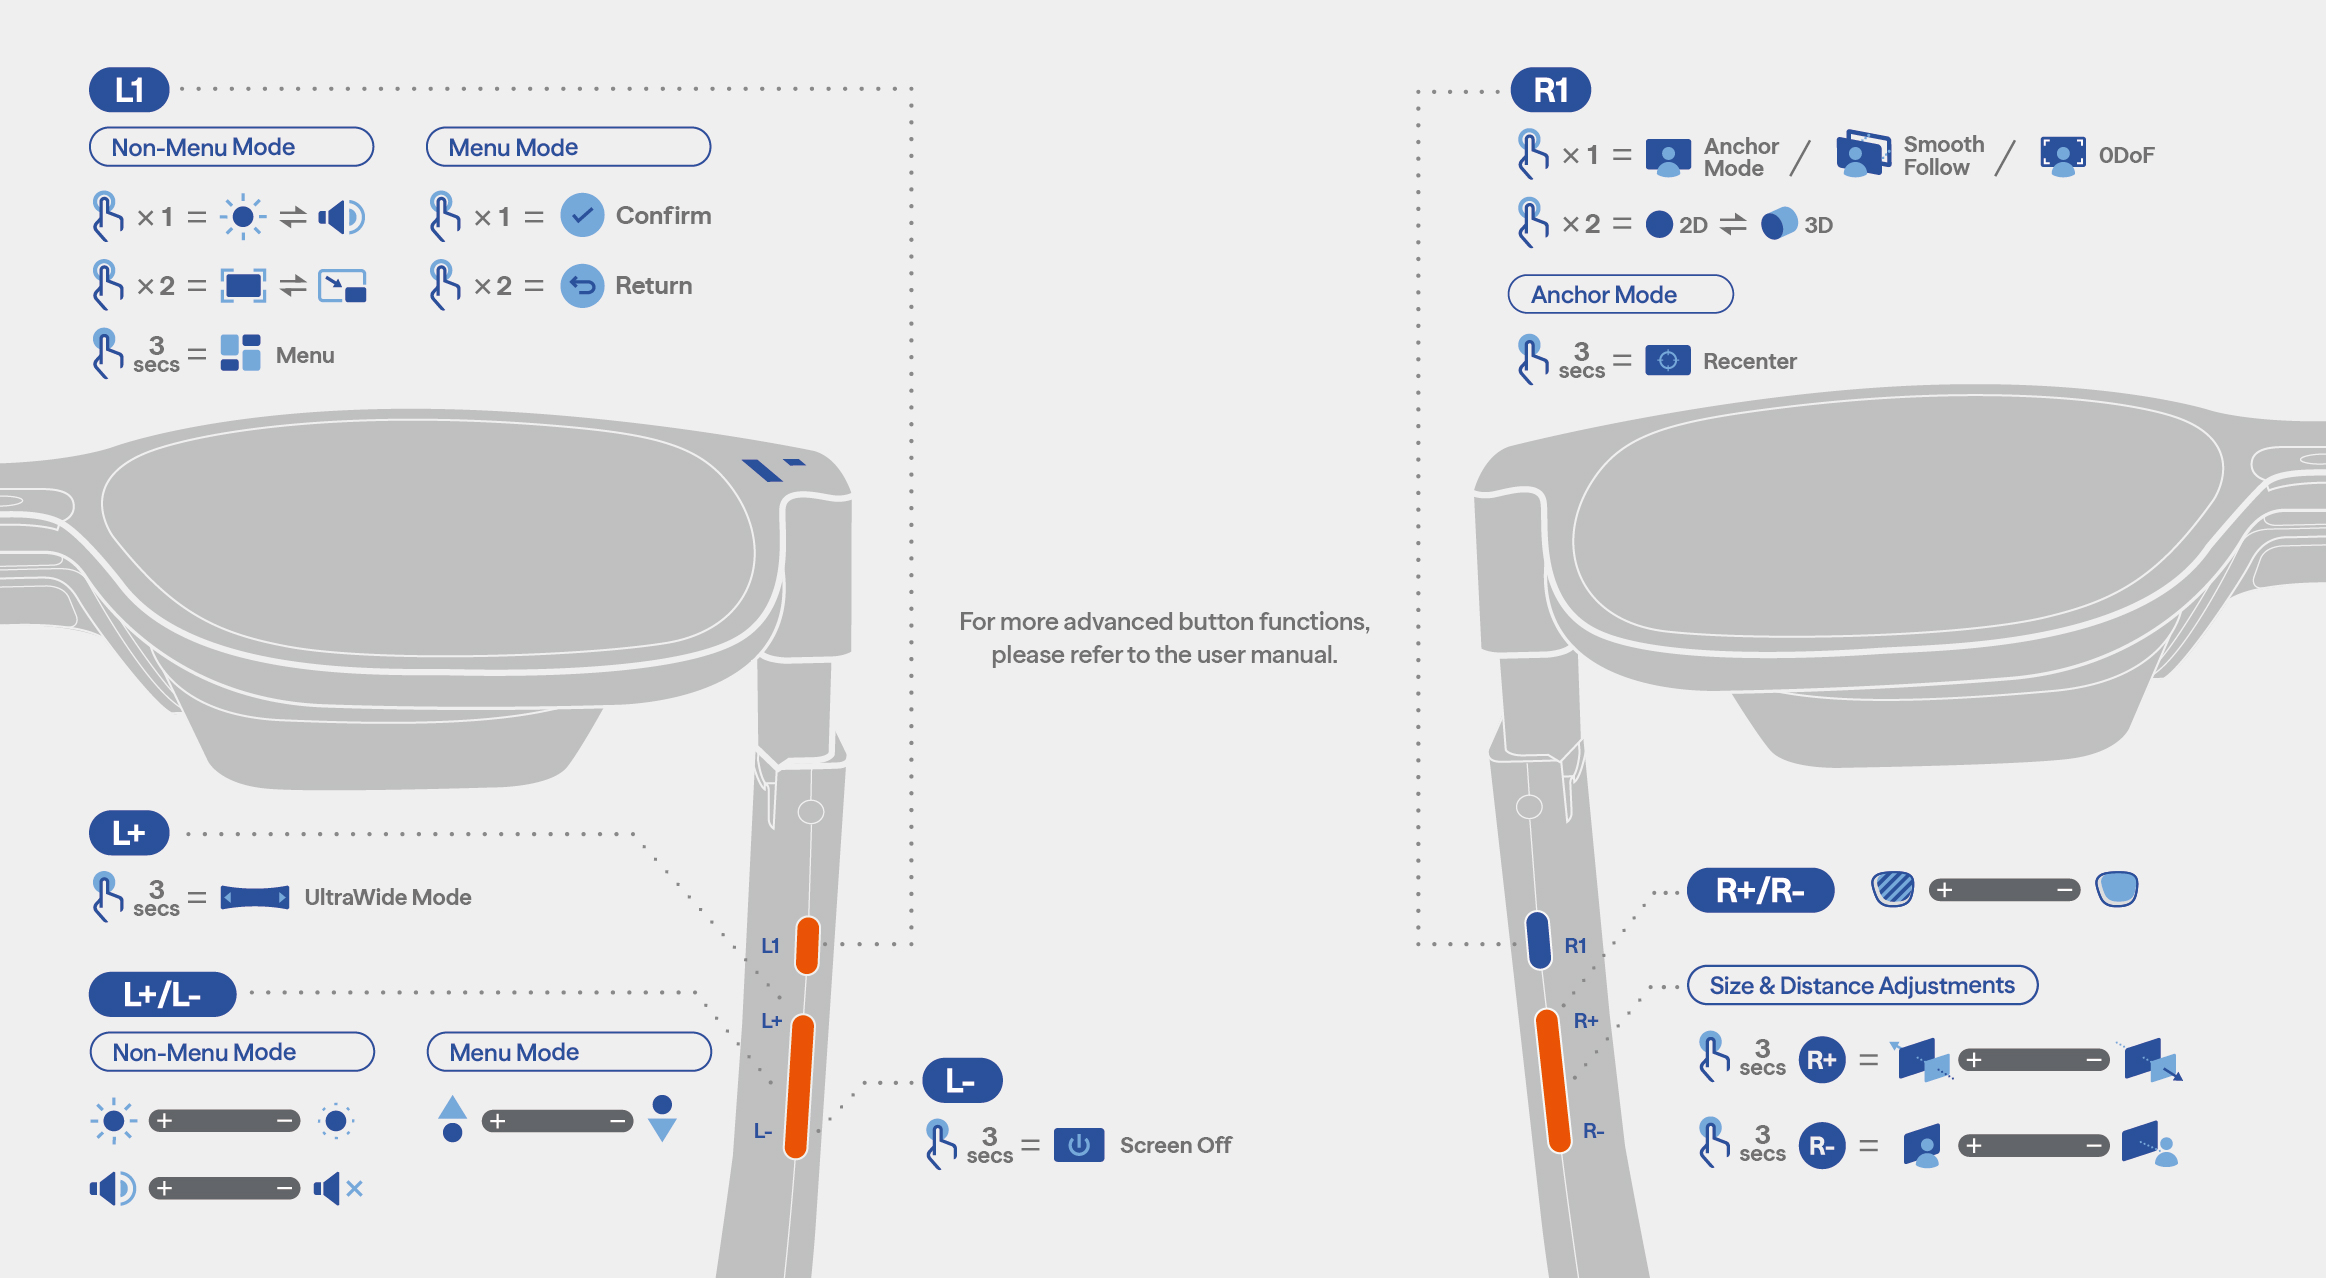
Brightness & Volume
Use L+ / L- to adjust brightness or volume. Press L1 to switch between them.
Menu Navigation
Press and hold L1 to open the menu, and use L+ / L- to move the cursor. Press L1 to confirm, or double press L1 to return. In the menu, you can also long-press L1 to close the menu directly.
Switch Display Mode
Long-press the L+ button to enter the display mode selection. Use L+/L- to switch between Default, UltraWide, 3D, and SideMode, then press L1 to confirm and apply the selected display mode.
Screen Off
Press and hold L- to turn off the screen display and electrochromic films. Press any button to wake up.
Spatial Positioning
Press R1 to switch between Anchor Mode, Smooth Follow and 0DOF Modes.
In Anchor Mode, press and hold R1 to recenter the screen.
Electrochromic Dimming
Press R+ / R- to adjust the transparency of the electrochromic film.
Spatial Screen Adjusting
Press and hold R+ to enter Screen Size adjustment, then press R+ / R- to resize the virtual screen. Press and hold R− to enter Screen Distance adjustment, then use R+ / R− to adjust the virtual screen distance.
Custom Shortcut Keys
By default, double press L1 to switch to the Side Mode. By default, double press R1 to switch between normal 2D Mode and Full Side-By-Side (SBS) 3D Mode.
These functions can be customized in the menu.
Display & Positioning Modes
Display Modes
Display Modes control the screen’s visual format and layout. They can be switched quickly at any time and do not affect positioning behavior.
Long-press the L+ button to enter the display mode selection. Use L+/L- to switch between Default, UltraWide, 3D, and Side Mode, then press L1 to confirm and apply the selected display mode.
Default
A standard widescreen display mode with the best overall compatibility. Suitable for most apps, videos, and everyday use.
UltraWide Mode
A 32:9 Ultra-wide panoramic display mode that expands the horizontal field of view. Ideal for multitasking, wide timelines, and immersive content.
3D Mode
A full side-by-side 3D display mode that delivers separate images to each eye.Designed for compatible 3D content, providing full stereoscopic depth. You can double-press the R1 button to quickly switch to 3D Mode (Without any customization).
Side Mode
A side-oriented display mode designed for scenarios such as walking or quick real-world awareness. You can double-press the L1 button to quickly switch to Side Mode (Without any customization).
Positioning Modes
Positioning Modes control how the virtual screen is placed and tracked in relation to your head. They do not change the display format or content itself. Single tap the right button to cycle through Anchor Mode → Smooth Follow → 0DoF
Anchor Mode
The screen is fixed in space and responds to head rotation. You can naturally look around within the virtual display, enhancing spatial presence and immersion.
Smooth Follow
The screen smoothly follows head movement. Keeps the display comfortably within view while minimizing sudden or jarring motion.
0DoF
The screen is locked to the center of your view and does not respond to head movement. Provides a stable, always-centered viewing experience.
Notes: UltraWide Mode must be used with Anchor Mode for the best and intended experience. Side Mode requires Smooth Follow or 0DoF.
Choose the Right Nose Pad
When wearing VITURE XR Glasses, the virtual screen should be unobstructed and centered in your line of sight. Try nose pad sizes 0, 1, 2, and 3 (or no nose pads at all) to find the best fit.
If none of the four nose pads fit perfectly, gently bend or spread size #3's stems to find the fit that allows you to see the full display. Refer to this video for instructions.
To remove nose pads:
- Hold the XR Glasses upright with one hand, so that the temples are away from you.
- With your other hand, put your thumb between the lenses, touching the metal wire pad arms.
- Push forward with your thumb until the nose pads come off.
To install the nose pads:
- With one hand, rotate and hold the nose pads with the size facing you and the number upright.
- With your other hand, hold the XR Glasses upright so that the temples are close to you.
- Slide the nose pads into the bridge of the XR Glasses until you hear a click.
Connect to Your Devices
To connect your XR Glasses to a laptop, smartphone, or tablet, follow these steps:
- Clip the USB-C to USB-C Cable (included) to the USB-C port on your XR Glasses. Then, plug the USB-C end of the cable into your device.
- Turn on and unlock your device. The XR Glasses will power on automatically.
If there is no display on your XR Glasses, try disconnecting any other external displays connected to your device. Some device models support only one external display. Alternatively, connect to a different USB-C port on your device and try again.
To adjust mirror settings, access your device's system settings:
- On Macs, go to System Settings > Displays, choose VITURE, and modify the "use as" settings from the dropdown menu.
- On iPads, go to Settings > Display & Brightness > Displays > Arrangement.
- On PCs, go to Settings > Display.
SpaceWalker supports using your XR glasses even when your computer screen is turned off. Once connected, you can turn off the device display to save power and reduce distractions—your virtual screen will remain fully visible in the glasses. This makes SpaceWalker ideal for focused work, media consumption, and long sessions with lower battery drain.
To confirm compatibility with VITURE XR Glasses, refer to your device's manufacturer specifications. Look for keywords such as DisplayPort over USB-C, DP Alt Mode, Alt DP over USB-C, or Thunderbolt 4.
Please check this list for VITURE-certified supported mobile devices.
See also:
Connect the Pro Neckband to the XR Glasses The Beast XR Glasses now fully support the Pro Neckband. You'll need to update the Beast glasses to version 0.01.024_20260521 and OTA the Pro Neckband to v2.1.2.30516.
Connect the Pro Mobile Dock to XR Glasses
Compatibility: VITURE One Neckband and VITURE One Mobile Dock are not supported by VITURE Beast.
Control Your Display Directly on the Glasses
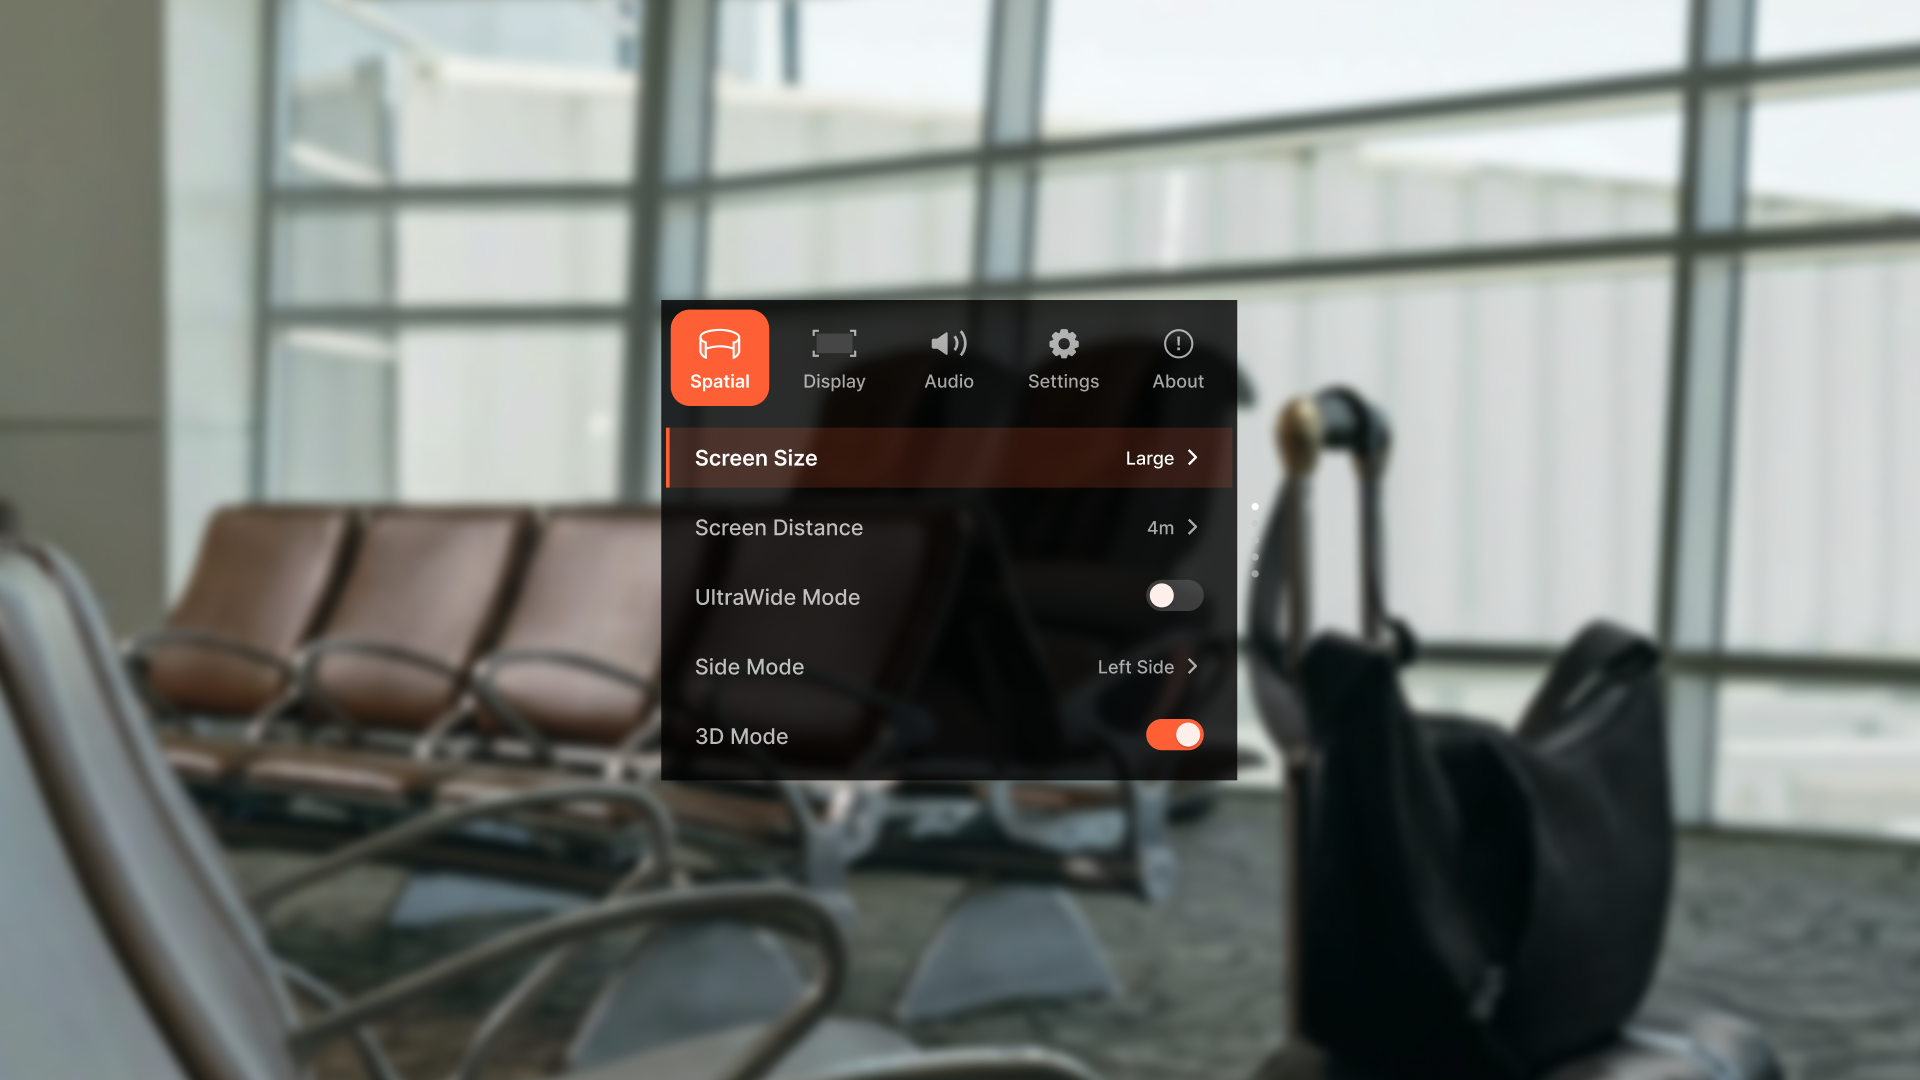
The Beast XR Glasses come with a built-in OSD (On-Screen Display) menu, allowing you to adjust display modes, screen position, visual settings, and shortcuts directly using the buttons on the glasses — no external app required.
Notes: When connected to the Pro Neckband, The Beast XR Glasses functions are managed through the Neckband, so the glasses-side menu is unavailable.
This guide introduces the main menu structure, key features, and how to use them efficiently.
Tutorial
On first use, the Tutorial will start automatically to introduce the main button functions, helping you get comfortable with the device.
Once completed, you’ll be able to use the device more easily and confidently.

How to Open and Navigate the OSD Menu
Press and hold L1: Open/Close the OSD menu
L+ / L-: Move the cursor
Single press L1: Confirm
Double-press L1: Go back
If there is no input for 8 seconds, changes are automatically saved and the menu closes.
Menu Functions
Spatial Screen
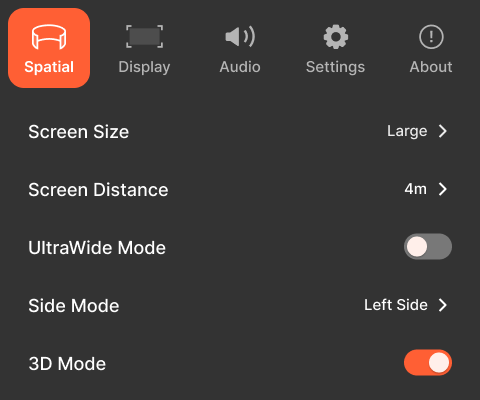
This group controls how the virtual screen exists in space, including size, distance, aspect ratio, and spatial layout.
Screen Size: Defines the perceived physical size of the virtual screen. Provides five preset size levels. Use this when you want the screen to feel larger or smaller without changing its distance.
Screen Distance: Controls how far the virtual screen appears from your eyes. Adjustable from 1 m to 5.5 m, in 0.5-meter steps. Use this to simulate near-field monitors or far-field TVs / cinema screens.
UltraWide Mode: Enables an ultra-wide virtual display. Note: UltraWide Mode does not support Smooth Follow.
Side Mode: Places the virtual screen to the side of your field of view.
Side Position: Set the window display position in Side Mode.Set the window display position in Side Mode. You can choose from top-left, bottom-left, top-right, or bottom-right. The window will appear at the selected position the next time Side Mode is enabled.
3D Mode: Controls stereoscopic rendering, enables full side-by-side (SBS) stereoscopic display. Use this mode when viewing native 3D content that supports Full SBS format.
Display
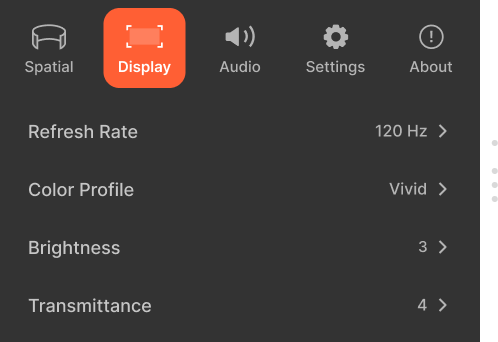
This group controls visual quality and rendering parameters of the display.
Refresh Rate: Defines the display refresh rate.
Resolution (per eye): Choose between 1080p and 1200p.
Color Profile: Applies predefined color tuning presets.
True Color – Neutral and accurate color reproduction
Vivid – Higher saturation and contrast
Film – Tuned for movie viewing
Warm – Warmer overall tone
Cold – Cooler overall tone
Use color profiles to quickly adapt the display to different content types.
Brightness: Controls overall display luminance. Adjustable from level 0 to 8. Affects visibility, comfort, and battery usage.
Transmittance: Controls lens transparency using the electrochromic film. Adjustable from level 0 to 8. Can be adjusted instantly without opening the menu. Use higher transparency in bright environments, and lower transparency for immersive viewing.
Audio
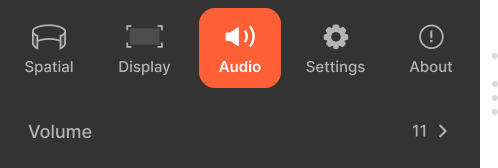
This group manages audio output behavior.
- Volume: Controls system output volume. Adjustable from level 0 to 11.
Settings
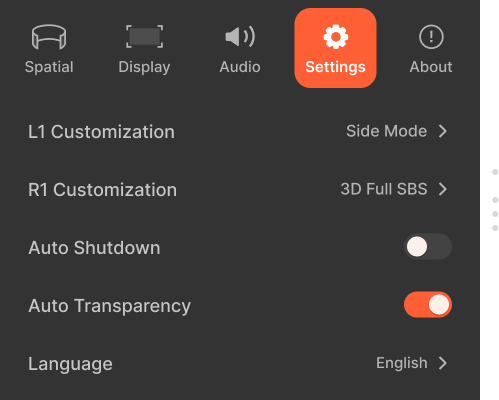
This group defines system behavior, shortcuts, and automation.
L1/R1 Customization: Assigns a function to the double-press action of L1/R1.
Available functions include: UltraWide Mode, Side Mode, 3D Full SBS, Transparency, None.
Used to enable fast switching for frequently used features.
Auto Shutdown: Automatically turns off the display after inactivity. Reduces power consumption.
Auto Transparency: Automatically adjusts lens transparency.
Language: Changes the OSD interface language. Supports multiple languages including English and Chinese.
About
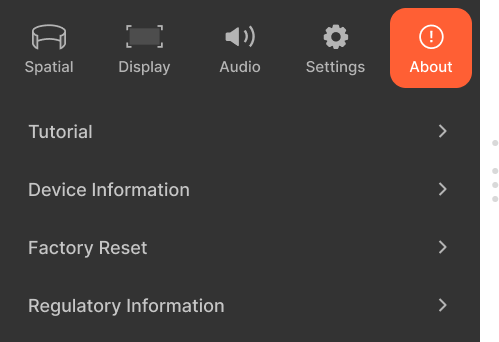
This group provides guidance, system information, and compliance details.
Tutorial: Launches the built-in interactive tutorial. The tutorial is automatically shown on first use. Can be reopened at any time. Covers core interactions such as menu navigation, tracking modes, display modes, and screen adjustment.
Device Information: Displays device-specific information: Product model, Serial number (SN), Firmware version.
Factory Reset: Clears all settings and restores factory defaults. This feature will be available in a future OTA update.
Regulatory Information: Displays certification and compliance icons for supported regions.
Software Experience on The Beast XR Glasses
Hardware + Software = An Unmatched Experience
On The Beast XR Glasses, we introduce a new software adaptation strategy that builds upon existing SpaceWalker and Immersive 3D capabilities while unlocking enhanced stability, wider visual layouts, and more immersive experiences—fully optimized for The Beast’s hardware architecture.
This section explains how each software experience is supported and differentiated on The Beast.
SpaceWalker Mobile
Compatibility: iOS and Android supported
SpaceWalker Mobile is designed around an UltraWide display and native anchor mode, delivering a stable and expressive mobile browsing experience.
Key Features
- Anchor Mode: Anchor Mode is used as the default experience, ensuring stable head tracking, low visual drift, and comfortable long-duration use.
- UltraWide Home Experience: The home interface adopts an Ultrawide layout, making SpaceWalker’s multi-window capabilities easier to understand and more efficient to use at a glance.
- Fullscreen 21:9 Mode: When entering fullscreen, web content is rendered at a 21:9 aspect ratio, significantly expanding the horizontal field of view for a more immersive and cinematic browsing experience.
SpaceWalker Desktop
Compatibility: macOS and Windows supported.
SpaceWalker Desktop on The Beast is designed specifically for desktop-class productivity, leveraging anchor and advanced Ultrawide display modes.
Key Features
- Anchor Mode: The Beast delivers a stable fixed-screen experience while reducing rendering latency for improved visual comfort and responsiveness.
- Screen Layouts: The Beast supports multiple display configurations to match different workflows: Standard single screen, UltraWide-based layouts supporting single, dual, and triple screens. These layouts allow users to fully utilize horizontal space for multitasking and productivity.
- System-Level Controls: Screen distance adjustment, recentering, and related controls are handled directly by The Beast's system, ensuring consistency, reliability, and low-level performance optimization.
Immersive 3D
Compatibility: macOS, Windows, iOS and Android supported.
Immersive 3D is VITURE’s widely-loved real-time 2D-to-3D engine. On The Beast, Immersive 3D combines Anchor Mode with stereoscopic 3D rendering, creating a deeper sense of spatial presence and immersion.
Transforms your worlds:
- Family videos
- Photos
- YouTube
- Netflix (Mac / Windows)
- Even games in 3D (powered by high-end devices)
Real-time conversions. No gimmicks, just pure, unadulterated 3D video enjoyment.
Mobile tutorial
Try this video with immersive 3D on the stable screen mode — it truly feels like Jensen is standing right in front of you:)
Pro Neckband
VITURE Beast currently supports the Pro Neckband in Android Mode only. Support for SpaceWalker Mode will be added in a future update.
Update Your XR Glasses' Firmware
Before using your XR Glasses, we highly recommend updating the firmware for a better experience and access to the latest features.
You can update your XR Glasses firmware in several ways, including through the web, an Android device, a Mac, or a Windows device.
View the firmware release history here.
Update via Web
Notes:
- Make sure you are using Google Chrome (version 98 or later).
- Before connecting, ensure your device is not being used by other applications.
- Do not unplug the XR Glasses or refresh the page during the update process unless otherwise specified.
- If the update failed, please refer to this page for troubleshooting.
- Unplug the XR Glasses only after you see the Update Successful message.
Rollback Glasses Firmware Version
The web interface supports firmware rollback for the glasses. Users can select a previously released firmware version, and the glasses will automatically revert to the selected version after the update is completed.
Some Beast glasses from the newest batch after 1200p was unlocked, and they were also calibrated based on 1200p before shipping. These units can access all firmware versions released after 4/27. In the future, they will still be able to roll back to any firmware released after that date, but firmware versions from before 4/27 are blocked. The reason is that earlier firmware versions were still based on 1080p, so units labeled and calibrated for 1200p are not compatible with those older firmware versions.
Update via Android Phones & Tablets
You can use an Android device with a USB-C port to update your XR Glasses' firmware. Even if your Android phone or tablet doesn't support DP Alt Mode, you can still use it for updating the firmware.
- Download the Neckband Remote or SpaceWalker app on Google Play Store.
- At the top left, tap the = icon. Then tap Firmware Update.
- Connect your XR Glasses to your Android device.
- Your device will ask you to allow the app to access the USB device so that it can read the firmware version of your XR Glasses.
- If there is an update available, tap UPDATE NOW, then confirm UPDATE NOW in the pop-up window to start the update process.
- Your device may ask you to allow the app to access the USB device. If so, tap OK to start updating MCU firmware. Do not unplug or disconnect the USB connection during the update process.
- After finishing the MCU firmware update, your mobile device will ask you to allow the app to access the USB device again. A DP firmware update process will start.
If the update process is stuck at MCU 100% and the permission request does not show up within 5 seconds, try unplugging the USB connection and reconnecting. Or, restart the Neckband Remote app then tap UPDATE NOW to go on to update DP firmware.
Update via Mac or Windows
SpaceWalker for Mac and Windows also offers a simple way to update your XR Glasses to the latest firmware.
Click the links for more information on SpaceWalker Desktop.
Adapters
USB-C XR Charging Adapter Ultra
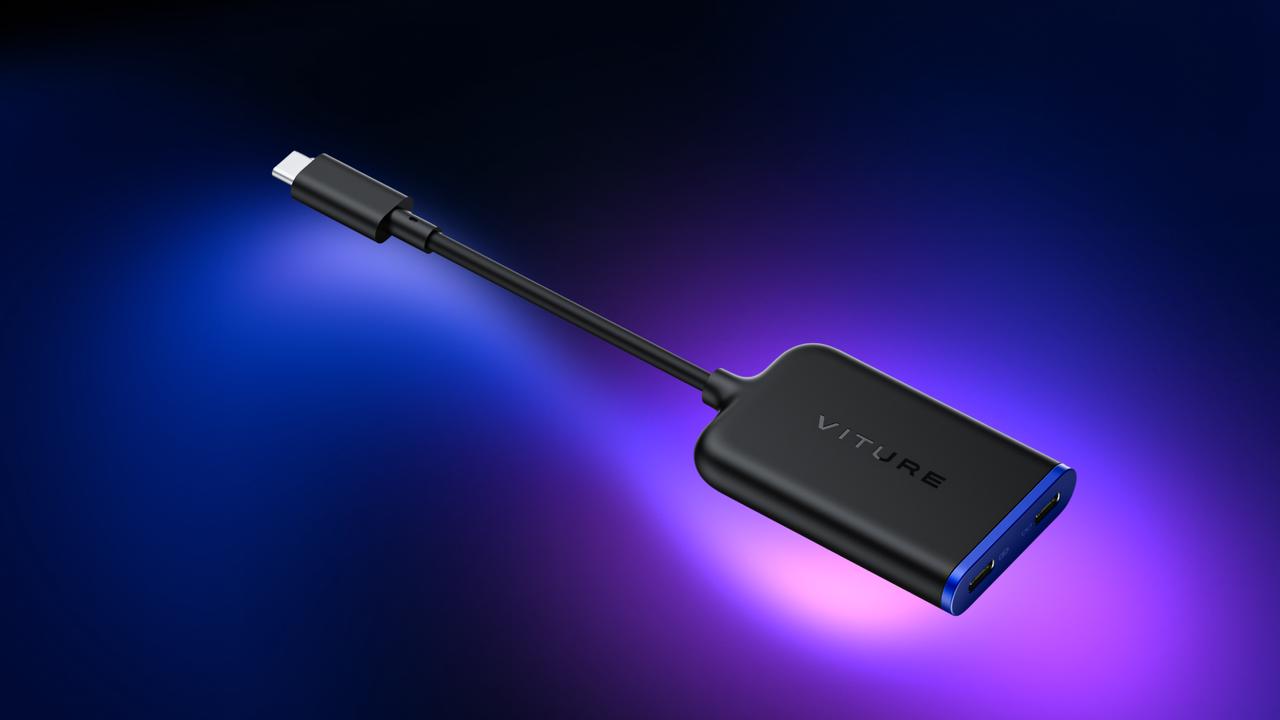
One adapter. The whole VITURE ecosystem. Play without limits.
Important: iPhone 16e and iPhone Air are not compatible with VITURE XR Glasses.
Experience with The Beast
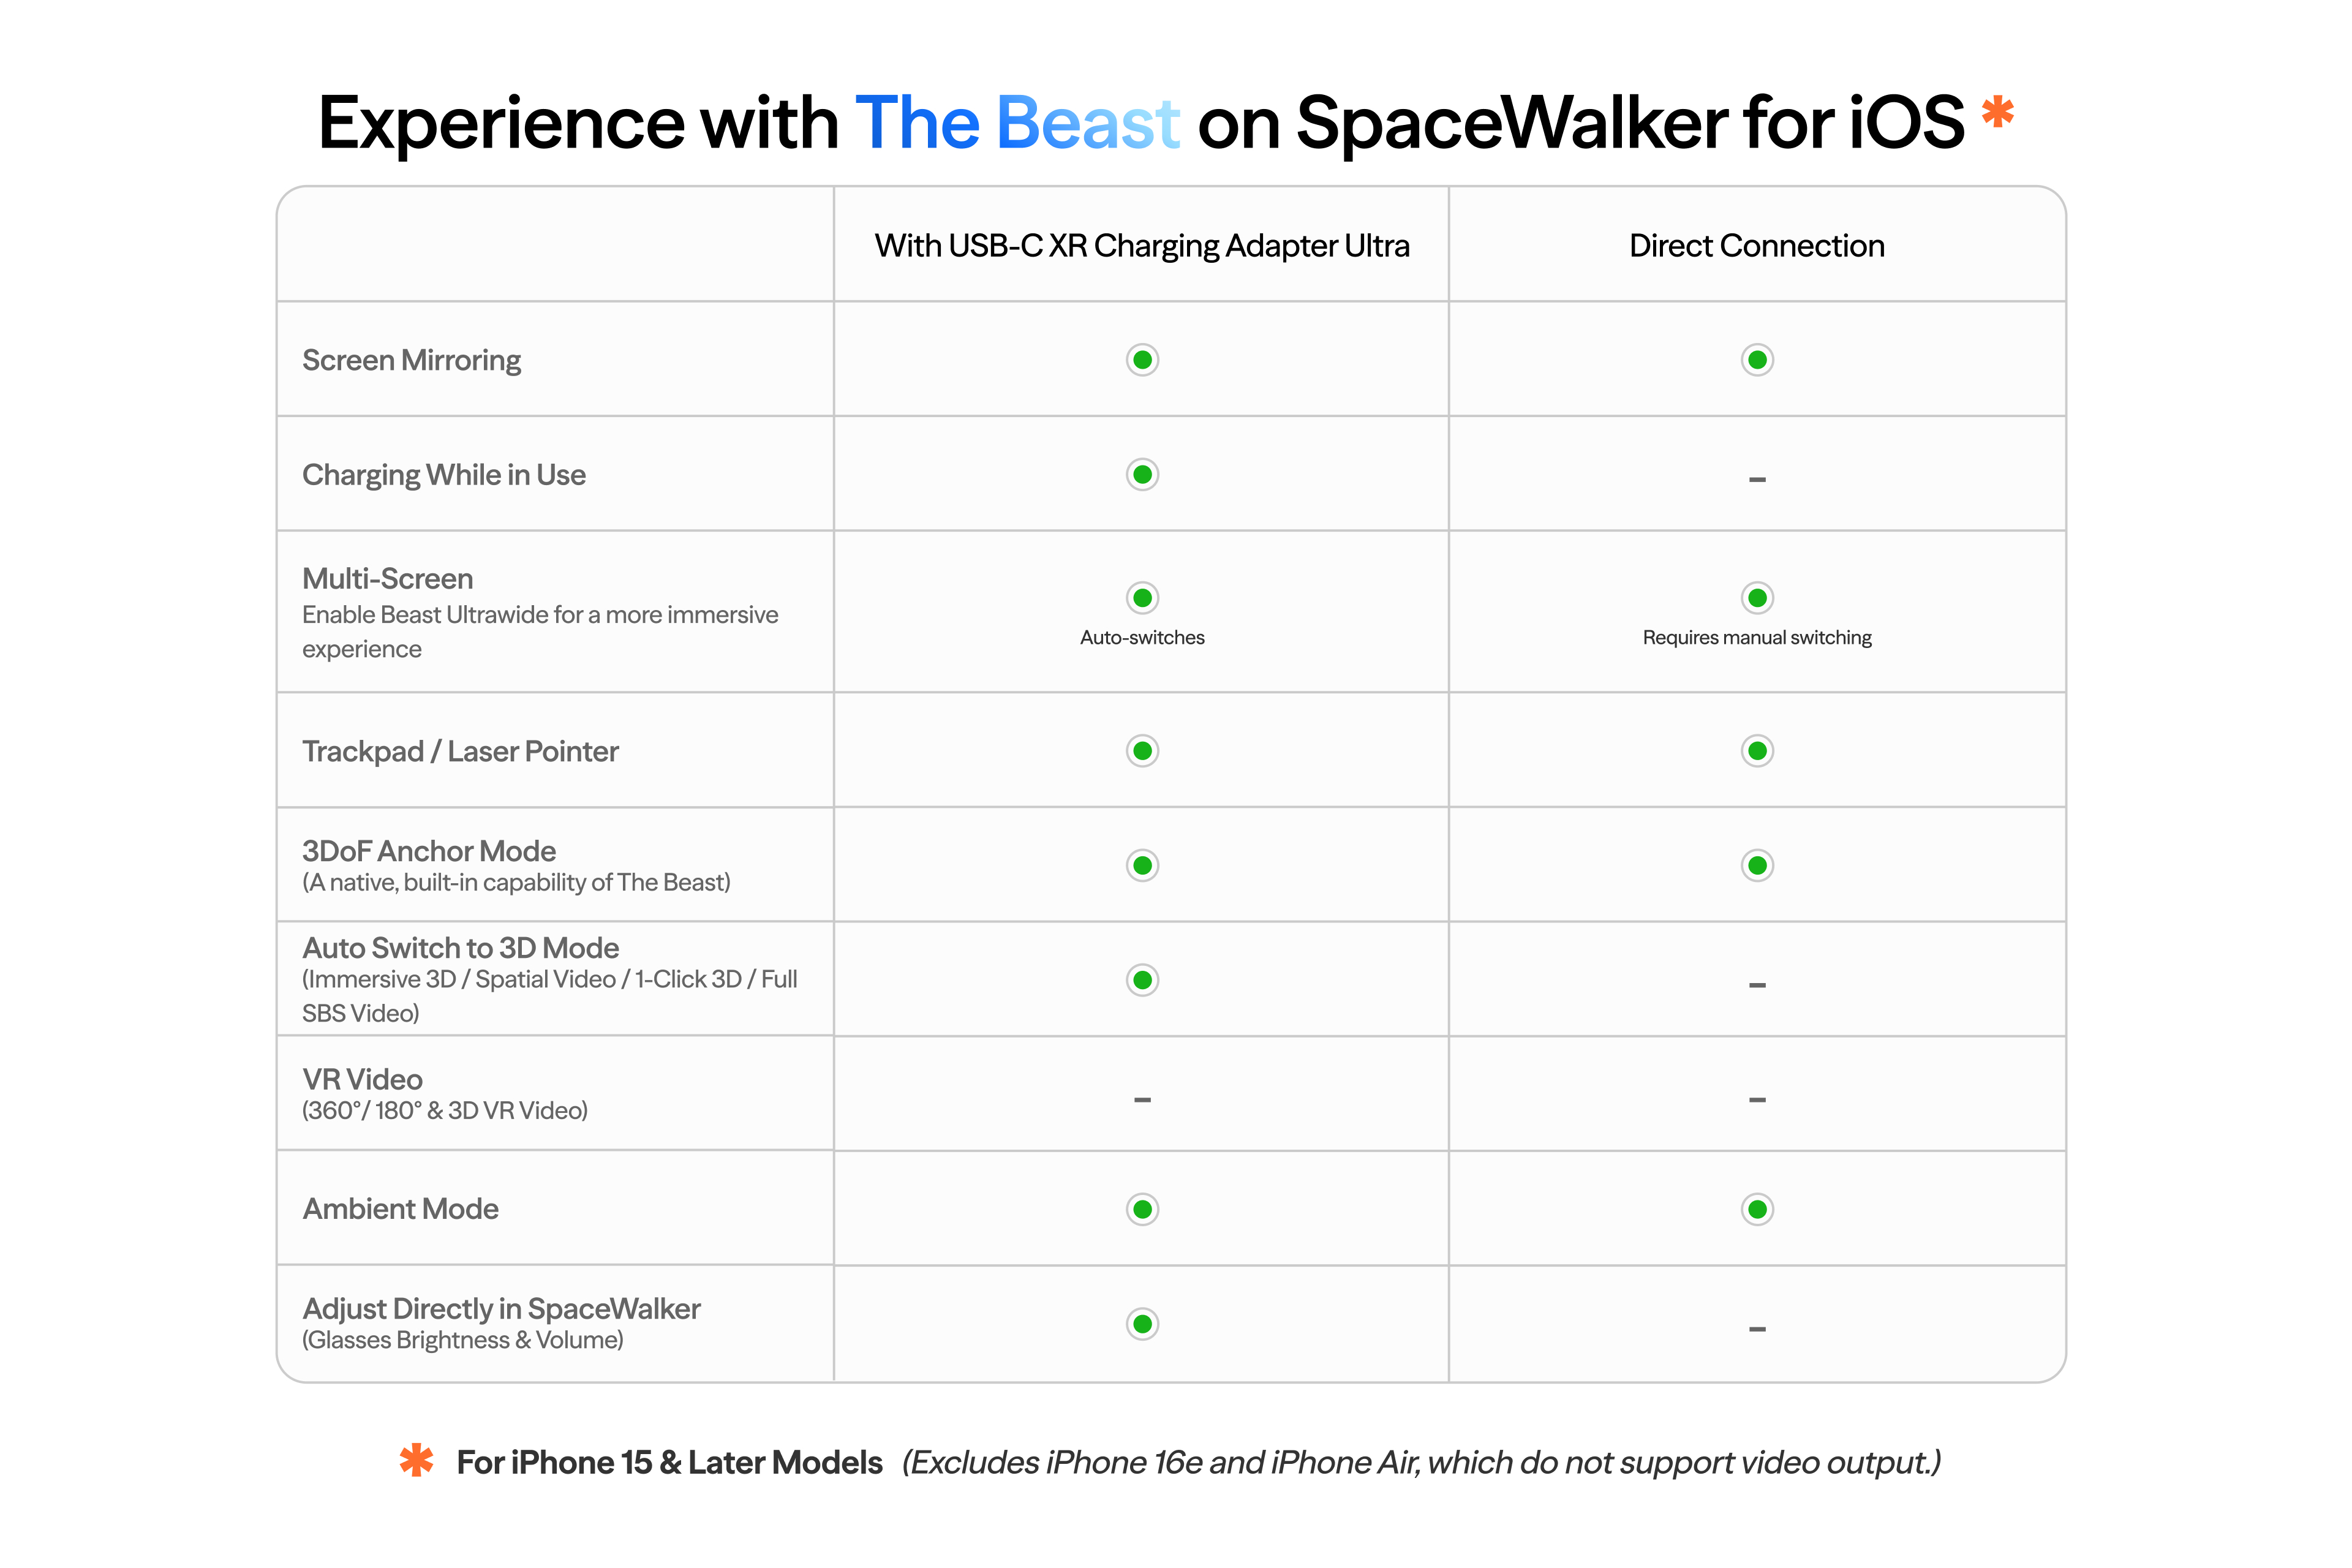
The Beast natively supports 3DoF functionality, allowing stable anchoring without an Adapter. However, connecting to Adapter Ultra can provide a smoother experience on SpaceWalker for iOS. See the table below for details:
USB-C XR Charging Adapter
Note: VITURE Beast XR Glasses support native 3DoF tracking and do not require an adapter for the core 3DoF experience.
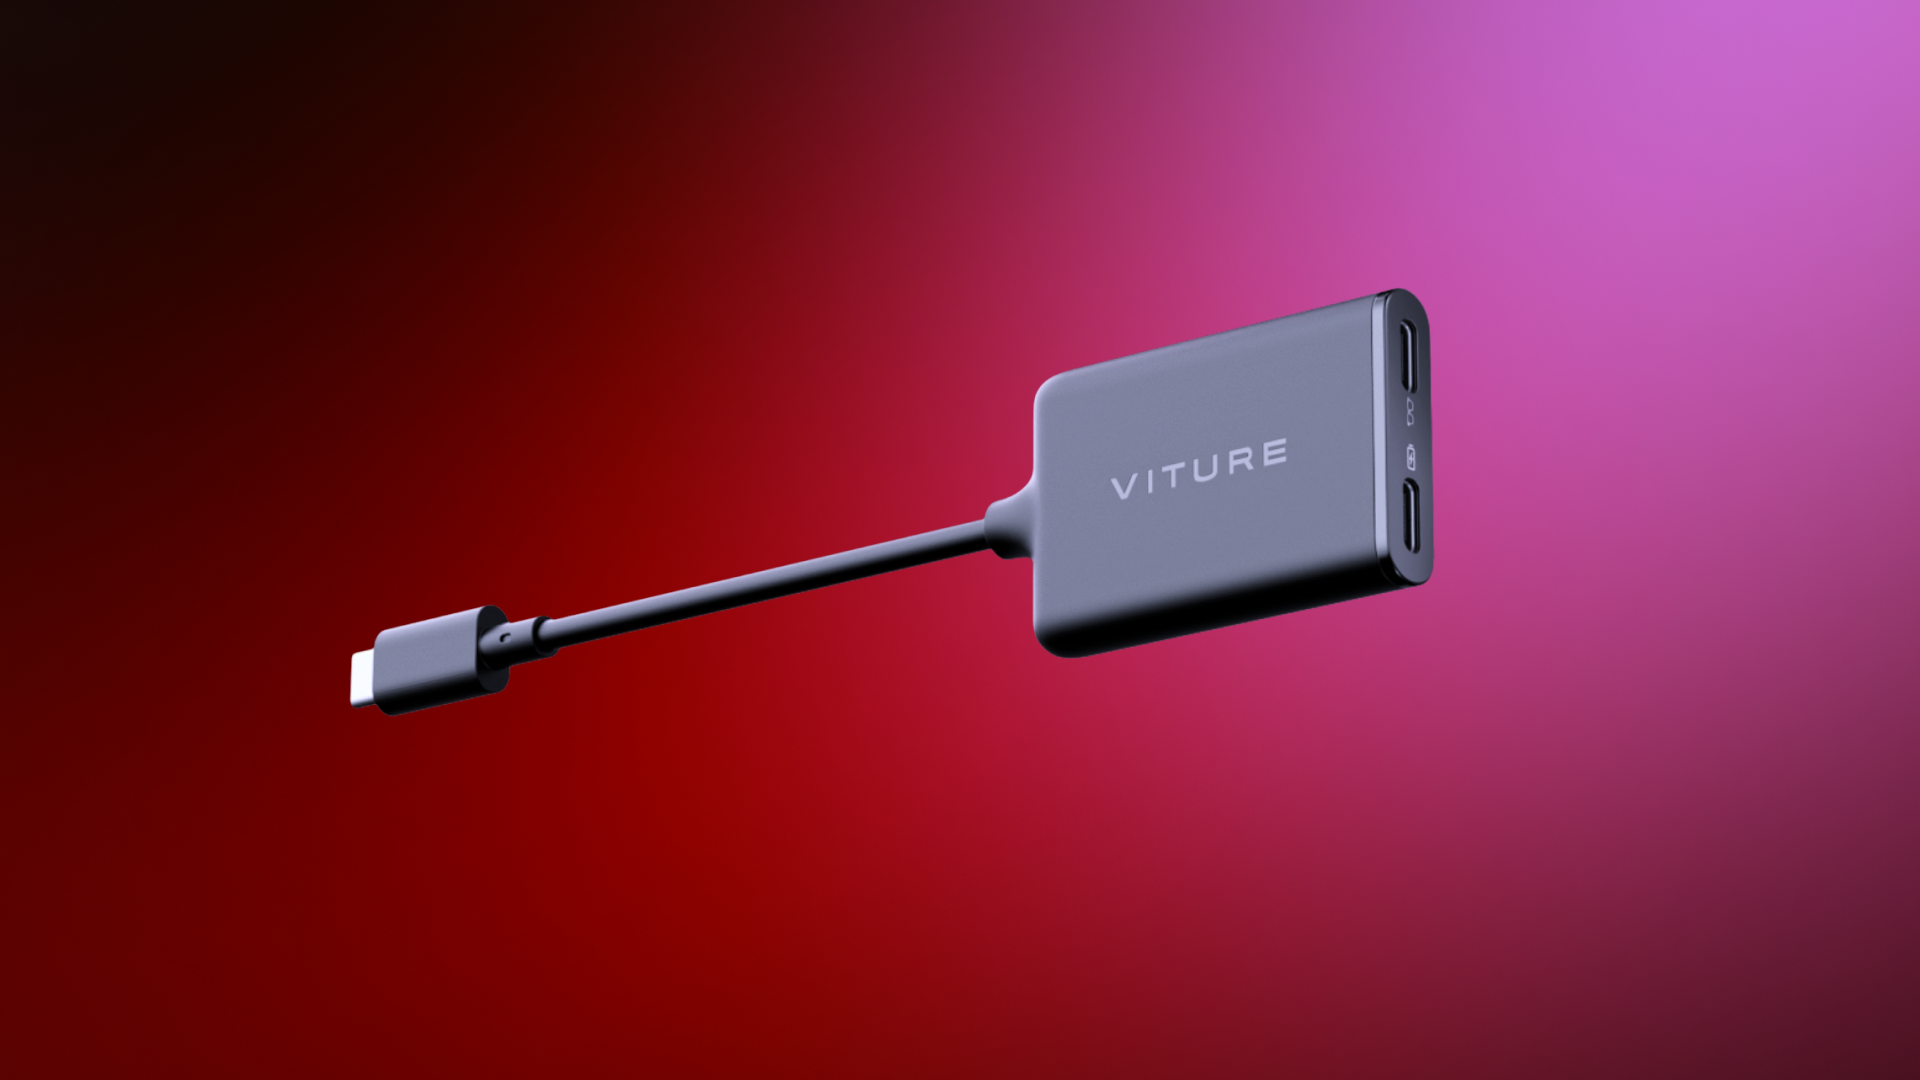
iPhone 15 and later models can connect directly to VITURE Beast XR Glasses for standard SpaceWalker features.
With the USB-C XR Charging Adapter, users can charge their iPhone while using VITURE Beast XR Glasses at the same time.
At this time, the adapter only supports simultaneous charging and playback when Beast is running in:
- Default Display Mode
- 60Hz refresh rate
The adapter currently does not support:
The Beast:
- 3D Mode
- UltraWide Mode
- 120Hz
- 1200p
Enhanced adapter-based XR features:
- 360° / 180° VR Video
- 1-Click 3D
- 3D VR video
- Pin Mode
- Adjusting the XR Glasses' brightness & volume
Note: iPhone 16e and iPhone Air are not compatible with VITURE XR Glasses.
Get the USB-C XR Charging Adapter.
For further information, refer to USB-C XR Charging Adapter
HDMI XR Adapter
Note: The HDMI XR Adapter does not support VITURE Beast XR Glasses. VITURE Beast supports 3DoF natively and does not require this adapter.
Charging Adapter
Don't let a dead battery get in the way of your gaming — the USB-C to Glasses Charging Adapter is a must-have accessory that allows you to connect your device to your XR Glasses and charge up at the same time. Perfect for staying energized for hours of nonstop, uninterrupted immersion.
At this time, the adapter only supports simultaneous charging and playback when Beast is running in:
- Default Display Mode
- 60Hz refresh rate
Get the USB-C to Glasses and Charging Adapter.
| Color | Black |
|---|---|
| Weight | 22.5g |
| Dimensions | 160.0 × 35.0 × 10 (mm) |
| Connectors | USB-C |
| USB-C Video Output | 1920×1080 @ 60Hz, 3840×1080 @ 60Hz |
| USB Type | USB 3.2 Gen 1 (5Gbps) |
| Charging Power | 45W (5V~3A, 9V~2A, 12V~2A, 15V~3A) |
VITURE Beast Prescription Lens Frame
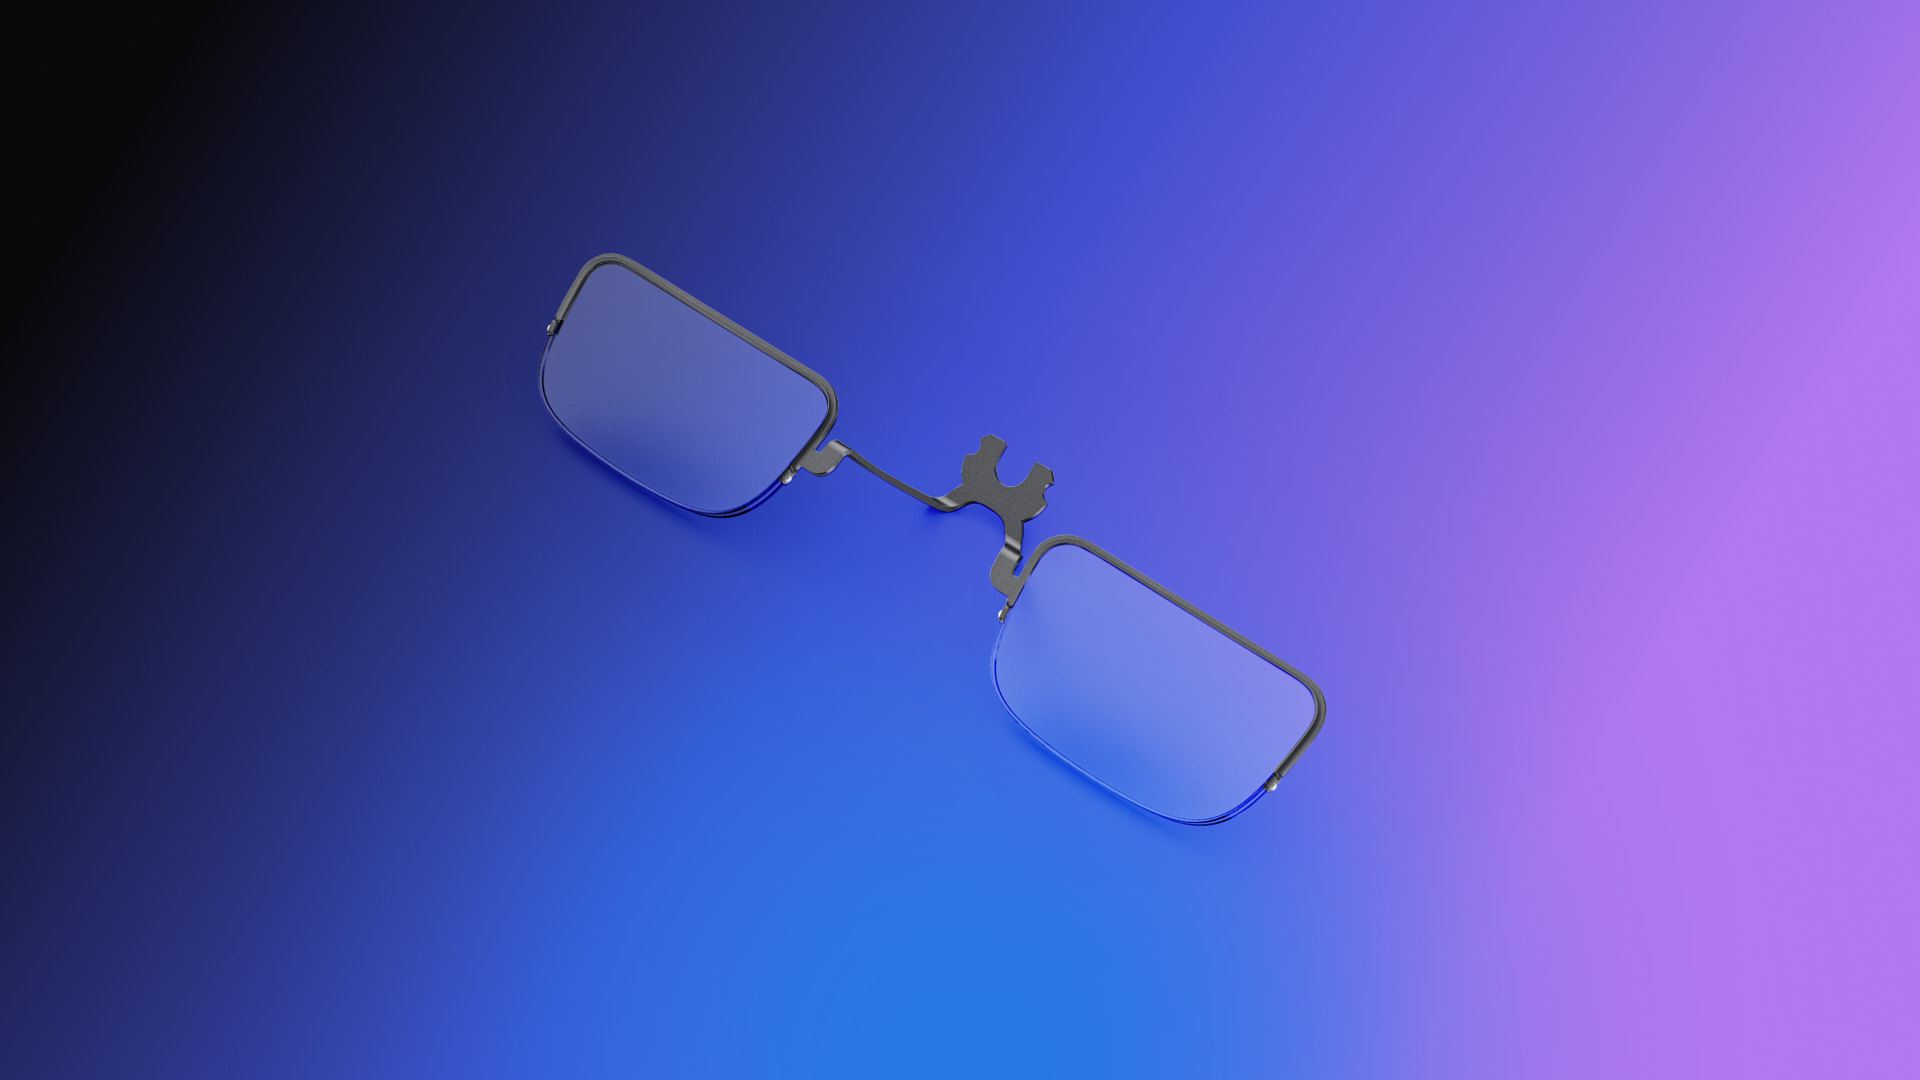
The VITURE Beast Prescription Lens Frame is a dedicated accessory for the VITURE Beast XR Glasses, designed to provide a clear, distortion-free visual experience for users with custom optical prescriptions.
A prescription frame is included with the glasses. You can also order prescription lenses that match your vision through official channels.
| Color | Black |
|---|---|
| Dimensions (Regular) | 98.2 × 21.4 × 17.8 mm |
| Dimensions (Large) | 102.6 × 23.9 × 18 mm |
| Weight (Regular) | 3.3g |
| Weight (Large) | 3.4g |
| Material | Stainless steel (main frame) |
Size Selection
The frame is available in two sizes: Regular and Large. Be sure to select the correct size that matches your XR Glasses. Using the wrong size may result in an improper fit, reduced visual clarity, or potential incompatibility..
| Model | Frame Size Needed |
|---|---|
| Beast (Regular) | Regular |
| Beast (Large) | Large |
Instructions
To Attach the Frame
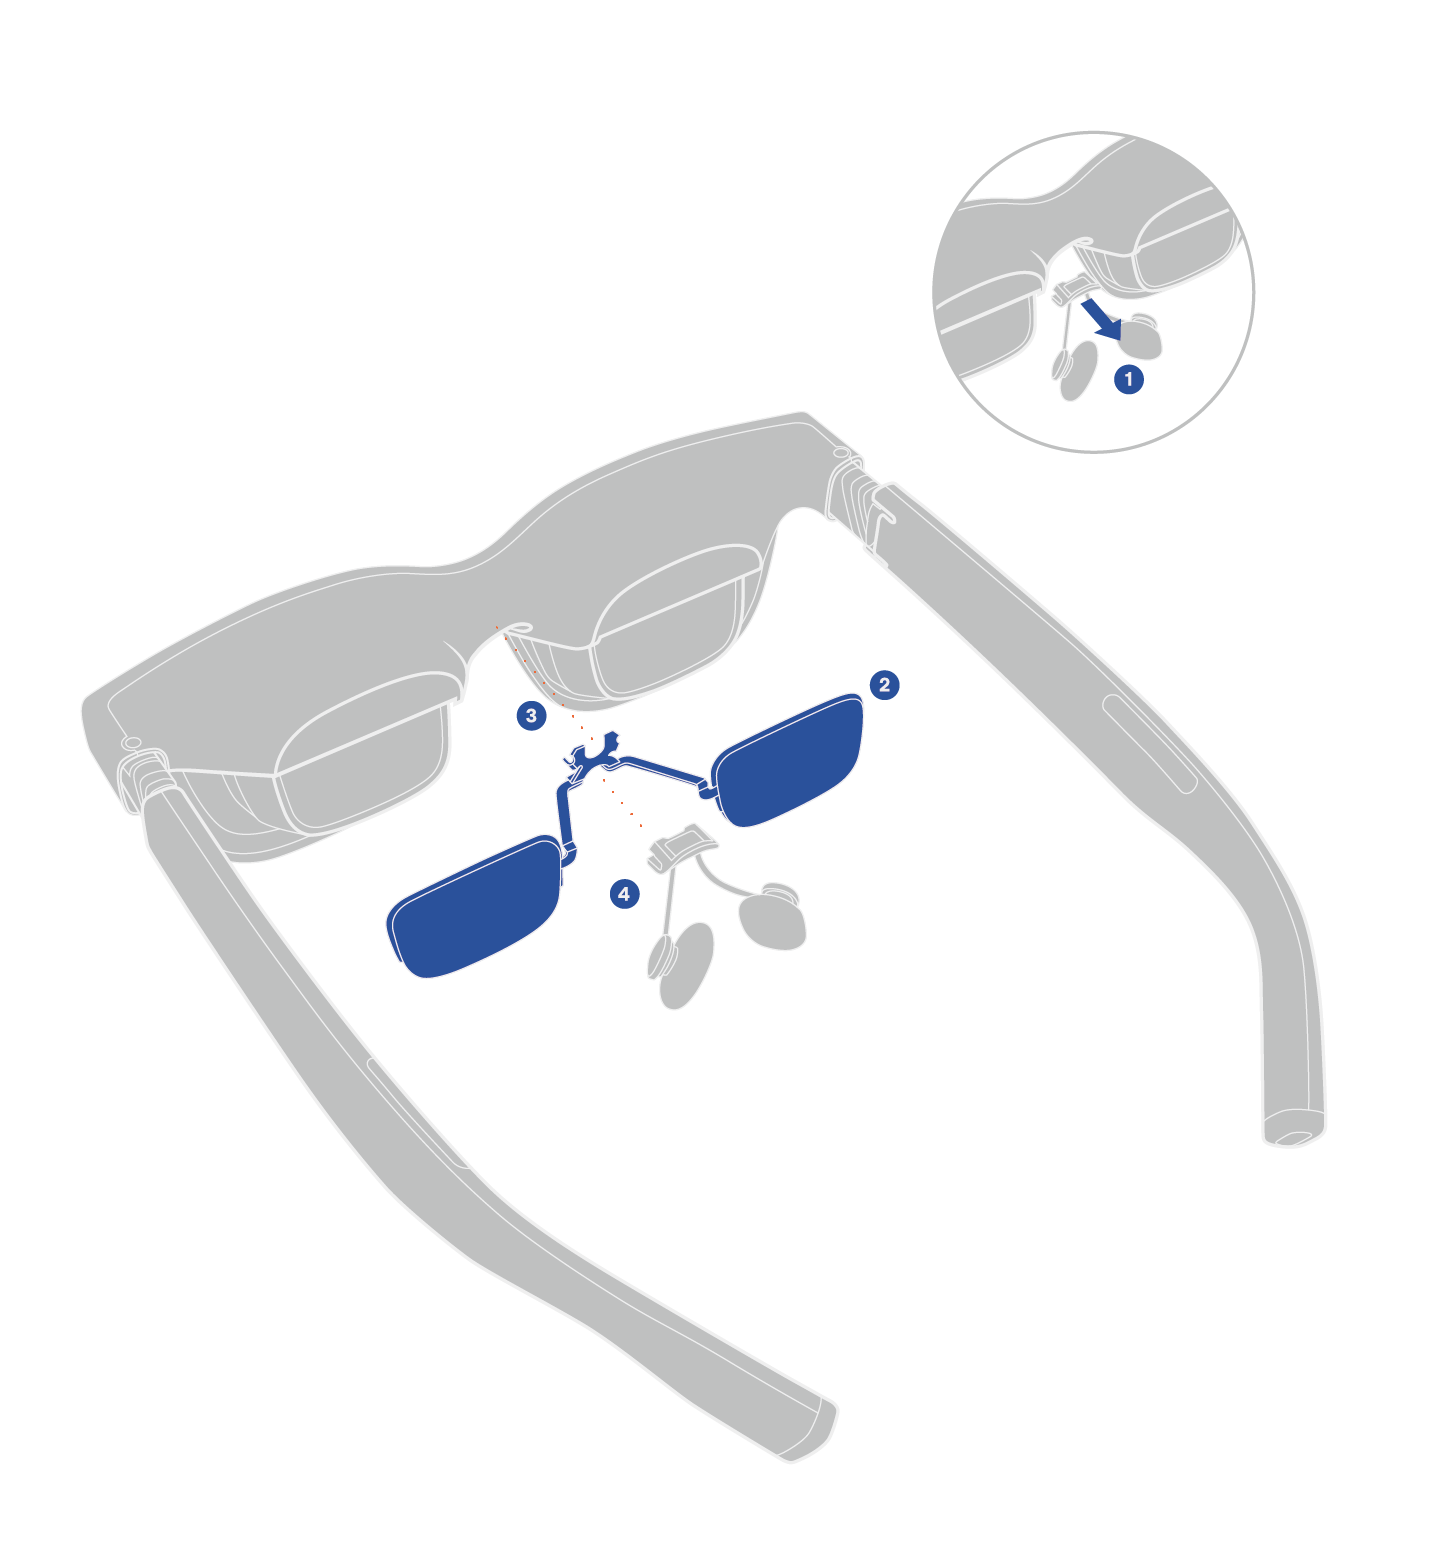
- If the nose pad is already attached, remove it first.
- Ensure the frame is facing the correct direction. Hold the upper and lower edges of the frame and align it with the inner side of the XR Glasses.
- Position the center of the frame over the nose pad groove of the XR Glasses, then gently push it down until it fits snugly.
- Reattach the nose pad to complete installation.
To Remove the Frame
- Remove the nose pad and hold the XR Glasses securely.
- From the nose pad groove area, gently push outward to detach the frame from the XR Glasses.
- Reattach the nose pad to complete removal.
Tech Specs
| Feature | VITURE Beast XR Glasses |
|---|---|
| Display Size | 174" at 4 meters |
| Resolution | Up to 1200p. 1920 × 1200 per eye, 3840 × 1200 combined |
| Refresh Rate | Up to 120Hz |
| FOV | 58° |
| Brightness (Perceived) | Up to 1250 nits |
| Contrast Ratio | ≥100,000:1 |
| IPD | 64.0±6.0 mm (Regular) 68.0±6.0 mm (Large) |
| Colors | 108% sRGB |
| Electrochromic Film | Supports 9 levels of adjustment. |
| Optical Transmittance | 0.5–40% |
| Haze | < 1% |
| Discoloration Time | 0.1 s |
| 3D Support | Yes |
| 3DoF | Built-in VisionPair™ Ultra-Low Latency 3DoF |
| Color Modes | 5 Modes |
| Audio | HARMAN AudioEFX |
| Spatial Sound | Yes |
| Brightness & Volume Control | 9-level brightness adjustment and 16-level volume control |
| Connection | USB-C Connector |
| Myopia Adjustments | Not supported (Prescription lens frame required for nearsightedness or astigmatism) |
| Wear Detection | Yes |
| Weight | 88g (Regular) 90 g (Large) |
| Folded Dimensions | 150.3 x 50.5 x 55.6 mm (Regular) 154.3 × 50.5 × 55.6 mm (Large) |
| Case Dimensions | 191 × 85 × 85 mm |
| Case Weight | 286g (Regular) 288g (Large) |
| Suggested Wear Time | 3–4 hrs |