Pro 2 XR Glasses
VITURE Pro 2 XR Glasses
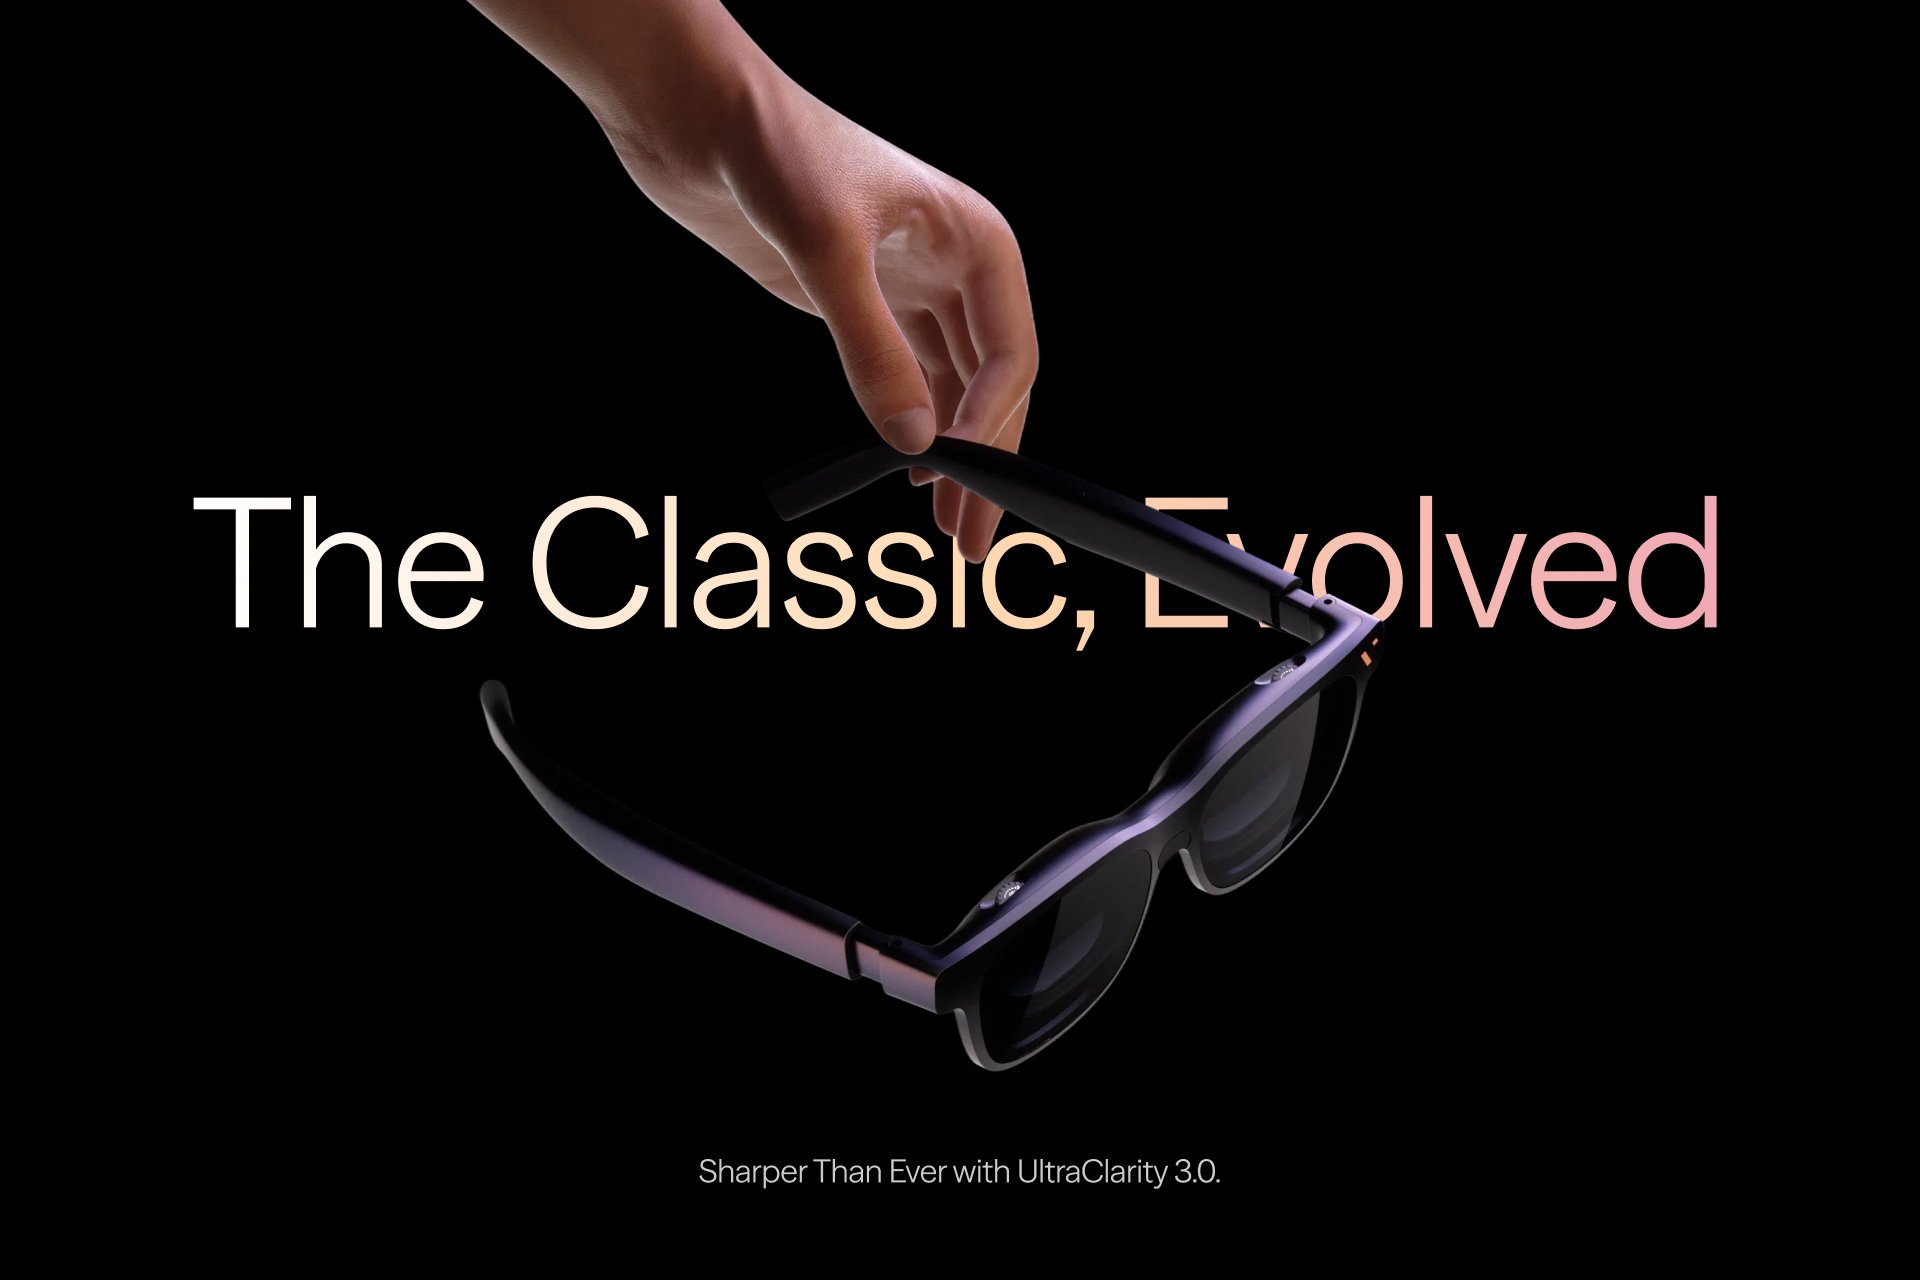
Five years in the making. A Premium You Can Truly Feel. The 5th Anniversary Collection is five years of refinement built not around a spec sheet, but around you. VITURE Pro 2 is the thinnest XR glasses you forget you're wearing, with an exceptional vision experience only your eyes will know. All that's left is the experience.
UltraClarity 3.0 is Here — Push Birdbath Clarity to a New Height
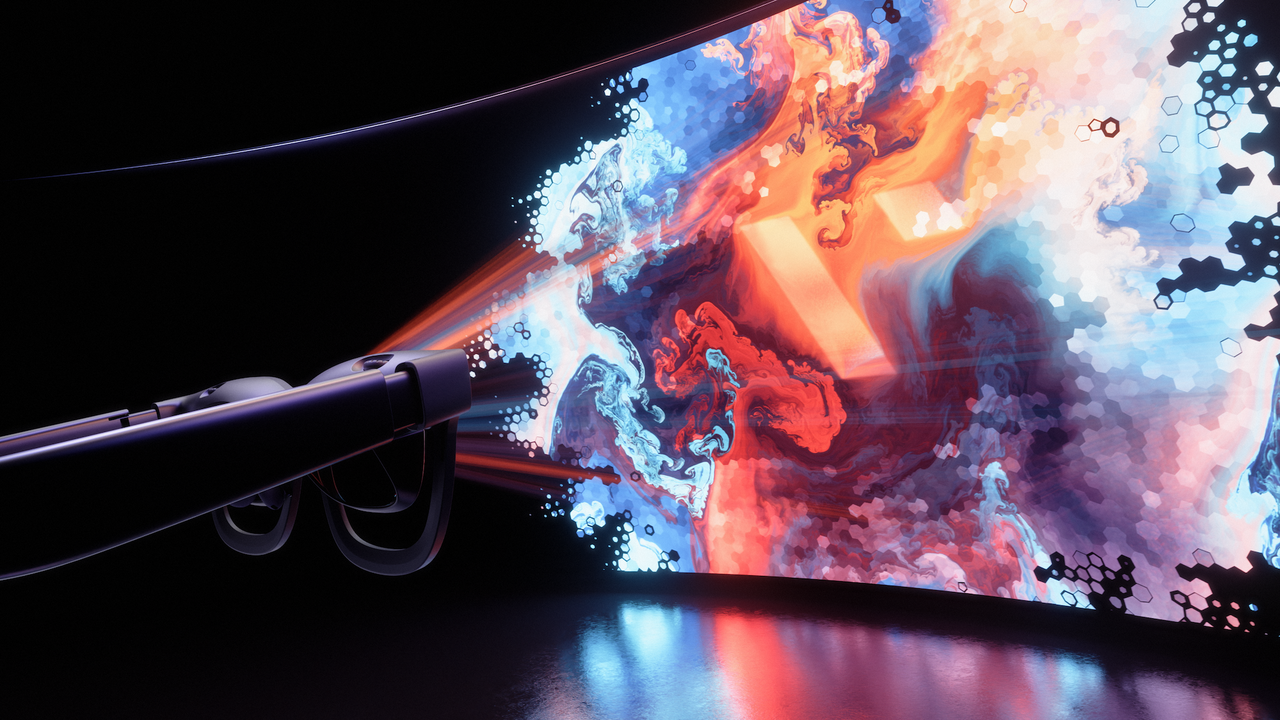
Not just the center — every corner, every prescription, every eye. Focus stays smooth edge to edge; horizontal and vertical, equally sharp; straight lines stay straight at any diopter. Color is tuned at the Micro-OLED source, not a chip. Sony Micro-OLED and Birdbath optics. 146" at 4 meters. 1,600 nits. 50° FOV. 120Hz. Your eyes will know before your brain does.
The Next Big Thing is COMFORT
Hour three, still on. Still comfortable. That's 63g, a 16% thinner frame, and SGS Eye Strain A+ certification doing their job. UltraClarity 3.0 takes care of the rest — clarity that hits edge to edge, sharpness you feel before you can name it. VITURE Pro 2 is engineered around you — your eyes, your play, your life. A premium you can truly feel. Five years in the making.
Built-In Myopia, 0 to −5.0D
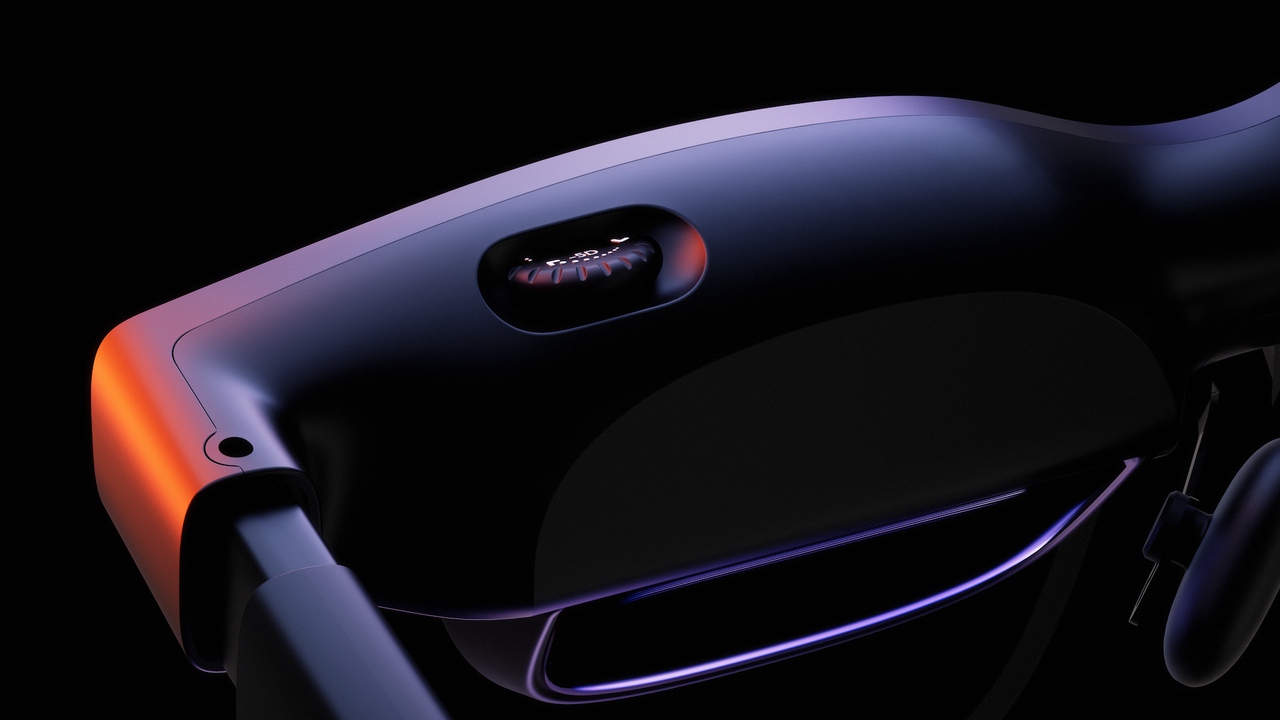
Independent per-eye diopter dials mean sharp vision out of the box. Birdbath optics shift focus naturally from center to edge, so your eyes micro-adjust the way they do in the real world — instead of locking onto a fixed plane for hours. Easier on your eyes, and gentler on your vision. SGS Eye Strain A+ Certified: low blue light · flicker-free · low visual fatigue.
One Pair. Every Setup.
Gaming
A 120Hz refresh rate and 50° FOV create a deeply immersive gaming environment — even lying down in bed. Plug into Steam Deck, Switch 2, or any USB-C device. Low latency, pocket IMAX, no compromises.
Streaming & Cinema
146 inches of private IMAX. 1,600 nits of brightness means you can watch anywhere, from a midnight bedroom to a long-haul flight. Open-ear spatial audio keeps you in the action without cutting you off from the world.
Productivity
Unlock a spatial workstation via SpaceWalker. Expand your laptop into an UltraWide canvas, stack windows, and work anywhere. One cable — your whole desktop, for coding or more.
Capabilities
UltraClarity 3.0 is Here — Sharper Where It Counts
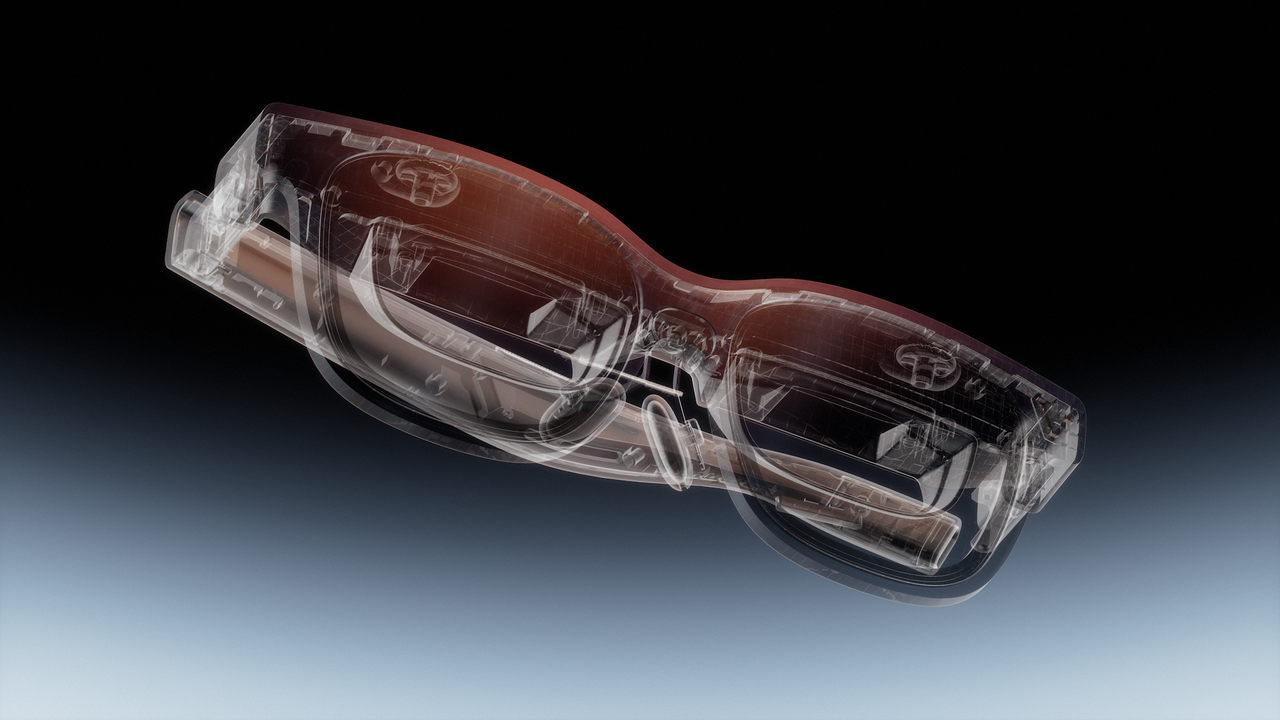
UltraClarity 3.0 · Inherited Clarity King
146" 120Hz 1080p Display
High-fidelity visuals on a massive cinema canvas.
Sony Micro-OLED
1,600-nit peak brilliance via pro-grade Birdbath optics. Gamma-calibrated at the Micro-OLED level for cinematic color fidelity.
50° Cinematic FOV
A wide field of view for fully immersive viewing.
Four Optical Breakthroughs Inside UltraClarity 3.0: Field curvature, isotropic RMS, full-prescription distortion, and pupil-offset stability. None appear on a spec sheet — all are felt by your eyes. Read More
Built-in Diopter
Edge-to-Edge Sharpness, Adjusted for Every Pair of Eyes
a 0 to −5.0D per-eye dial delivers sharp vision with no inserts. SGS Eye Strain A+ Certified — low blue light, flicker-free.
Why a Built-In Diopter is Better for Your Eyes: Semi-transparent Birdbath optics naturally break the fixed focal distance, giving your ciliary muscles intermittent relief throughout every session — not just correcting what you see, but caring for your vision over time. Read More
Thinnest XR Glasses Ever
63g Build
18% lighter than VITURE Pro. Comfort for extended wear, not endurance.
Thinner Signature Frame
Optimized internal optics and a precision low-profile hinge for the slimmest VITURE silhouette ever. Sleek by default. Fits every face.
Spatial Audio
AAC Acoustic System
Immersive spatial audio tuned specifically for XR. Clear dialogue, punchy bass, and a wide soundstage.
Fits Out of the Box
Free Lens Shade Included
Completely blocks ambient light for the ultimate daytime visual experience.
Nose Pad Design
3 pad sizes and 7 positions for the broadest face-shape support.
Adaptable Comfort
Flexible, tilt-adjustable temples for secure comfort over long sessions.
Universal Ecosystem
Universal Connectivity
USB-C plug-and-play with iPhone, Android, macOS, Windows, and Steam Deck. Nintendo Switch / Switch 2 connect via the Mobile Dock Mini, Pro Mobile Dock, or Adapter Ultra; PlayStation and Xbox via the Pro Mobile Dock (all sold separately).
Full Potential via SpaceWalker
Unlock UltraWide spatial workstations, Immersive 3D, and more.
What's in the Box
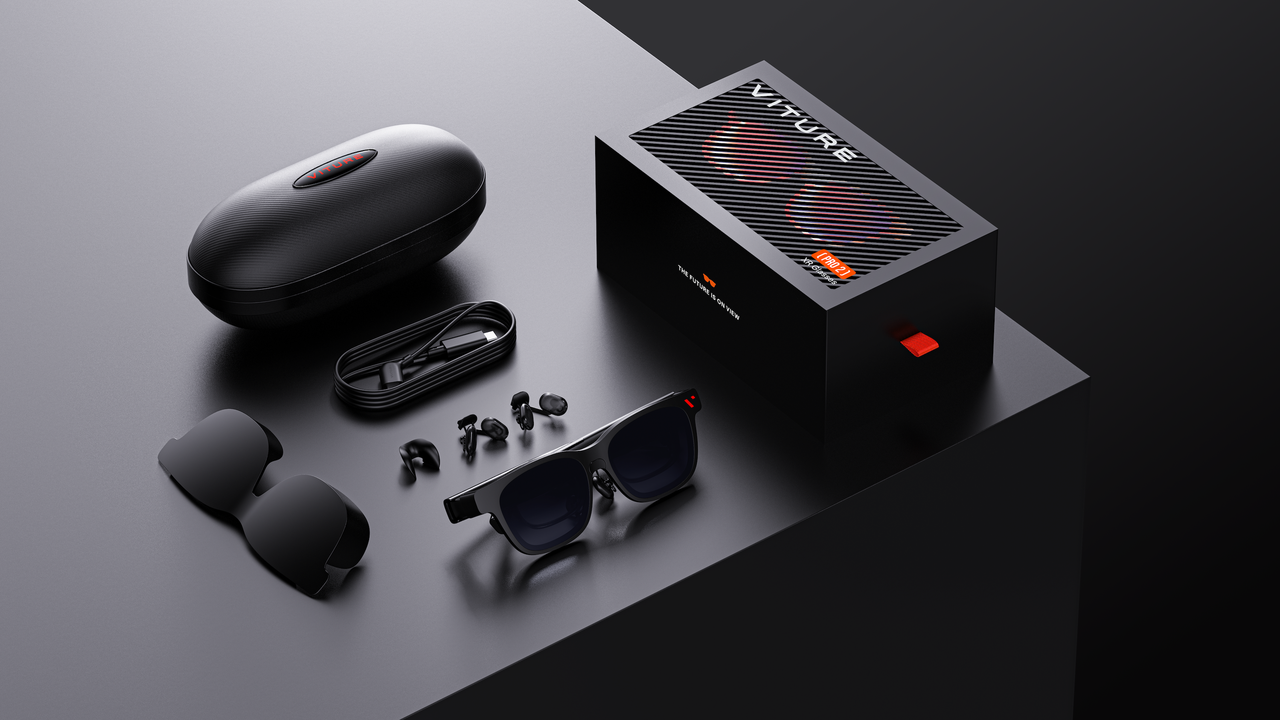
- VITURE Pro 2 XR Glasses
- Swappable Nose Pads
- Lens Shade
- USB-C to USB-C Cable
- Glasses Case
- Glasses Cloth
- Quick Start Guide
- Safety Guideline
Tutorial Video
Buttons & Modes
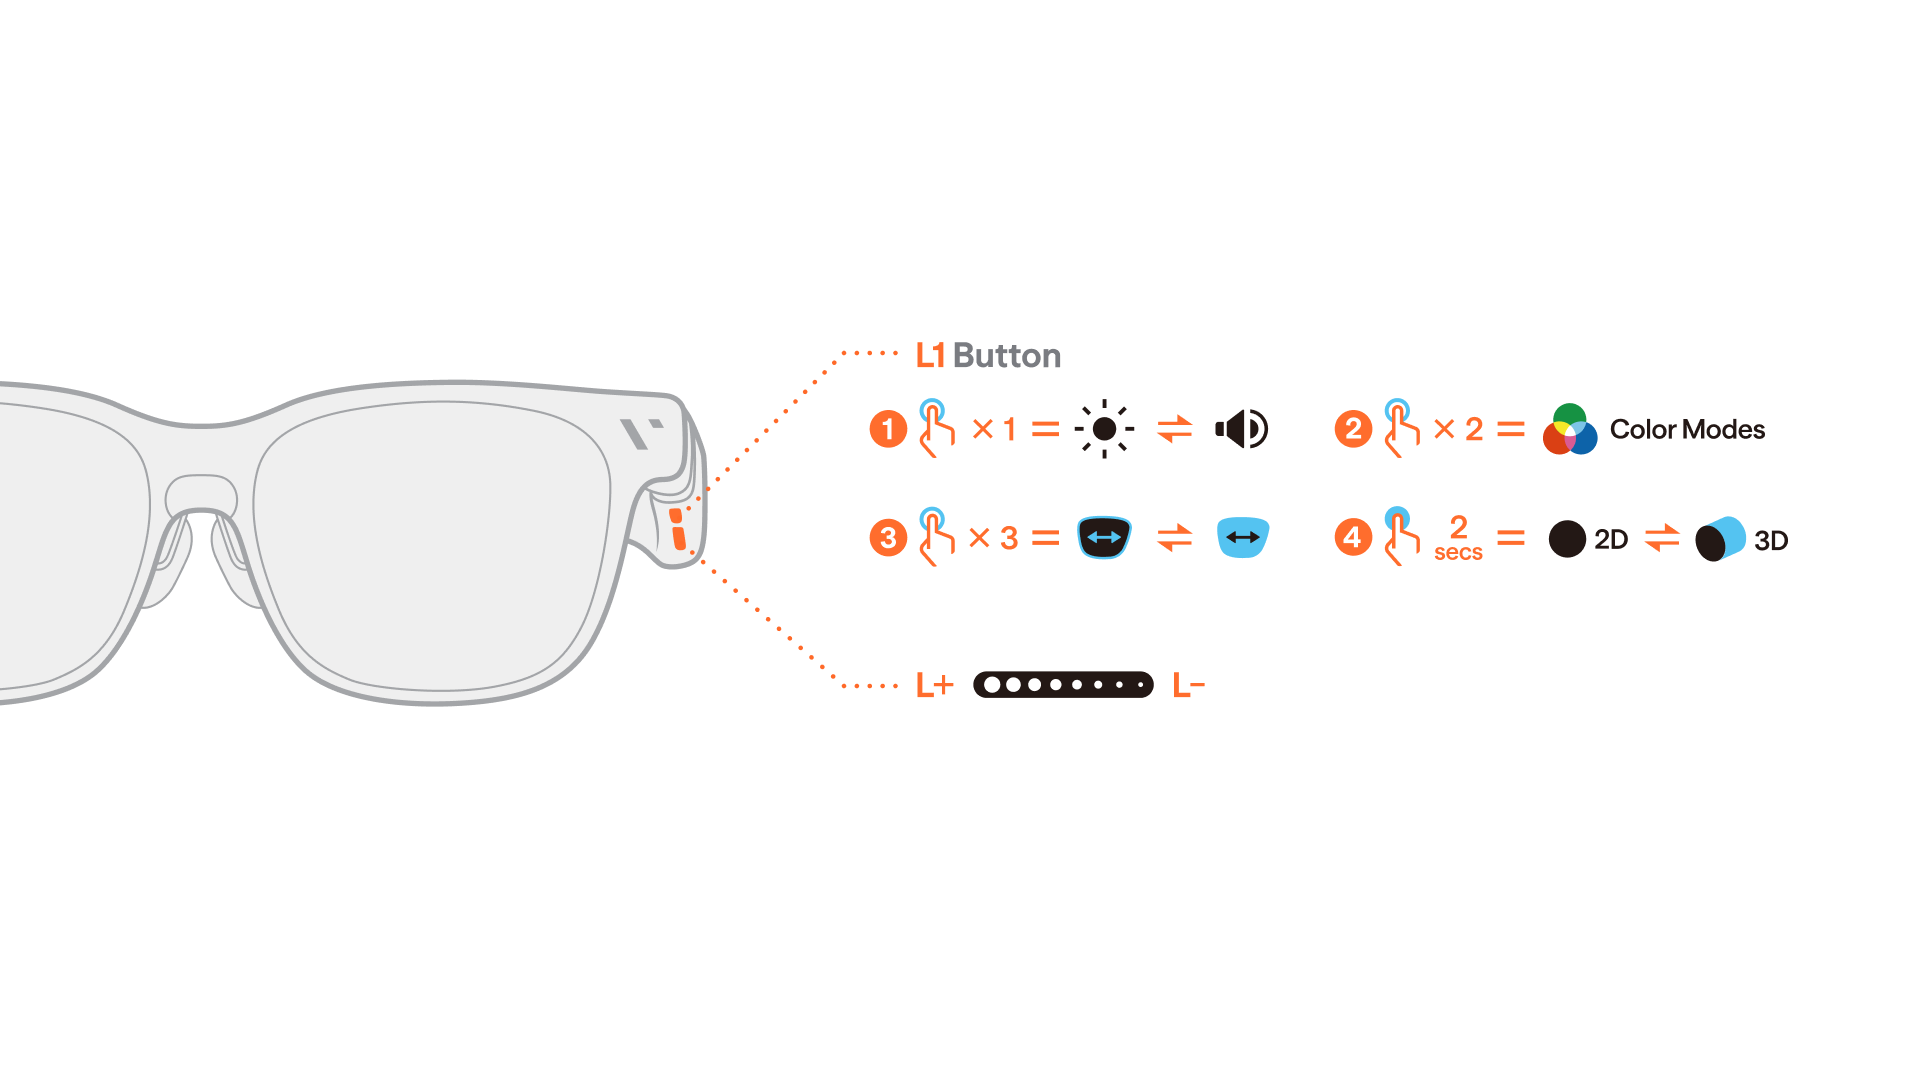
VITURE Pro 2 XR Glasses keep every control on the left side — simple to reach, easy to learn.
| Control | Description |
|---|---|
| Adjust brightness / volume | Press L+ / L- to increase or decrease the brightness (default) or volume. |
| Switch between brightness and volume adjustment | Single-press L1 to switch between brightness and volume adjustment. |
| Cycle through color modes | Double-press L1 to open the color mode menu, then use L+ / L- to switch modes. |
| Adjust eye axis | Triple-press L1, then use L+ / L- to align the visual axis. |
| Switch between 2D and 3D modes | Press and hold L1 to switch between 2D and 3D display modes. |
Choose the Right Nose Pad
When wearing your VITURE Pro 2 XR Glasses, the virtual screen should be unobstructed and centered in your line of sight. The right nose pad makes all the difference for both fit and image quality.
VITURE Pro 2 XR Glasses come with three nose pad sizes — 0, 1, and 2. Sizes 1 and 2 each clip into three positions, giving you seven total height settings to fine-tune fit, viewing angle, and weight distribution. Try different sizes and positions (or no nose pad at all) until the full display is clear and centered.
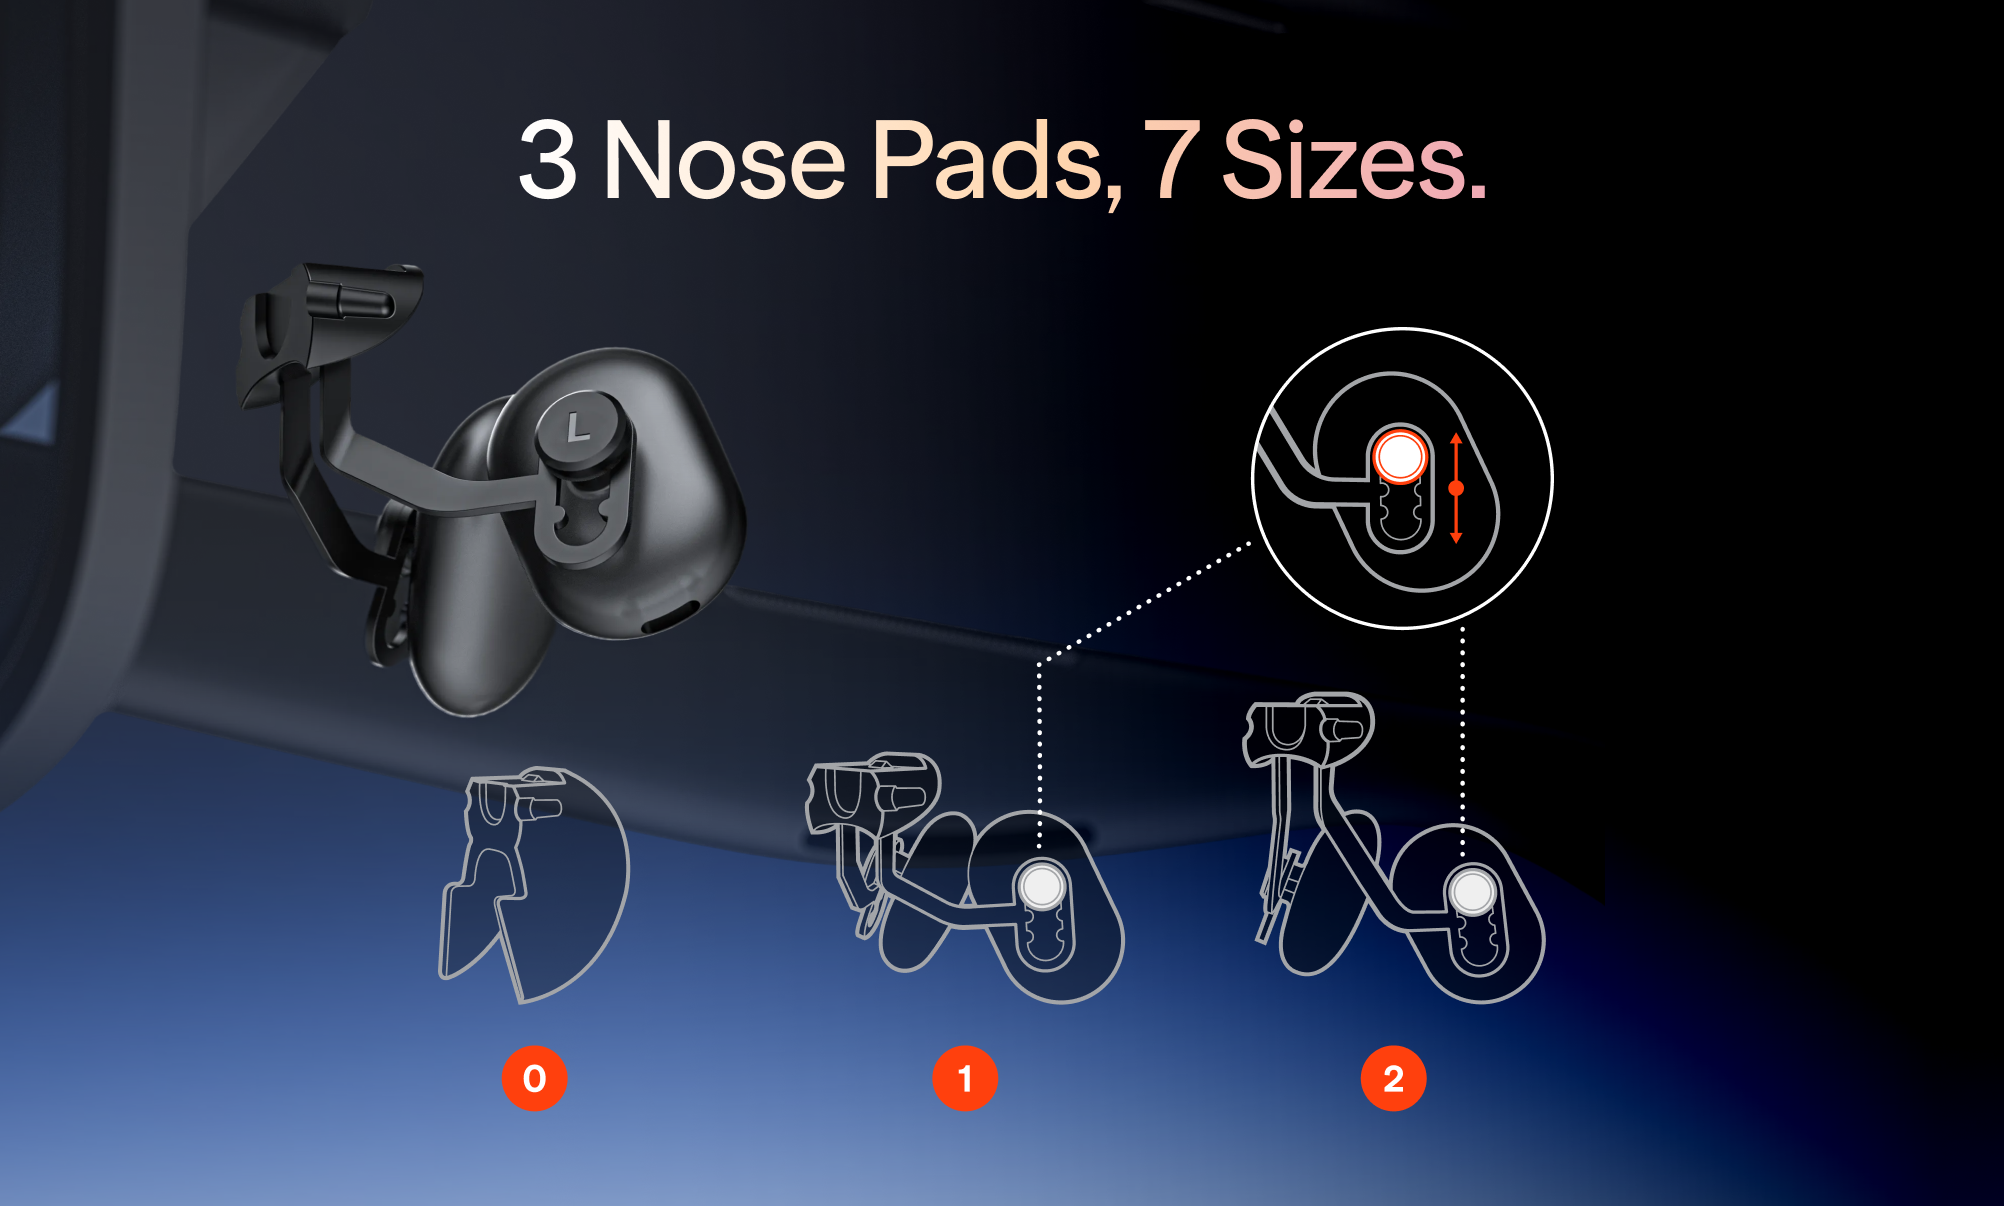
To remove a nose pad:
- Hold the XR Glasses upright with one hand, so that the temples are away from you.
- With your other hand, put your thumb between the lenses, touching the metal wire pad arms.
- Push forward with your thumb until the nose pad comes off.
To install a nose pad:
- With one hand, rotate and hold the nose pad with the size number facing you and upright.
- With your other hand, hold the XR Glasses upright so that the temples are close to you.
- Slide the nose pad into the bridge of the XR Glasses until you hear a click.
Tip: The temple arms also adjust to three positions — pick the one that best suits your head shape for a secure, comfortable fit.
Myopia Adjustment
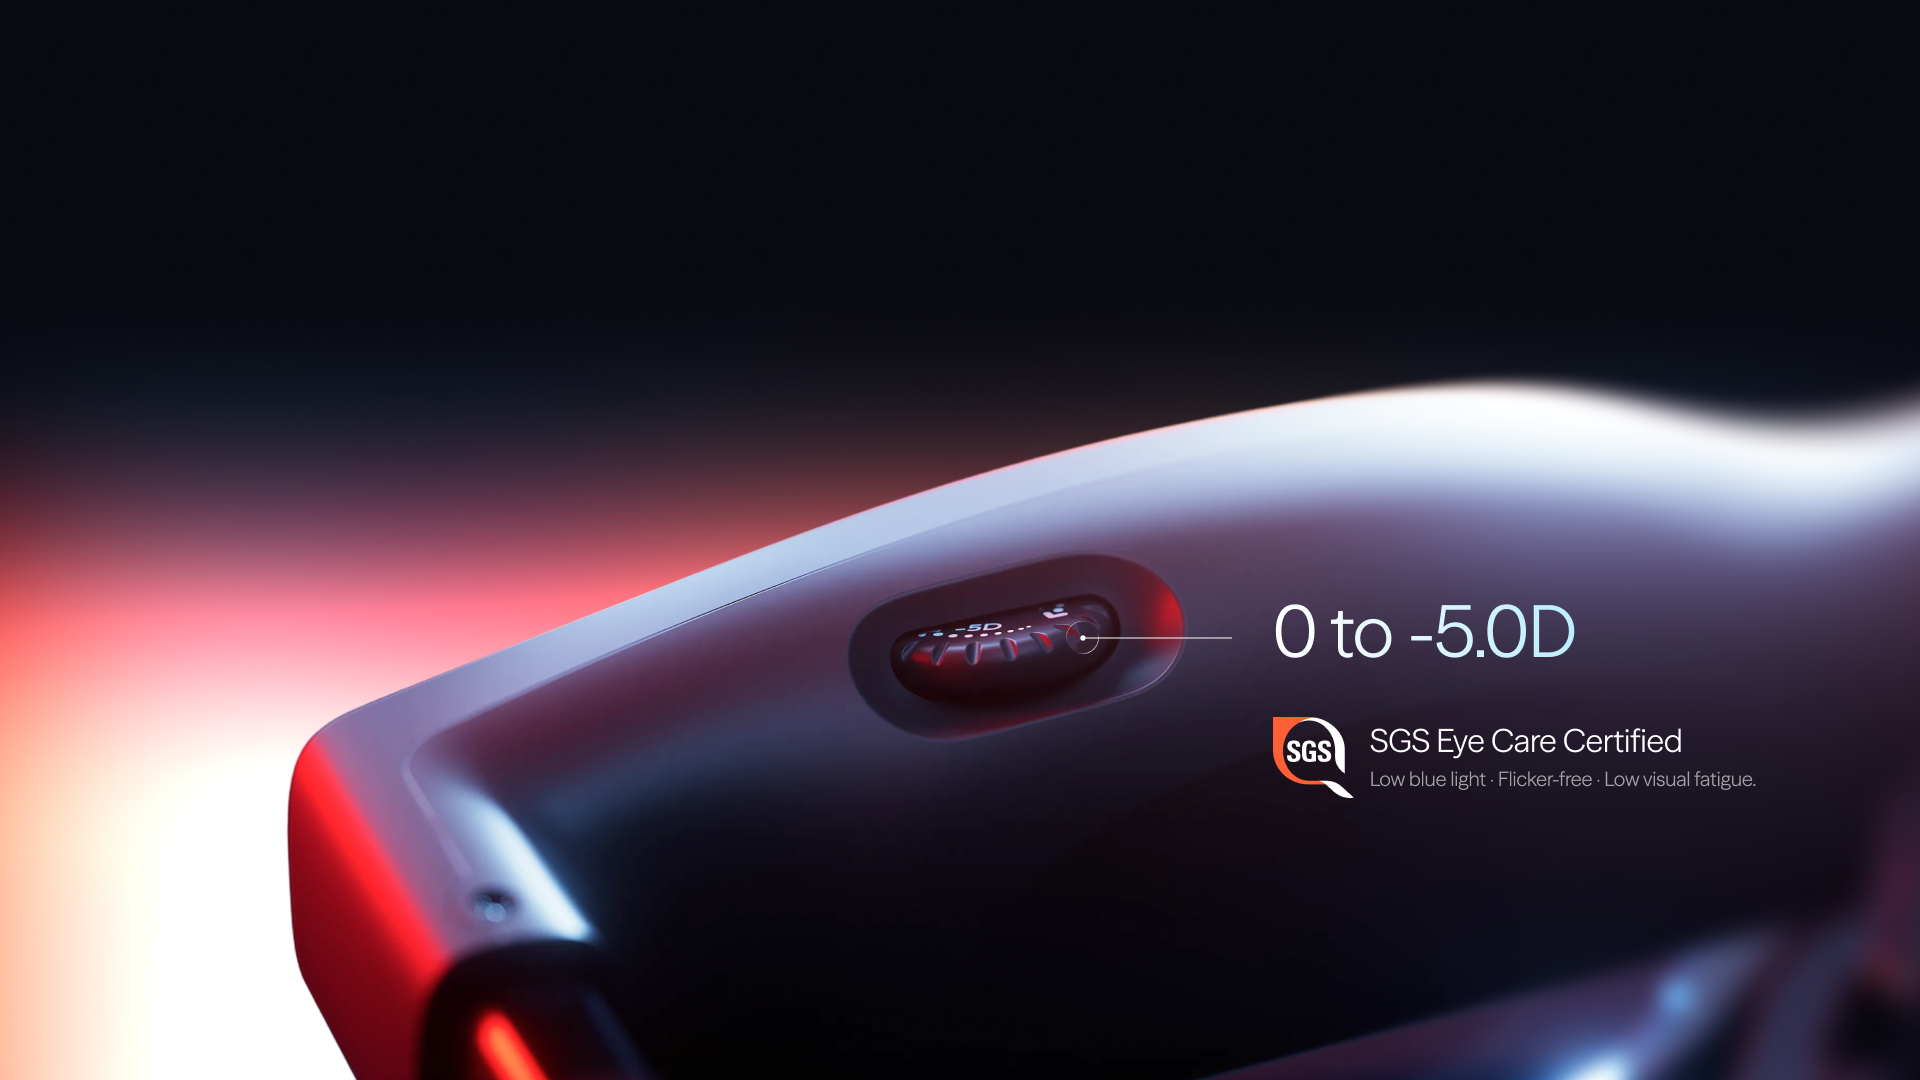
VITURE Pro 2 XR Glasses have a built-in diopter adjustment, so most nearsighted users can enjoy a sharp image without contacts or clip-on lenses.
Turn the twin dials above each lens counterclockwise to dial in focus for myopia up to -5.00D, until the image is sharp and clear.
- SGS Eye Care Certified: low blue light, flicker-free, and low visual fatigue for comfortable long sessions.
For prescriptions beyond -5.00D, or for astigmatism, use the Prescription Lens Frame (sold separately) with your own custom lenses.
Connect to Your Devices
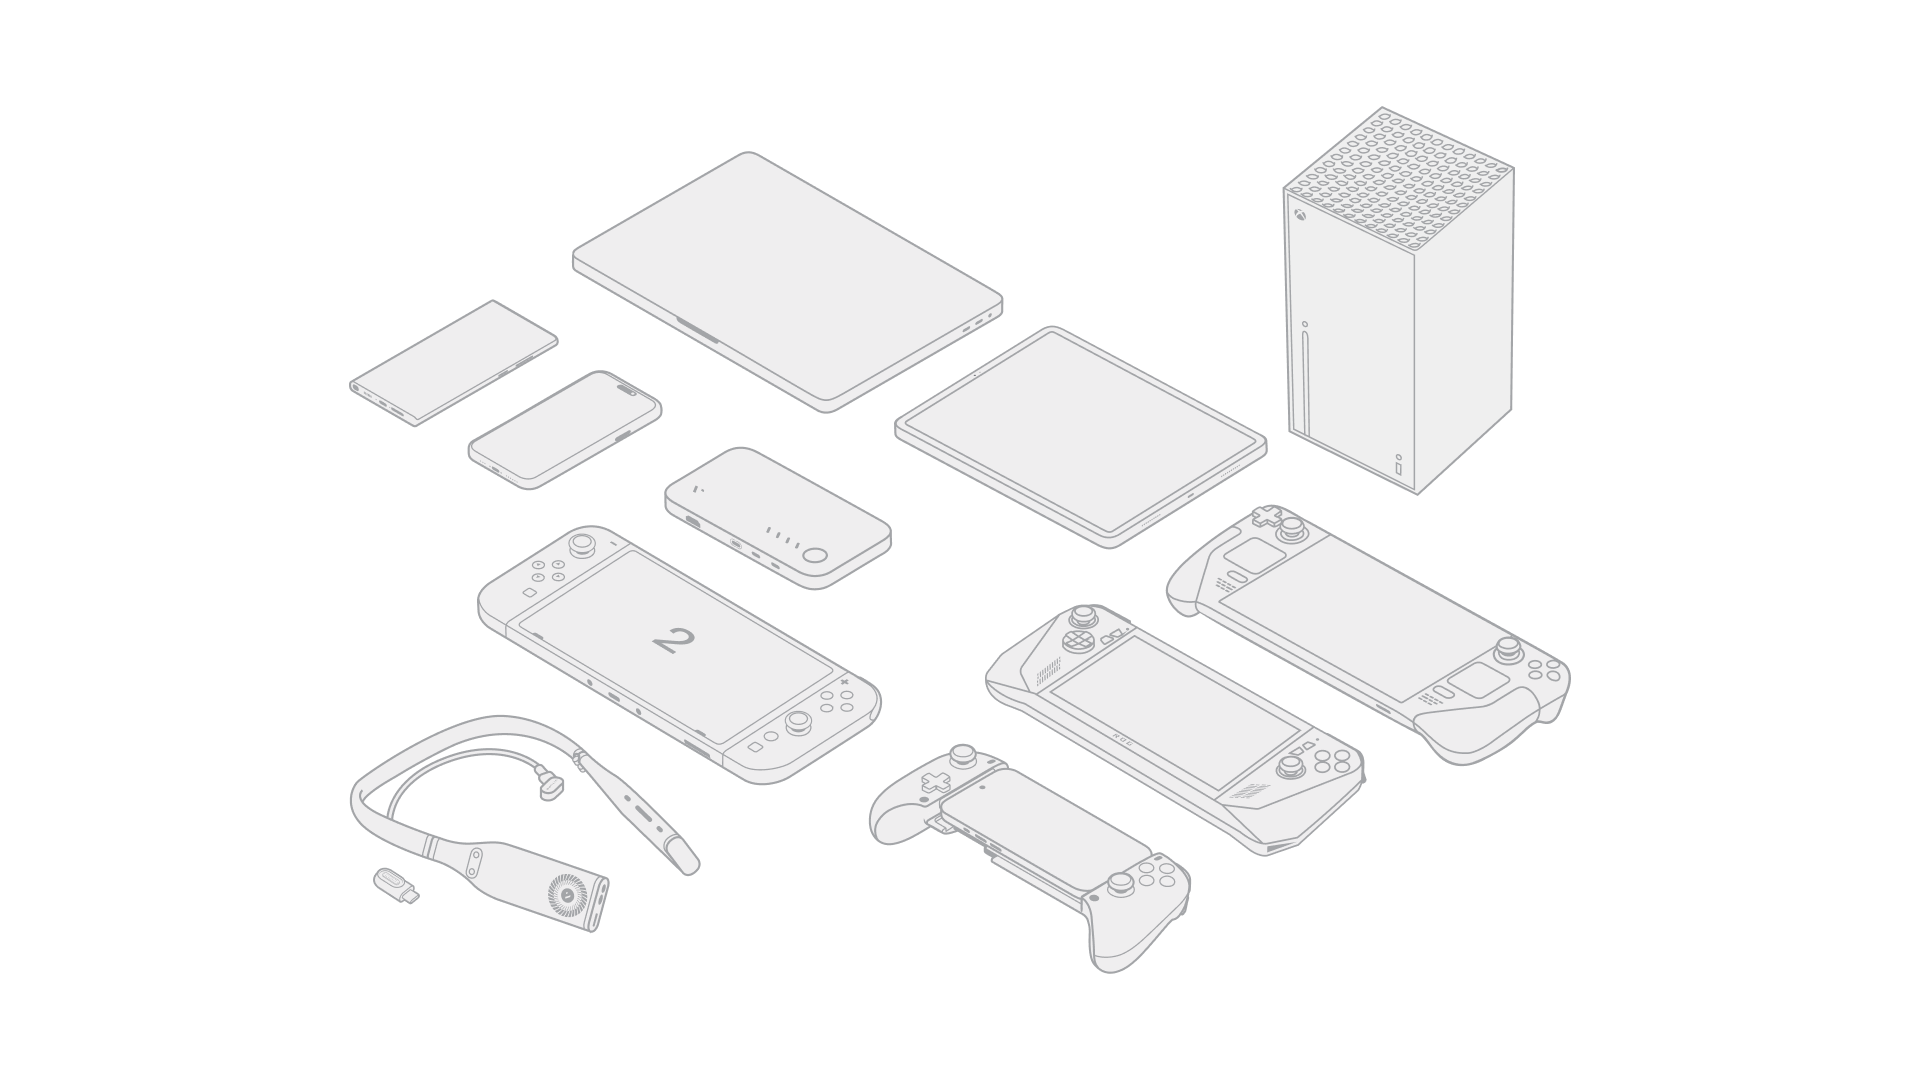
VITURE Pro 2 XR Glasses connect over USB-C with DisplayPort Alt Mode (DP Alt Mode).
Connect directly over USB-C
- iPhone 15 and later (excluding iPhone 16e and iPhone Air)
- Most Android phones with DP output
- USB-C laptops and MacBooks
- USB-C iPads and other compatible tablets
- USB-C handheld consoles such as Steam Deck and ROG Ally
Connect via a VITURE dock or adapter (sold separately)
- Nintendo Switch / Switch 2 — via the Mobile Dock Mini, Pro Mobile Dock, or Adapter Ultra
- PlayStation / Xbox — via the Pro Mobile Dock
To connect:
- Connect your XR Glasses to your device with the included USB-C to USB-C cable.
- Turn on and unlock your device. The XR Glasses will power on automatically.
If there is no display, try disconnecting any other external displays connected to your device (some devices support only one external display), or connect to a different USB-C port and try again.
To adjust display settings, open your device's system settings:
- On Macs, go to System Settings > Displays, choose VITURE, and modify the "use as" settings.
- On iPads, go to Settings > Display & Brightness > Displays > Arrangement.
- On PCs, go to Settings > Display.
To confirm compatibility, look for DisplayPort over USB-C, DP Alt Mode, or Thunderbolt in your device's specifications. Check the full, always-current list on our Compatibility page.
Change Display Refresh Rate
VITURE Pro 2 XR Glasses support refresh rates up to 120Hz:
- 120Hz
- 90Hz
- 60Hz
Windows PC
- Open the Start menu and select Settings.
- Navigate to System > Display.
- Under "Advanced display," select your VITURE display.
- From the "Choose a refresh rate" dropdown menu, select your desired refresh rate.
MacBook
- Open the Apple menu and select System Settings (or System Preferences).
- Click on Displays.
- Choose your VITURE display.
- Click the "Refresh Rate" pop-up menu and select your desired refresh rate.
SpaceWalker for Desktop (Mac & Windows)
SpaceWalker for Mac and Windows lets you select a refresh rate (120Hz, 90Hz, or 60Hz) each time you launch the app with your XR Glasses, and remembers your last choice.
Some accessories (such as One mobile docks and neckbands) may support 60Hz only. Refresh-rate switching is not available on those accessories.
Change Color Mode
VITURE Pro 2 XR Glasses offer five color modes:
- True Color (default)
- Vivid
- Film
- Warm
- Cold
To switch color modes: double-press L1 to open the color mode menu, then use L+ / L- to cycle through the modes. A prompt on screen shows the mode you've selected.
Color on Pro 2 is tuned at the source — within the Sony Micro-OLED panel itself.
Note: Some color modes may be unavailable on older firmware. Make sure your XR Glasses are updated to the latest firmware. Click here to update.
Update Your XR Glasses' Firmware
Before using your XR Glasses, we highly recommend updating the firmware for a better experience and the latest features.
You can update your VITURE Pro 2 XR Glasses through the web, an Android device, a Mac, or a Windows device.
View the firmware release history here.
Update via Web
Notes:
- Make sure you are using Google Chrome (version 98 or later).
- Before connecting, ensure your device is not being used by other applications.
- Do not unplug the XR Glasses or refresh the page during the update process unless otherwise specified.
- Unplug the XR Glasses only after you see the Update Successful message.
Update via Android Phones & Tablets
Coming soon.
You can use an Android device with a USB-C port to update your firmware — even if it doesn't support DP Alt Mode.
- Download the SpaceWalker app from Google Play.
- Open the menu and tap Firmware Update.
- Connect your XR Glasses, then follow the on-screen prompts to update. Do not disconnect during the update process.
Update via Mac or Windows
SpaceWalker for Mac and Windows also offers a simple way to update to the latest firmware. See SpaceWalker for Desktop for details.
บทความแนะนำ
Calibrate Your XR Glasses' IMU
We recommend calibrating your XR Glasses' IMU after updating the firmware. A calibrated IMU gives you a lower drift rate and higher accuracy for 3DoF. You can also enable or disable Wearer Detection.
Immersive 3D
Immersive 3D is the world's first real-time 2D-to-3D conversion feature built into XR glasses, powered by cutting-edge AI.
This revolutionary technology combines advanced artificial intelligence with VITURE's proprietary 3D algorithms to transform your digital content into stunning immersive visuals. Whether you're enhancing productivity, enjoying entertainment, or gaming, Immersive 3D offers a whole new level of realism and depth.
By analyzing each frame in real time, the system identifies depth cues and spatial relationships to generate natural, high-quality 3D effects — all with minimal latency.
Immersive 3D is available in two forms:
- As a standalone desktop app on Mac and Windows, it converts your entire screen content into 3D in real time.
- As a built-in feature within the SpaceWalker app for iOS and Android, it transforms your own videos and even online streaming platforms like YouTube into immersive 3D experiences.
Learn more about Immersive 3D:
Watch 3D Movies
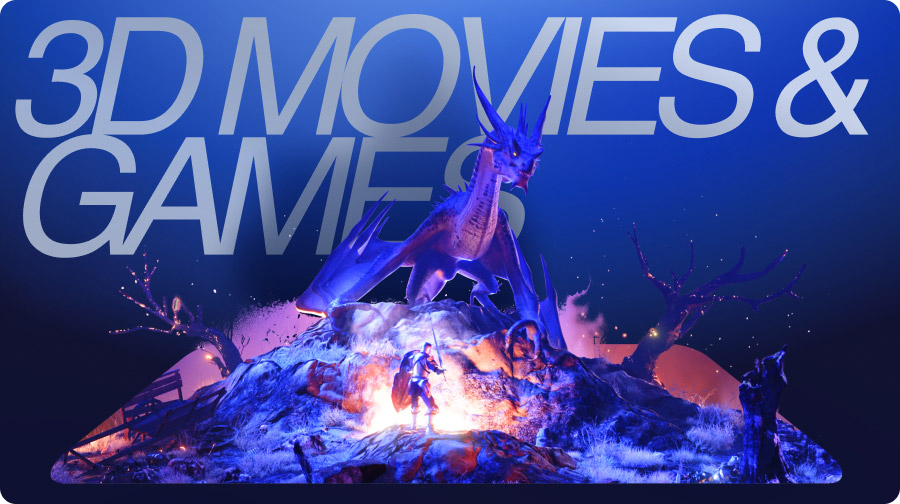
Enable 3D Mode on XR Glasses
VITURE XR Glasses natively support full SBS (Side-by-Side) 3D video at 3840×1080 resolution.
- For VITURE Pro 2 XR Glasses: press and hold L1 to switch between 2D and 3D modes.
Notes: All VITURE glasses currently support only Full SBS (Side-by-Side) format for 3D content. Immersive 3D works without any compatibility concerns. However, when watching videos or playing 3D games, please make sure to select the correct 3D format; choosing the wrong format may result in compatibility issues.
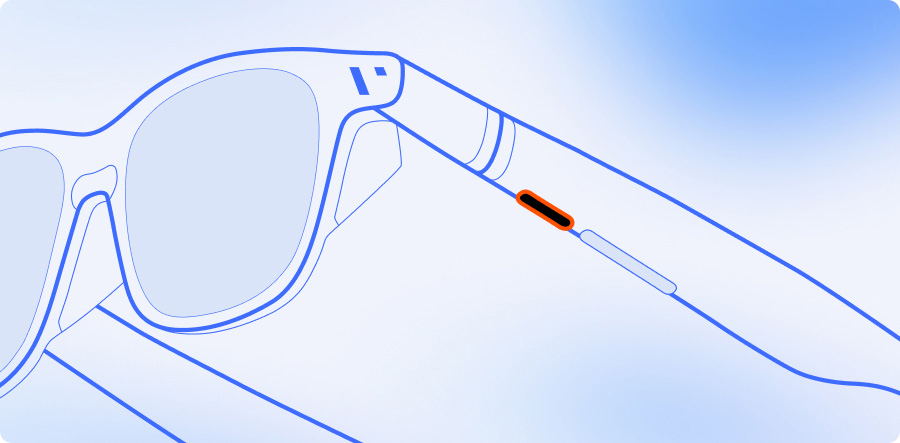
To try 3D Mode in gameplay, play the sample video clip in fullscreen using your XR Glasses:
Explore more Full SBS 3D videos in this YouTube playlist.
Connect to Compatible Devices
You can watch 3D movies by connecting your XR Glasses to a compatible device and using them as an external monitor.
Check the compatible device list.
Note: Some phones support DP Alt Mode but cannot output the resolution required for 3D video. For example, the Google Pixel 8 and 9 series do not support switching to 3D Mode. To ensure compatibility, your device must support video output at 4K resolution or higher.
Follow these steps to play 3D SBS movies on your Android phone using VLC Media Player:
- For Samsung users, please disable Samsung DeX (Settings > Advanced Features > Samsung DeX > Auto start when HDMI is connected).
- Transfer the movie: copy the 3D SBS movie file directly to your phone storage. Alternatively, access the movie on a local network storage device using VLC's browsing features.
- Open the movie in VLC Media Player.
- Enable 3D Mode: connect your XR Glasses to your phone, then press and hold L1 to enable 3D Mode.
- Adjust aspect ratio (optional): if the image appears distorted, press and hold the Aspect Ratio button (rectangle icon with markers), then select "Fit Screen" for the best viewing experience.
- Sit back and enjoy!
When you watch a 3D video on your PC or MacBook, enable 3D Mode on the XR Glasses and ensure you extend your desktop to the XR Glasses. Then open a video, move the media player to the XR Glasses' screen, and play in fullscreen.
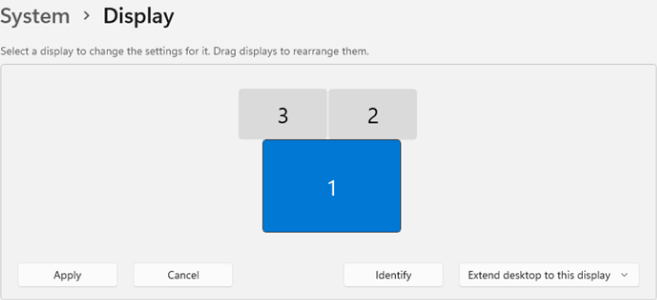
Some Windows PCs do not support 3840 × 1080; if the information is unclear, please contact the manufacturer of the computer you plan to use with the XR Glasses.
To experience 3D Mode in movies, please watch the sample video clip in fullscreen on your XR Glasses.
With the Neckband
The Neckband offers enhanced 3D features with auto-detection and side-by-side 3D support — so you can enjoy your favorite blockbusters the way they were meant to be seen.
Streaming Apps
If you are based in the United States, you can use streaming services like Prime Video, Netflix, YouTube, Vudu, and others to watch 3D movies online.
Local Files
Transfer your 3D videos to the Neckband by connecting the Neckband to your PC/MacBook via a USB-C-to-USB-C cable, then open the 3D Player app on the Neckband and select a video. Your XR Glasses will automatically switch to 3D Mode when playing a full SBS 3D video.
See also: Transferring Files To Your Neckband
Troubleshooting
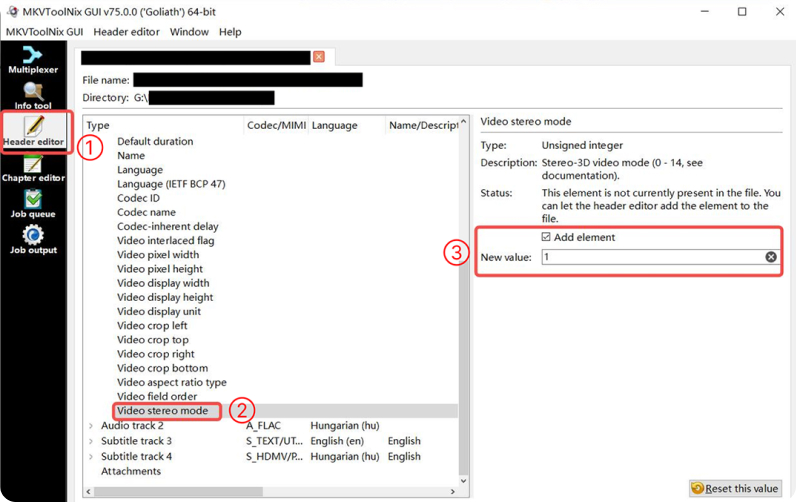
If you attempt to play a SBS 3D .MKV format video, the aspect ratio may not be correct. You can use MKVToolNix to convert the file and fix this issue. Download MKVToolNix and install it.
Click "Header editor," and set "Video stereo mode" to 1. This will allow most SBS 3D videos to play properly.
บทความแนะนำ
Play 3D Games with Your PC
Play Games with Immersive 3D
You can play games after launching Immersive 3D for Windows, but please note that this will significantly increase battery consumption and may reduce gaming performance.
We recommend reviewing the system requirements and our benchmark results before enabling this feature.
For the best experience, we suggest playing games only on systems equipped with an NVIDIA RTX 4080 or higher graphics card.
Native 3D Games
You can play native SBS video games by connecting XR Glasses to your PC. Here are some recommended video games that support 3D graphics. To determine whether your device supports these games, review the system requirements published by the game developers.
List of Native SBS 3D Games
| Title | Platforms | First release year |
|---|---|---|
| Shadow of the Tomb Raider | Windows | 2018 |
| Rise of the Tomb Raider | Windows | 2016 |
| Elite Dangerous | Windows, macOS (OS X) | 2015 |
| Trine 3: The Artifacts of Power | Windows, Linux, macOS (OS X) | 2015 |
| Trine 2 | Linux, Windows, macOS (OS X) | 2013 |
| Crysis 3 | Windows | 2013 |
| Doom 3 BFG Edition | Linux, Windows | 2012 |
See more native 3D games: Native 3D - PCGamingWiki. You can try more games on the list, but we cannot guarantee that every game works well with VITURE XR Glasses.
Reshade + Depth3D
If you want more 3D games on your PC, we strongly recommend using Reshade + Depth3D. It is easy to configure and can play many games in 3D Mode. See the game compatibility list of ReShade.
ReShade supports Direct3D 9, Direct3D 10, Direct3D 11, Direct3D 12, OpenGL, and Vulkan. A computer with Windows 7 SP1, 8.1, 10, or 11 and .NET Framework 4.6.2 or higher is required.
Make sure your PC supports dual monitors and has a USB-C DP 4K port.
Instructions
Download ReShade and launch it.
Select a game.
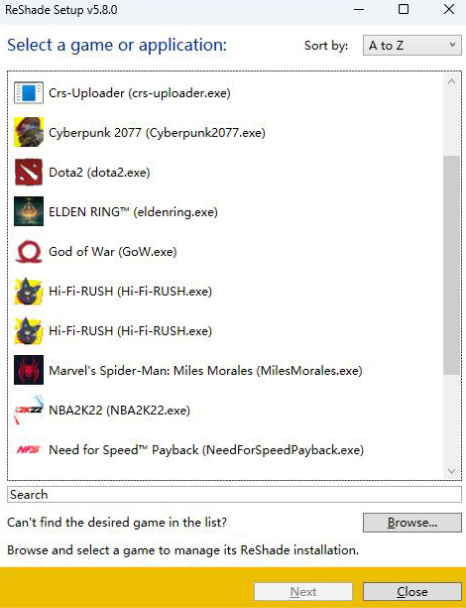
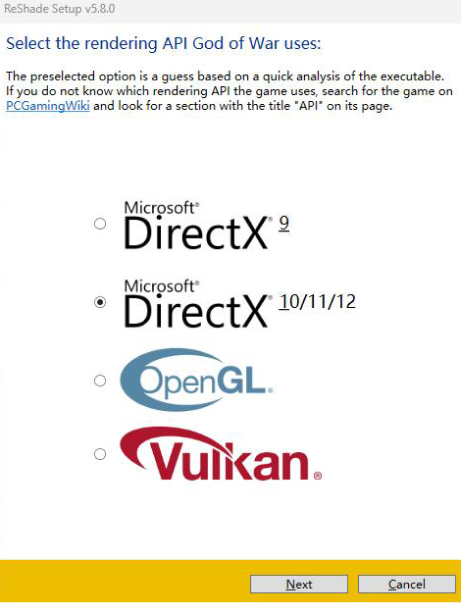
Select the rendering API that the game uses. Click "Next" to continue.
If you are using the latest version of ReShade, check Depth3D to continue. For older versions, download Depth3D and watch this video tutorial.
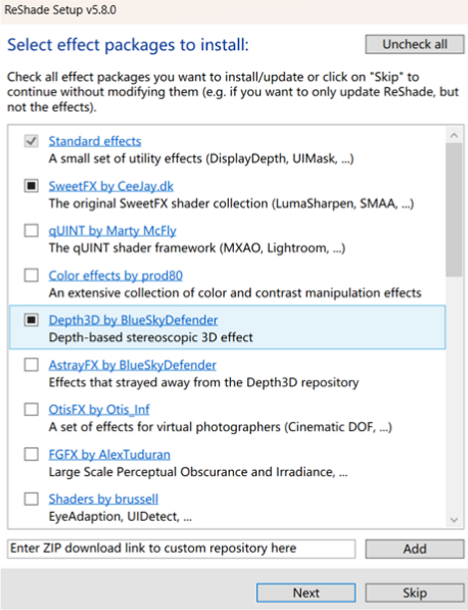
After downloading the effect packages, start the game and press Home on the keyboard. Select SuperDepth3D on the overlay menu, and press Home again to close the overlay.
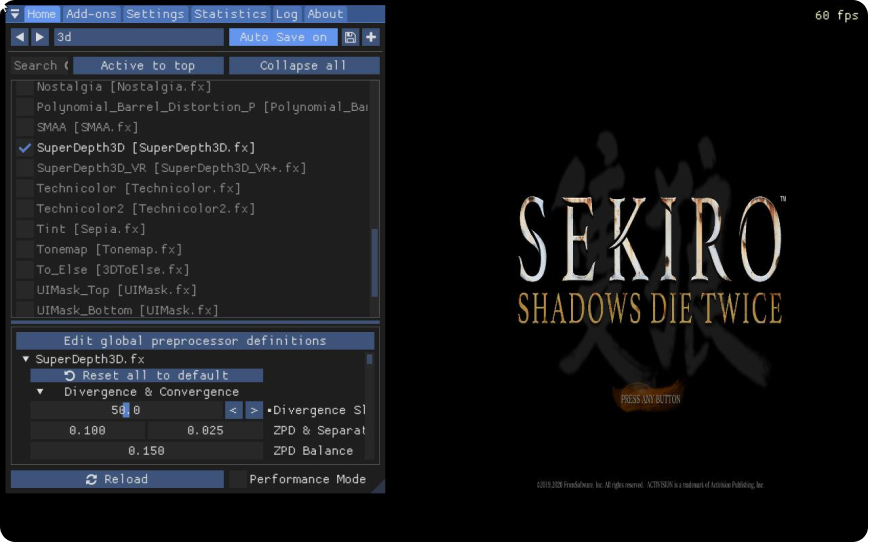
Connect your XR Glasses to your PC and switch to 3D Mode.
Because Half-SBS and Full-SBS use different formats, using ReShade or similar 3D conversion tools may lead to incorrect output on the glasses. To ensure proper Full-SBS rendering, configure your GPU as follows:
On AMD devices: set the VITURE display resolution in Windows to 1920 × 1080, then follow AMD's Custom Resolution instructions to create a 3840 × 1080 logical display mode.
On NVIDIA devices: first set the VITURE display resolution in Windows to 3840 × 1080, then create a 1920 × 1080 custom resolution following NVIDIA's Custom Resolution guide.
- Enjoy!
How to Return to Normal Gameplay
Launch a game and press Home on the keyboard, uncheck "SuperDepth3D," and the game will return to normal.
Uninstall ReShade
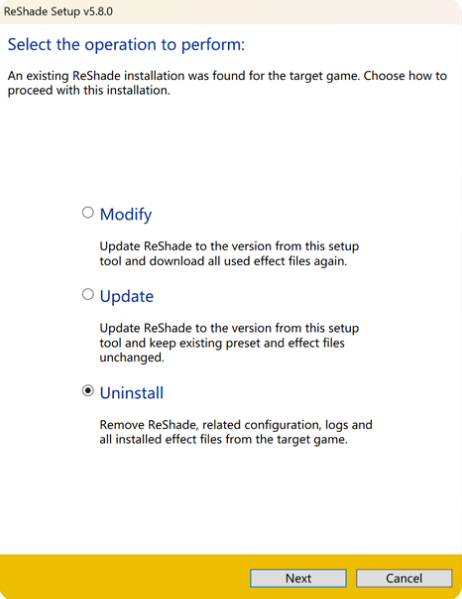
To uninstall ReShade, open it and select a game, then select "Uninstall." All ReShade effect packages will also be uninstalled.
Streaming (Using Moonlight / Sunshine)
After configuring ReShade and Depth3D on your PC, you can even use Moonlight and Sunshine to play remotely. Navigate to the Store page on the Neckband and download Moonlight, then install Sunshine on your PC. Watch the video tutorial to get set up, or refer to the official Sunshine documentation.
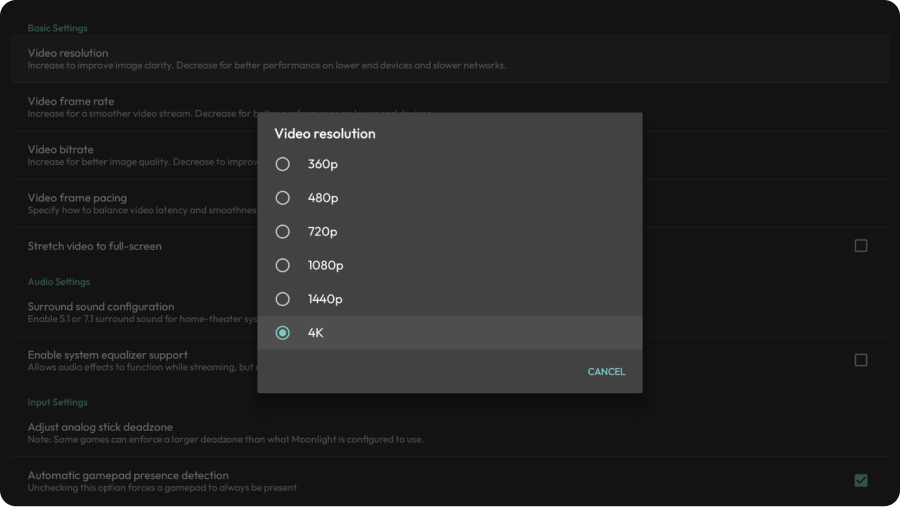
Make sure the video resolution is configured to 4K in the Moonlight settings.
บทความแนะนำ
Set the Resolution on Your Console
While not strictly necessary for using XR Glasses on handheld consoles like Steam Deck or ROG Ally, adjusting your console's settings can enhance your gaming experience.
External Display Resolution
Connect your XR Glasses to your console, then:
- Press the Steam button on your Steam Deck.
- Navigate to Settings > Display.
- Set the external display resolution to 1920x1080 @ 120Hz.
Tips:
- Set your external display resolution to 1080p (1920x1080) for optimal image quality.
- For smoother visuals, enable a 120Hz refresh rate on your external display.
In-game Settings
- Launch the game and open its settings menu.
- Set the resolution to 1920x1080.
- Consider disabling VSync for potential performance gains.
- Target 120fps for the smoothest experience.
Enable 3DoF on Steam Deck
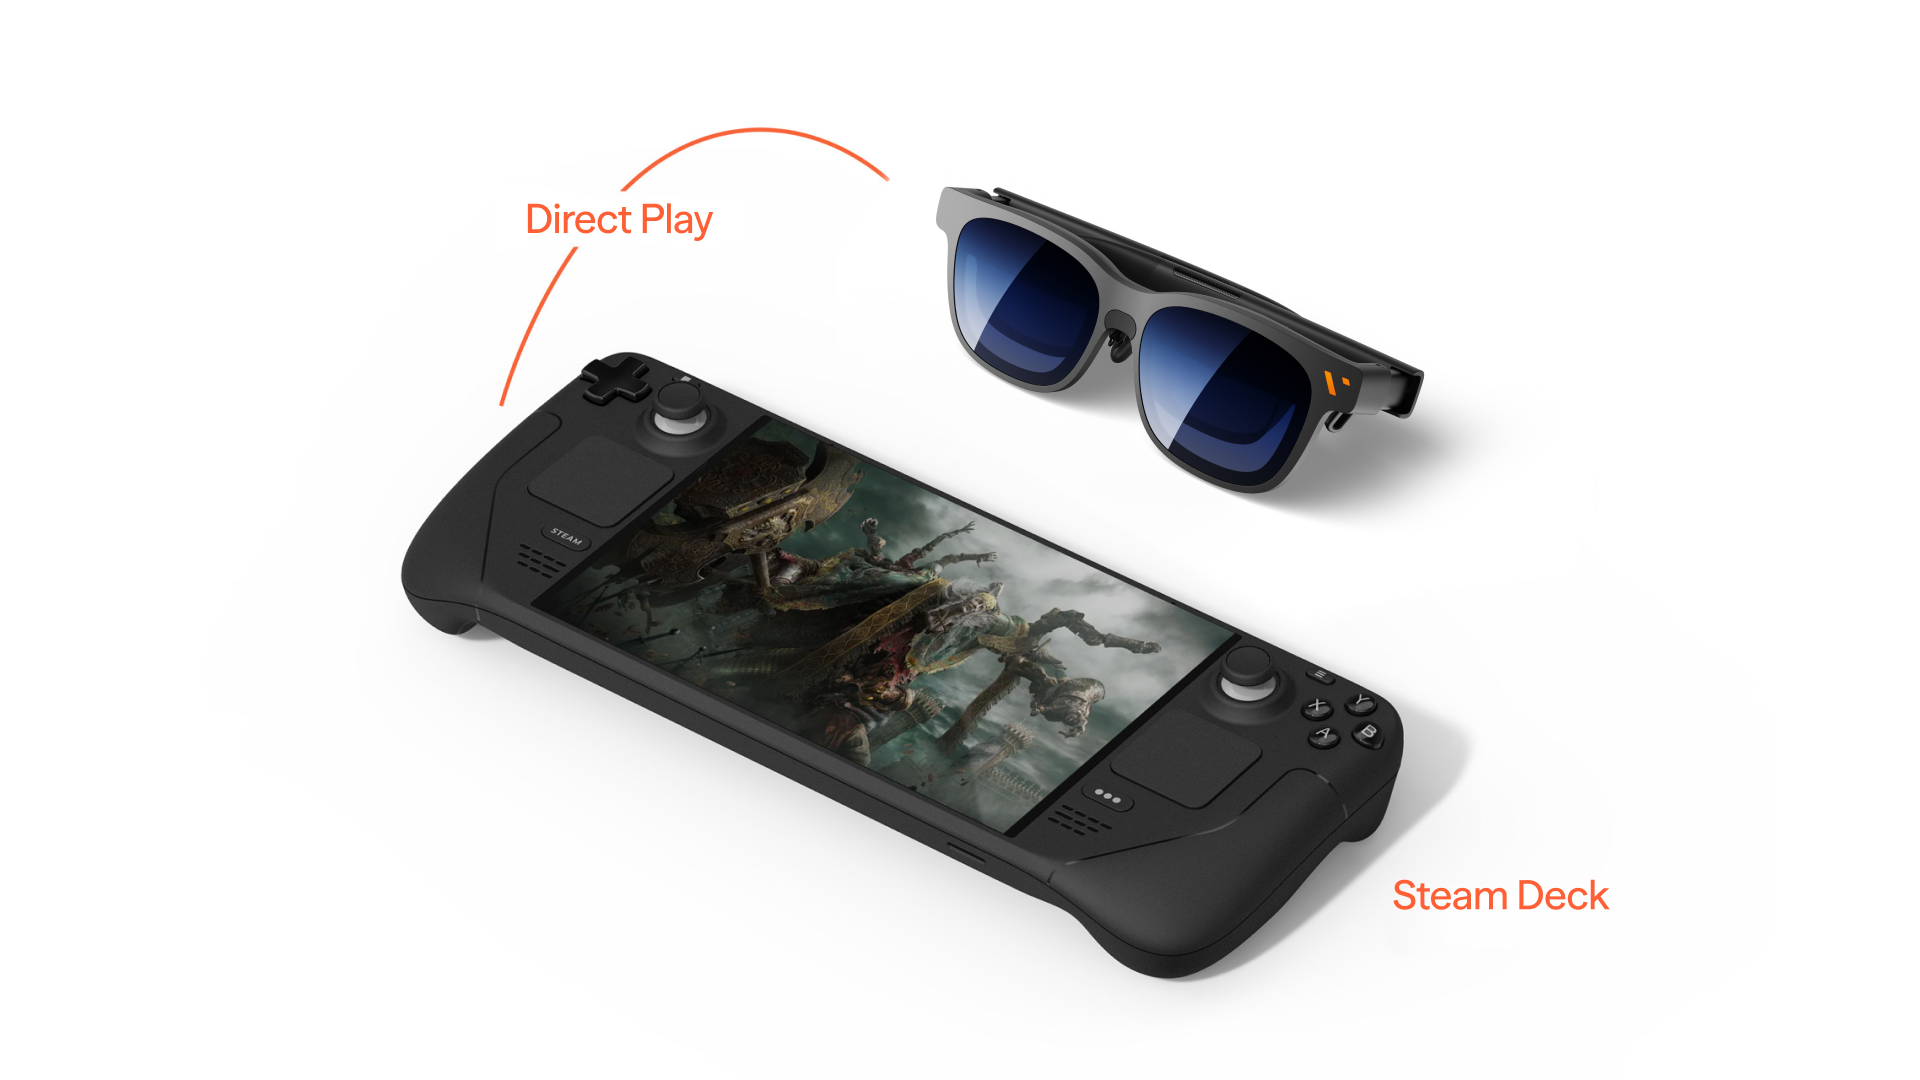
Connect your VITURE Pro 2 XR Glasses directly to your Steam Deck to use their native IMU data for 3DoF. For a better fixed-position screen, install Decky Loader and the XR Gaming plugin.
Install Decky Loader
- Press the STEAM button and open the Power menu, then select "Switch to Desktop."
- On the Decky Loader GitHub page, download the installer file.
- Drag the file onto your desktop and double-click to run it, following the prompts.
- Open the Return to Gaming Mode shortcut on your desktop.
Install the XR Gaming Plugin
- Press the … button and open the Decky menu (plugin icon).
- Select the store icon to open the Plugins Browser.
- Search for XR Gaming and install it.
Enable 3DoF
- Connect your VITURE Pro 2 XR Glasses to the Steam Deck.
- Open XR Gaming in the Decky menu.
- Turn on VIRTUAL DISPLAY — this renders a display fixed in space, so you can look around it by moving your head.
- Customize the screen size, and use Recenter display if the screen is offset.
- If offset persists, open Show advanced settings and use Recalibrate headset.
Learn more at the XR Gaming GitHub project.
Lens Shade
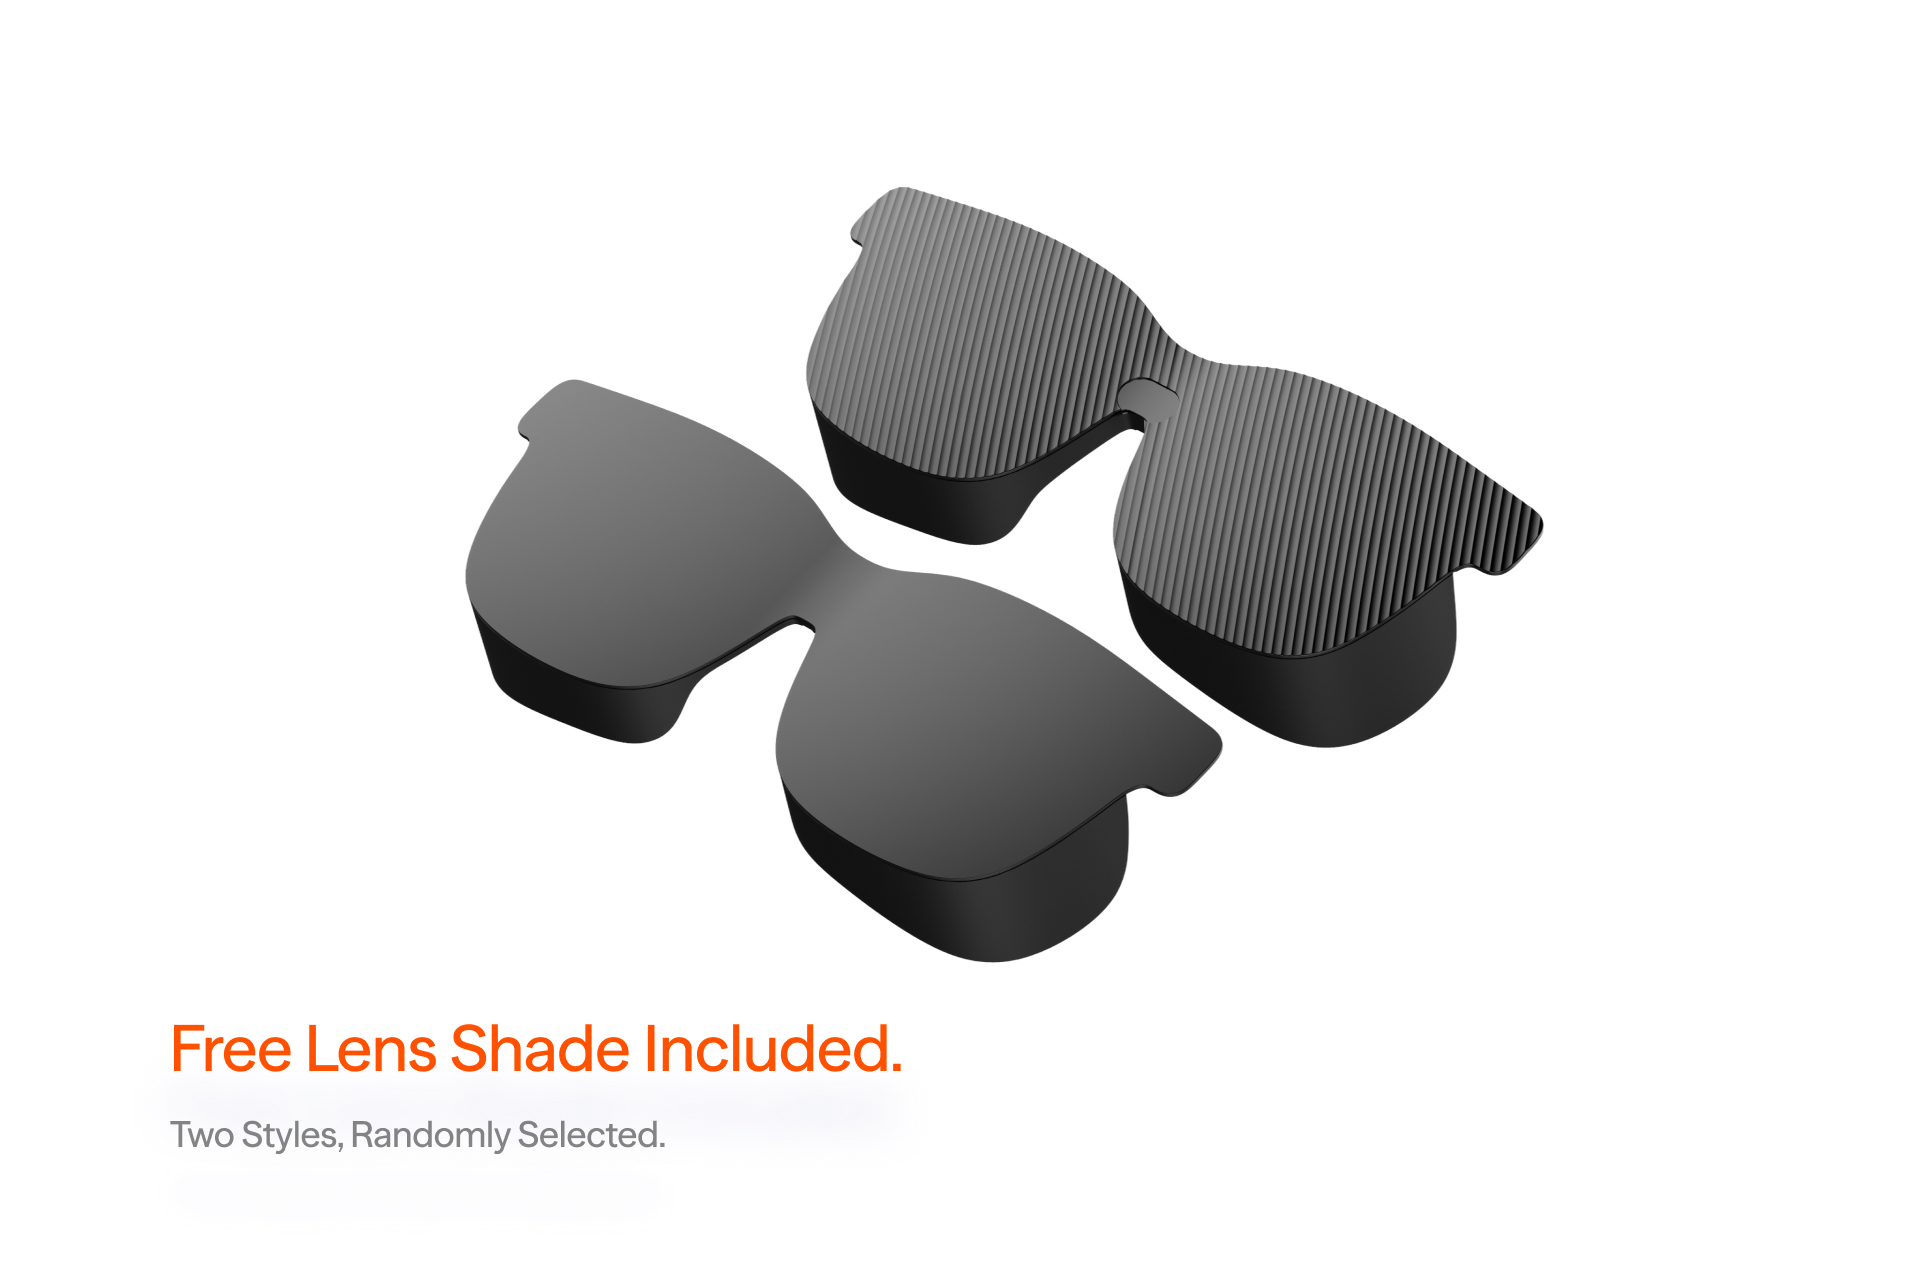
Every pair of VITURE Pro 2 XR Glasses includes a Lens Shade in the box — no separate purchase needed. It snaps onto the front of your glasses to block ambient light, so your virtual screen stays vivid and immersive even in bright surroundings.
- Two designs, randomly selected — the design you receive is assigned at random.
- Fully light-blocking — both designs are completely opaque for instant, full immersion.
- Snap on, snap off — switch between your bare glasses and the shaded look in seconds.
To install the Lens Shade:
- Check your surroundings to ensure you are in a safe environment.
- Fold the temples of the XR Glasses in, holding them with one hand.
- With the other hand, align the top of the Lens Shade to the top of the XR Glasses.
- Rotate and push the Lens Shade toward the XR Glasses until there is no gap between the shade and each lens.
Prescription Lens Frame
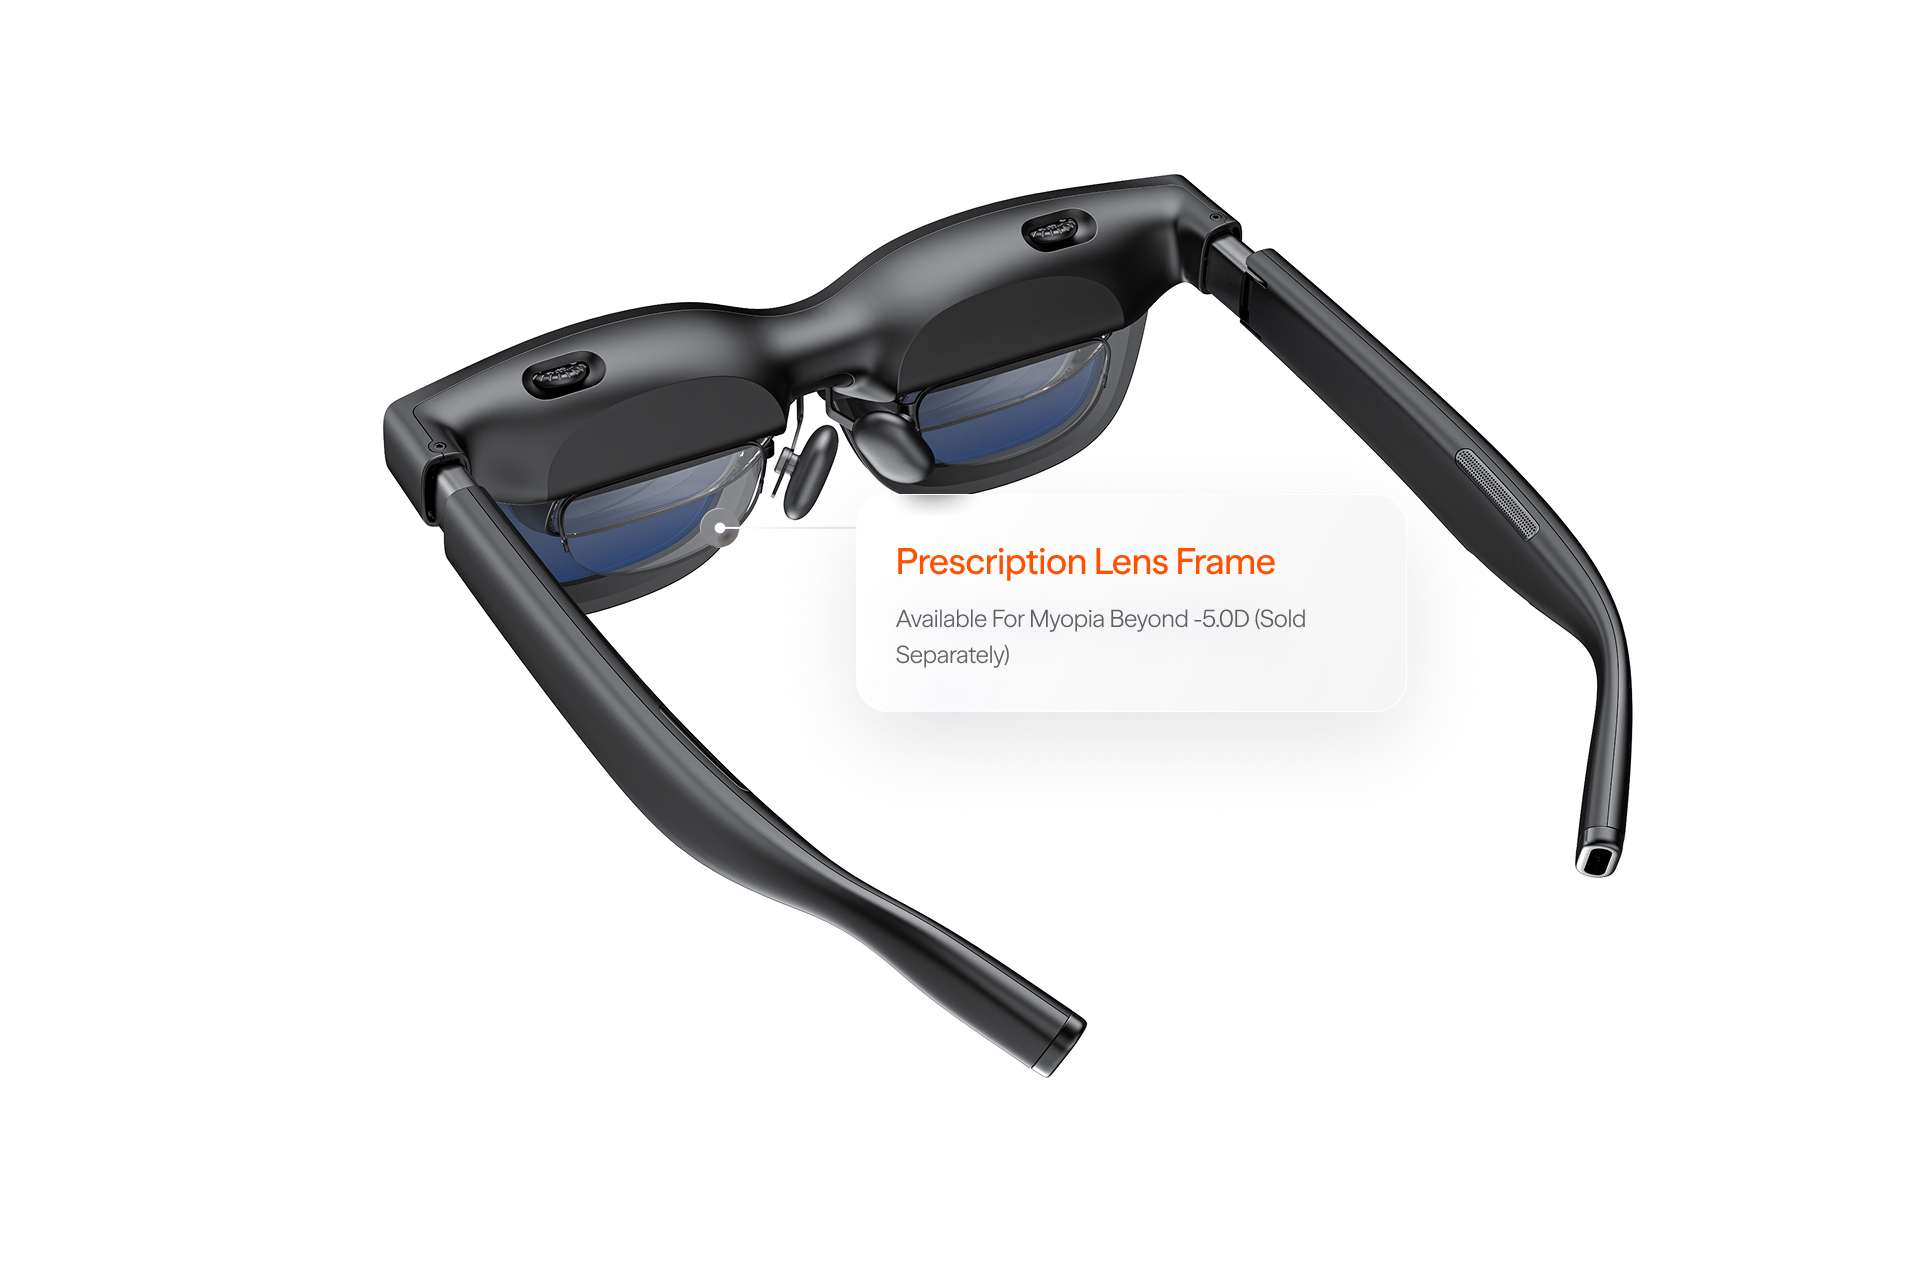
The built-in diopter adjustment covers myopia up to -5.00D. For stronger prescriptions or for astigmatism, the Prescription Lens Frame — a separate accessory, sold separately — lets you attach your own custom lenses to your VITURE Pro 2 XR Glasses for a clear, distortion-free view.
After your custom lenses are crafted, magnetically attach the frame: align it to the XR Glasses' frame with the magnets facing the glasses, and the two frames clip together automatically. To remove, hold the frame by the top and bottom edges and pull it away.
Tech Specs
| VITURE Pro 2 XR Glasses | |
|---|---|
| Display | Sony Micro-OLED |
| Virtual Screen | 146" at 4 meters |
| Resolution | 1920 × 1080 per eye (up to 1080p), 3840 × 1080 combined |
| Refresh Rate | Up to 120Hz (120Hz / 90Hz / 60Hz) |
| Peak Perceived Brightness | 1,600 nits |
| Brightness & Volume Control | 9 levels |
| Contrast Ratio | ≥100,000:1 |
| Colors | 108% sRGB |
| FOV | 50° |
| PPD | 43 |
| Color Modes | 5 (True Color, Vivid, Film, Warm, Cold) |
| Optical Transmittance | 5% |
| Haze | < 0.1% |
| Myopia Adjustment | 0.0D to -5.0D |
| IPD | 64.0±7.5 mm |
| Tracking | 3DoF via SpaceWalker |
| Audio | AAC acoustic system; built-in spatial sound |
| Fundamental Frequency (F0) | 250 Hz ± 40 |
| Eye Care | SGS A+ certified |
| Wear Detection | Yes |
| Connection | USB-C (DisplayPort Alt Mode) |
| Nose Pads | 3 sizes (0, 1, 2) · 7 height positions |
| Temple Arms | 3 positions |
| Weight of XR Glasses | 63 g |
| Dimensions (Folded) | 50 × 50 × 54.3 mm |
| Dimensions of Glasses Case | 191 × 85 × 84 mm |
| Weight of Glasses Case | 286 g |
| Suggested Wear Time | 3–4 hours |
Model Comparison
| Model | Pro 2 | Beast | Luma Ultra | Luma Pro | Luma |
|---|---|---|---|---|---|
| The Premium Choice for Comfort | The Immersive Giant | for Business and Prosumers | All-around Performer | Easiest to Find the Best Fit | |
| Weight | 63g | 88g | 83g | 79g | 77g |
| FOV | 50° | 58° | 52° | 52° | 50° |
| Resolution (up to) | 1080p UltraClarity 3.0 | 1200p | 1200p | 1200p | 1200p |
| Brightness (up to) | 1,600 nits | 1,250 nits (industry-first with SONY's latest panel) | 1,500 nits (industry-first with SONY's latest panel) | 1,000 nits | 1,000 nits |
| IPD | 64.0±7.5 mm | Regular: 64.0±6.0 mm Large: 68.0±6.0 mm | 64.0±6.0 mm | Regular: 64.0±6.0 mm Large: 68.0±6.0 mm | 64.0±8.0 mm |
| Built-in Diopter (up to) | -5.0D | ✗ | -4.0D | -4.0D | -6.0D |
| Electrochromic Film | ✗ Lens Shade included | ✓ + Dynamic Tint Control | ✓ | ✓ | ✓ |
| Frame | Ultra-light Premium Matte | Full Metal — signature aluminum-magnesium | Premium Translucent | Premium Translucent | Premium Translucent |
| Dynamic Light Effects | ✗ | ✗ | ✓ | ✓ | ✗ |
| Built-in Camera | ✗ | ✓ Front RGB | ✓ 1 Front RGB, 2× side gray-scale | ✓ Front RGB (enabled after launch) | ✗ |
| Microphone | ✗ | ✓ | ✓ | ✗ | ✗ |
| Built-in Screen Customization | ✗ | ✓ VisionPair 3DoF (horizontal ultrawide, ambient mode, or any screen size your device allows) | ✗ | ✗ | ✗ |
| DoF | 3DoF (via SpaceWalker) | Built-in VisionPair 3DoF | 6DoF (recommended; supports Pro Neckband, MacBook, Windows) | 3DoF (via SpaceWalker) | 3DoF (via SpaceWalker) |
| Hand Gestures | ✗ | ✗ | ✓ | ✗ | ✗ |
| 3DoF Audio | ✗ | ✓ | ✗ | ✗ | ✗ |
| Connection Type | USB-C | USB-C | Magnetic | Magnetic | USB-C |