Luma Series XR Glasses
Introduction to VITURE Luma Series XR Glasses
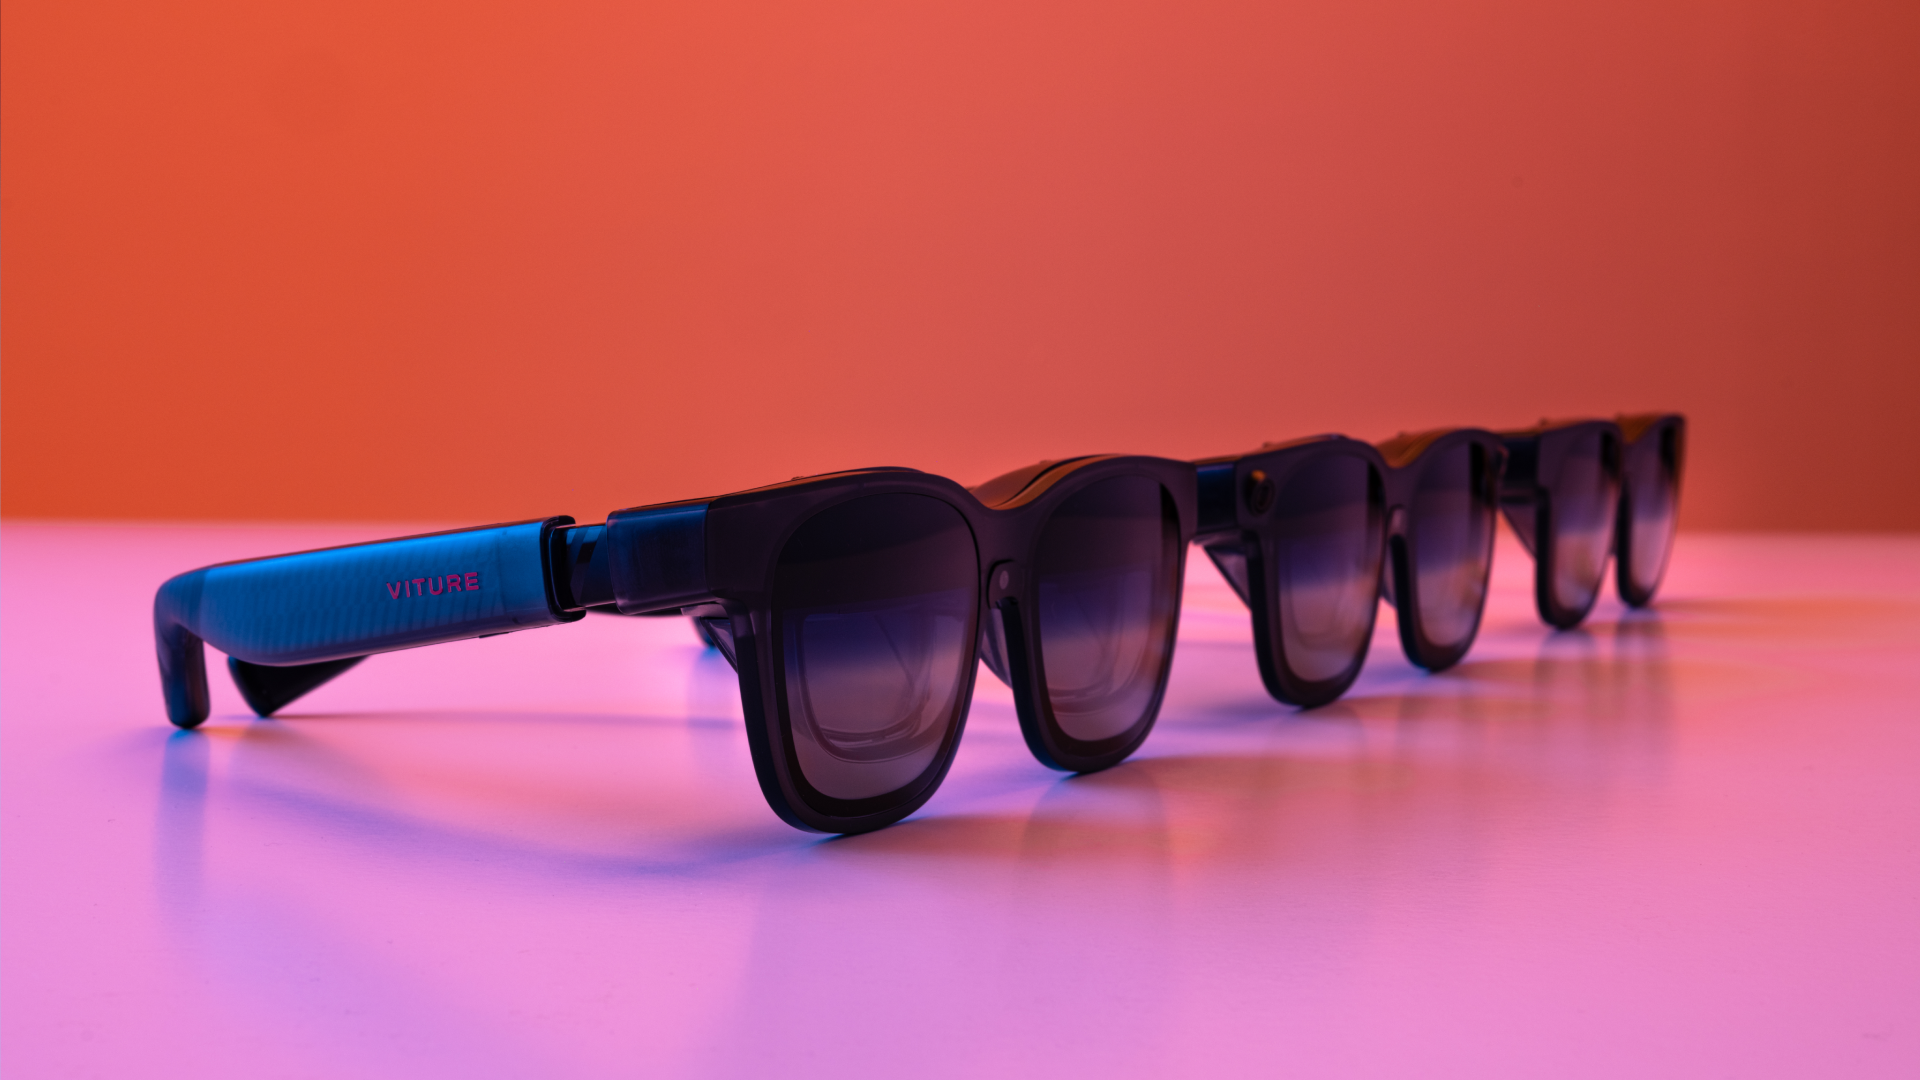
Welcome to the VITURE Luma Series — the next evolution in immersive wearable displays.
Built on years of user insights and optical breakthroughs, the Luma Series redefines what XR Glasses can do. With up to 4K-like sharpness, real-time 3D conversion, multi-screen productivity, and dynamic tint control, this series is engineered to serve both everyday users and professional creators.
Whether you're gaming on the go, working across multiple virtual screens, or diving into next-gen 3D content — Luma has a model made for you.
Four Versions, One Standard of Excellence.
- VITURE x Cyberpunk 2077 Luma Cyber XR Glasses: Co-created with CD PROJEKT RED, the Limited 5th Anniversary Collector's Edition is your access pass to Night City. Forged with a custom design and powered by Sony's latest MicroOLED Panel, only 10,000 serialized units exist to deliver an exceptional visual experience to the most dedicated fans and gamers.
- VITURE Luma Pro XR Glasses (available in Regular and Large sizes): Flagship performance with translucent design, 3DoF, 152" screen, and HARMAN AudioEFX.
- VITURE Luma Ultra XR Glasses: Advanced AR-ready model with full 6DoF, hand gestures, and enhanced brightness using Sony’s latest display tech.
- VITURE Luma XR Glasses: A sleek, featherlight model with -6.0D myopia adjustment, AAC sound, and direct USB-C connection for plug-and-play simplicity.
All versions are designed for comfort, clarity, and cross-platform compatibility, with features like electrochromic film, 9-level brightness/volume controls, and wear detection standard.
VITURE Luma Series is Designed For:
- Switch 2 and handheld console users — enjoy AAA titles on a massive screen
- Mobile productivity warriors — enable multi-screen workflows via the SpaceWalker app
- Content creators & prosumers — unlock 3D viewing, gesture interaction, and true AR
- XR enthusiasts — enjoy future-ready performance across Mac, Windows, and mobile platforms
Notes
- A VITURE Pro Mobile Dock (sold separately) is required to play on Switch 2.
- The SpaceWalker app is free to download across platforms; some advanced features may require in-app purchases.
- Real-time 3D Conversion is available via the Immersive 3D and SpaceWalker apps on Android and iOS. Look for titles marked "Immersive 3D" to learn more.
- To enable hand gesture interaction and enjoy the full 6DoF experience on the Luma Ultra, you’ll need the VITURE Pro Neckband (sold separately).
VITURE x Cyberpunk 2077 Luma Cyber XR Glasses
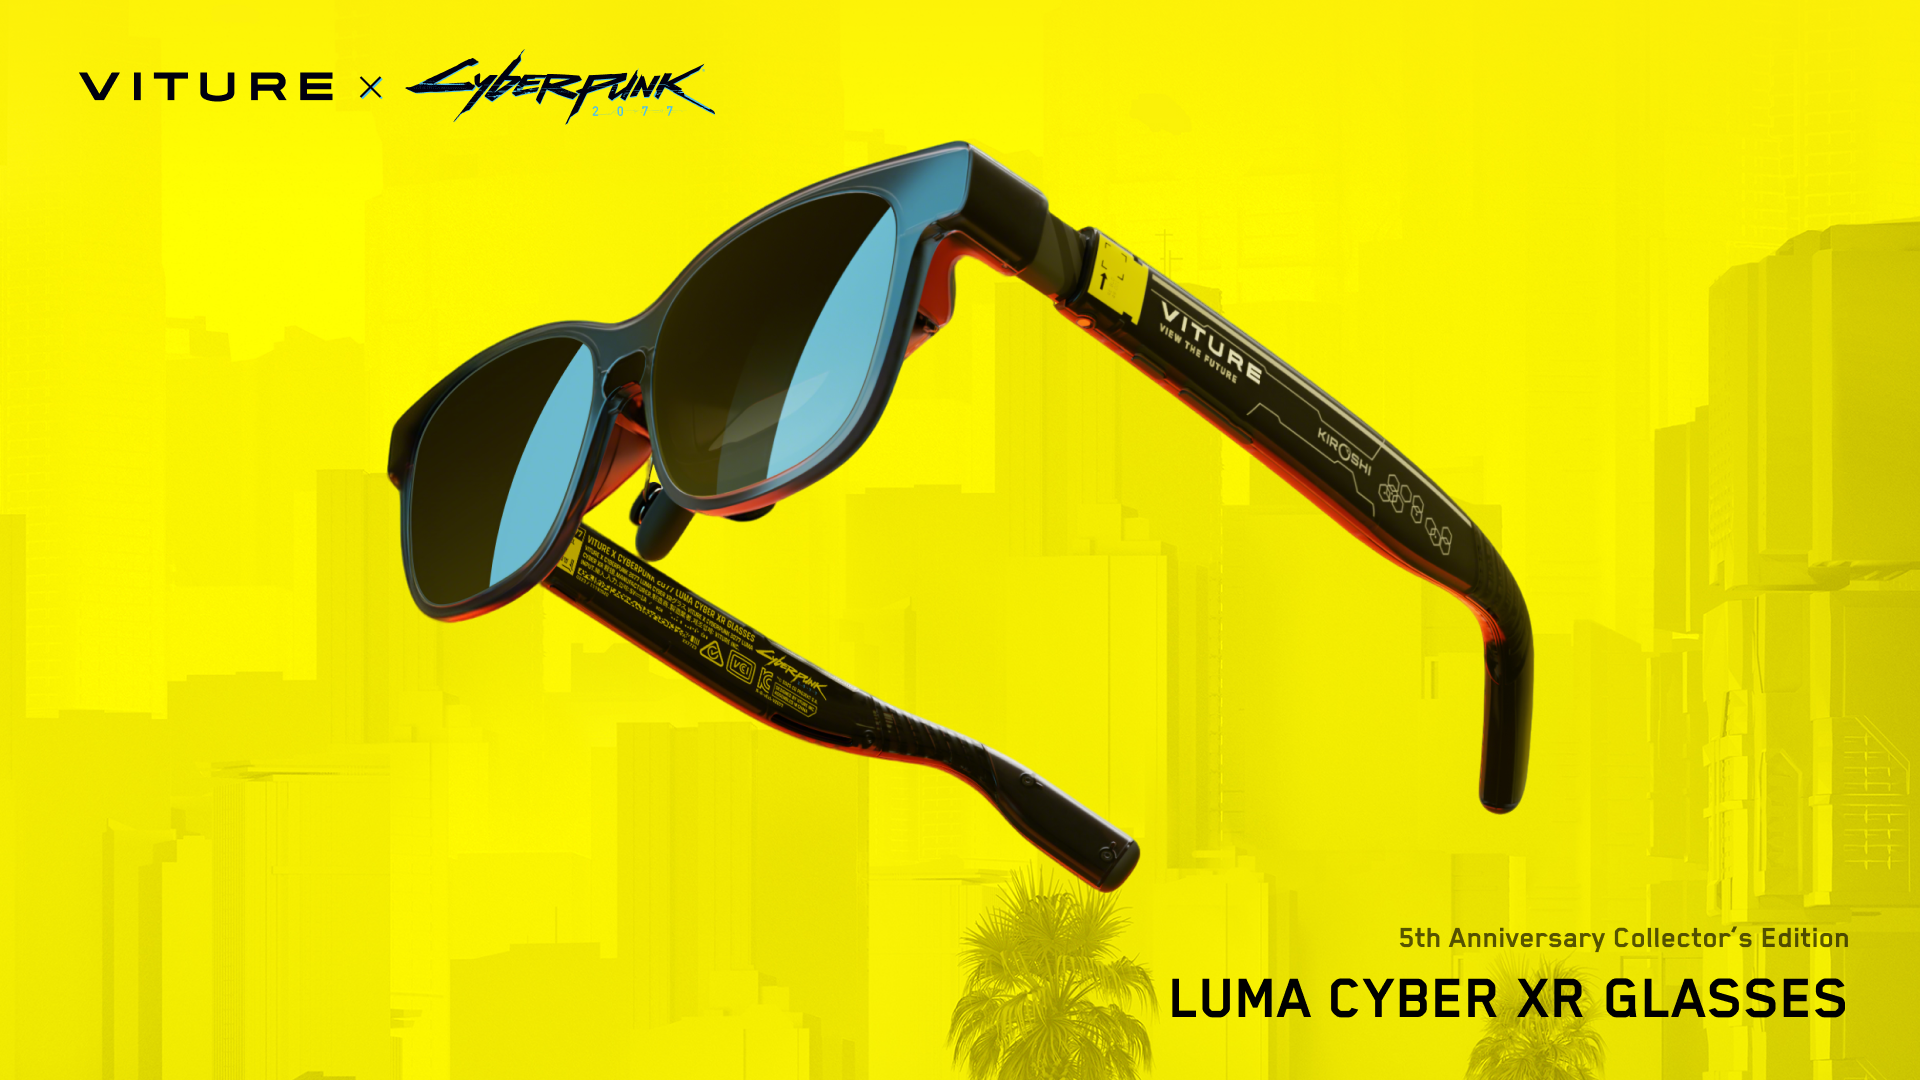
Luma Cyber is a tribute to the 5th Anniversary of Cyberpunk 2077, forged through a singular design partnership between VITURE and CD PROJEKT RED. Each pair features a semi-translucent, neon-infused design created by CD PROJEKT RED’s own art team, echoing the luminous streets of Night City, a collector’s-grade reimagining of Kiroshi optics. Only 10,000 serialized units exist.
Modeled after the premium Luma Pro and powered by the same stunning visuals as Luma Ultra, the Cyber Edition features Sony's latest MicroOLED panel combined with our proprietary optical technology. Step into the action: experience an ultra-crisp, ultra-vibrant 152-inch floating screen at 120Hz and 1500 nits of brightness.
Seamlessly integrated with the VITURE ecosystem, Luma Cyber links effortlessly to your Switch 2, PlayStation, Xbox, and more via the Pro Mobile Dock or wireless streaming. This is more than tech; this is the key to unlocking a console-grade gaming experience anywhere you roam.
Luma Cyber blends artistic vision with cutting-edge engineering, standing as both an essential gaming tool and a rare, uniquely immersive Night City collectible.
Key Features
- Signature Night City Aesthetic: A semi-translucent design crafted to feel at home in the neon haze of Night City
- 4K-Class Visual Fidelity: Powered by Sony's latest MicroOLED panel, featuring up to 1500 nits brightness
- 152" 120Hz Immersive Screen: Ultra-smooth, full-scale immersion built for gamers who demand the extraordinary
- HARMAN AudioEFX: Deep, atmospheric soundscapes, essential for true acoustic immersion in Night City
- 3DoF Spatial Tracking: Intuitive head-tracked realism enhances situational awareness via SpaceWalker
- Cross-Device Compatibility: Seamlessly connected across macOS, Windows, Android, and iOS via SpaceWalker
- Customizable Cyber LEDs: Personalize your glow among the neon haze of Night City
- Electrochromic Film: Instant, cinematic immersion day or night with light filtering
- Up to –4.0D Myopia Adjustment: Built-in optics ensure uncompromized visual clarity, staying true to your eyes
- 9-Level Onboard Controls: Intuitive onboard adjustments for fast, distraction-free brightness and volume control
- Adaptable Comfort: Ergonomically engineered with flexible, tilt-adjustable temples for secure, long-session comfort
What's in the Box
- VITURE x Cyberpunk 2077 Luma Cyber XR Glasses
- VITURE x Cyberpunk 2077 Co-branded Sticker
- Limited Edition ID Card
- USB-C to Magnetic Connector Cable
- Glasses Case
- Nose Pads (4 sizes: 0, 1, 2, and 3)
- Anti-Clip Hair Cover
- Camera Privacy Sticker
- Cleaning Cloth
- Quick Start Guide
- Safety Guidelines
Tip: Try adjusting the temples and nose pads to find your perfect viewing angle.
VITURE Luma Ultra XR Glasses
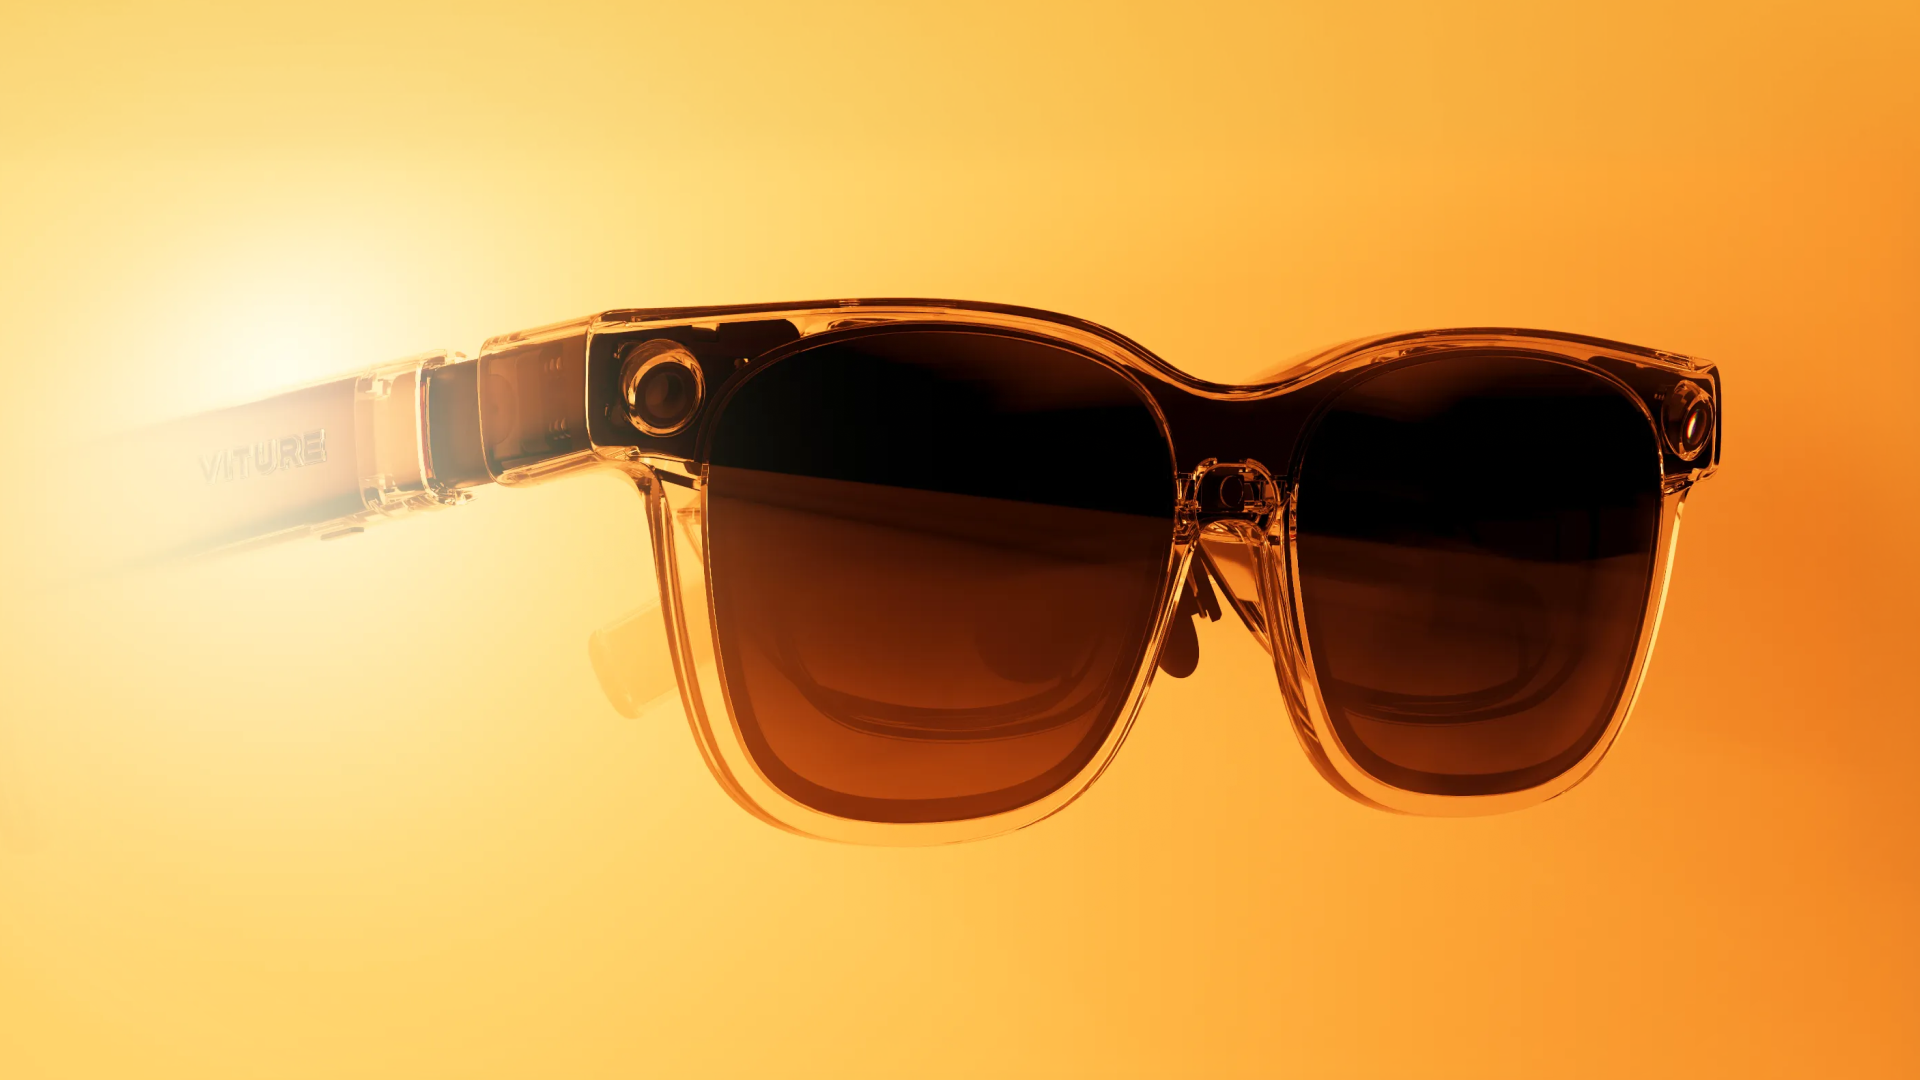
Step beyond immersive — VITURE Luma Ultra XR Glasses deliver a 152" 120Hz 1200p visual experience and elevate it with 6DoF tracking, hand gesture control, and true AR capabilities. Designed for high-end users, Luma Ultra is the first in the world to combine real-time 2D-to-3D transformation with hand gesture support and multi-platform 6DoF (6DoF not supported on the SpaceWlaker for iOS & Android Apps).
It also features up to -4.0D myopia adjustment, dynamic light effects, and HARMAN spatial sound — making it ideal for professional workflows and next-gen gaming alike.
Key Features
- 6DoF Tracking with Hand Gestures: Precise spatial movement and intuitive control powered by a triple-camera system
- Triple-Camera AR System: RGB camera + dual depth sensors for advanced spatial awareness
- 152" 120Hz 1200p Display: Ultra-sharp, ultra-bright screen with high motion fidelity
- Sony's Latest Panel Tech: Industry-first high-efficiency micro-OLED with 1500 nits brightness
- Up to -4.0D Myopia Adjustment: Built-in visual tuning for enhanced comfort
- Electrochromic Film & Dynamic Light Effects: Instant immersion and ambient feedback
- HARMAN AudioEFX: Immersive spatial audio tuned for XR experiences
- Cross-Platform Compatibility: Works across macOS, Windows, Android, and iOS via SpaceWalker; 6DoF supported on macOS and Windows
- 9-Level Brightness and Volume Controls: Intuitive onboard interaction
- Featherlight Design: Premium materials with ergonomic contouring for all-day wear
- Flexible Arms & Tilt-Adjustable Temples: Improved fit and ergonomic comfort
6DoF & Gesture Support Overview
- Pro Neckband (Full Features): For full 6DoF tracking and gesture control, pair the XR Glasses with the VITURE Pro Neckband and ensure both devices are running the latest firmware.
- SpaceWalker Desktop (Mac & Windows): On SpaceWalker for Mac & Windows, the latest version supports 6DoF. Gesture tracking is not yet available and will be supported in a future update.
- SpaceWalker for Android: On SpaceWalker for Android, 3DoF is supported within the app. 6DoF and gesture tracking are not supported.
- SpaceWalker for iOS: On SpaceWalker for iOS, 6DoF and gesture tracking are not supported. 3DoF support will be enabled in the near future through a next-generation adapter. Please stay tuned for upcoming updates.
What's in the Box
- VITURE Luma Ultra XR Glasses
- USB-C to Magnetic Connector Cable
- Glasses Case
- Nose Pads (3 sizes: 1, 2, and 3)
- Camera Privacy Sticker
- Cleaning Cloth
- Quick Start Guide
- Safety Guidelines
Tip: Try adjusting the temples and nose pads to find your perfect viewing angle.
VITURE Luma Pro XR Glasses
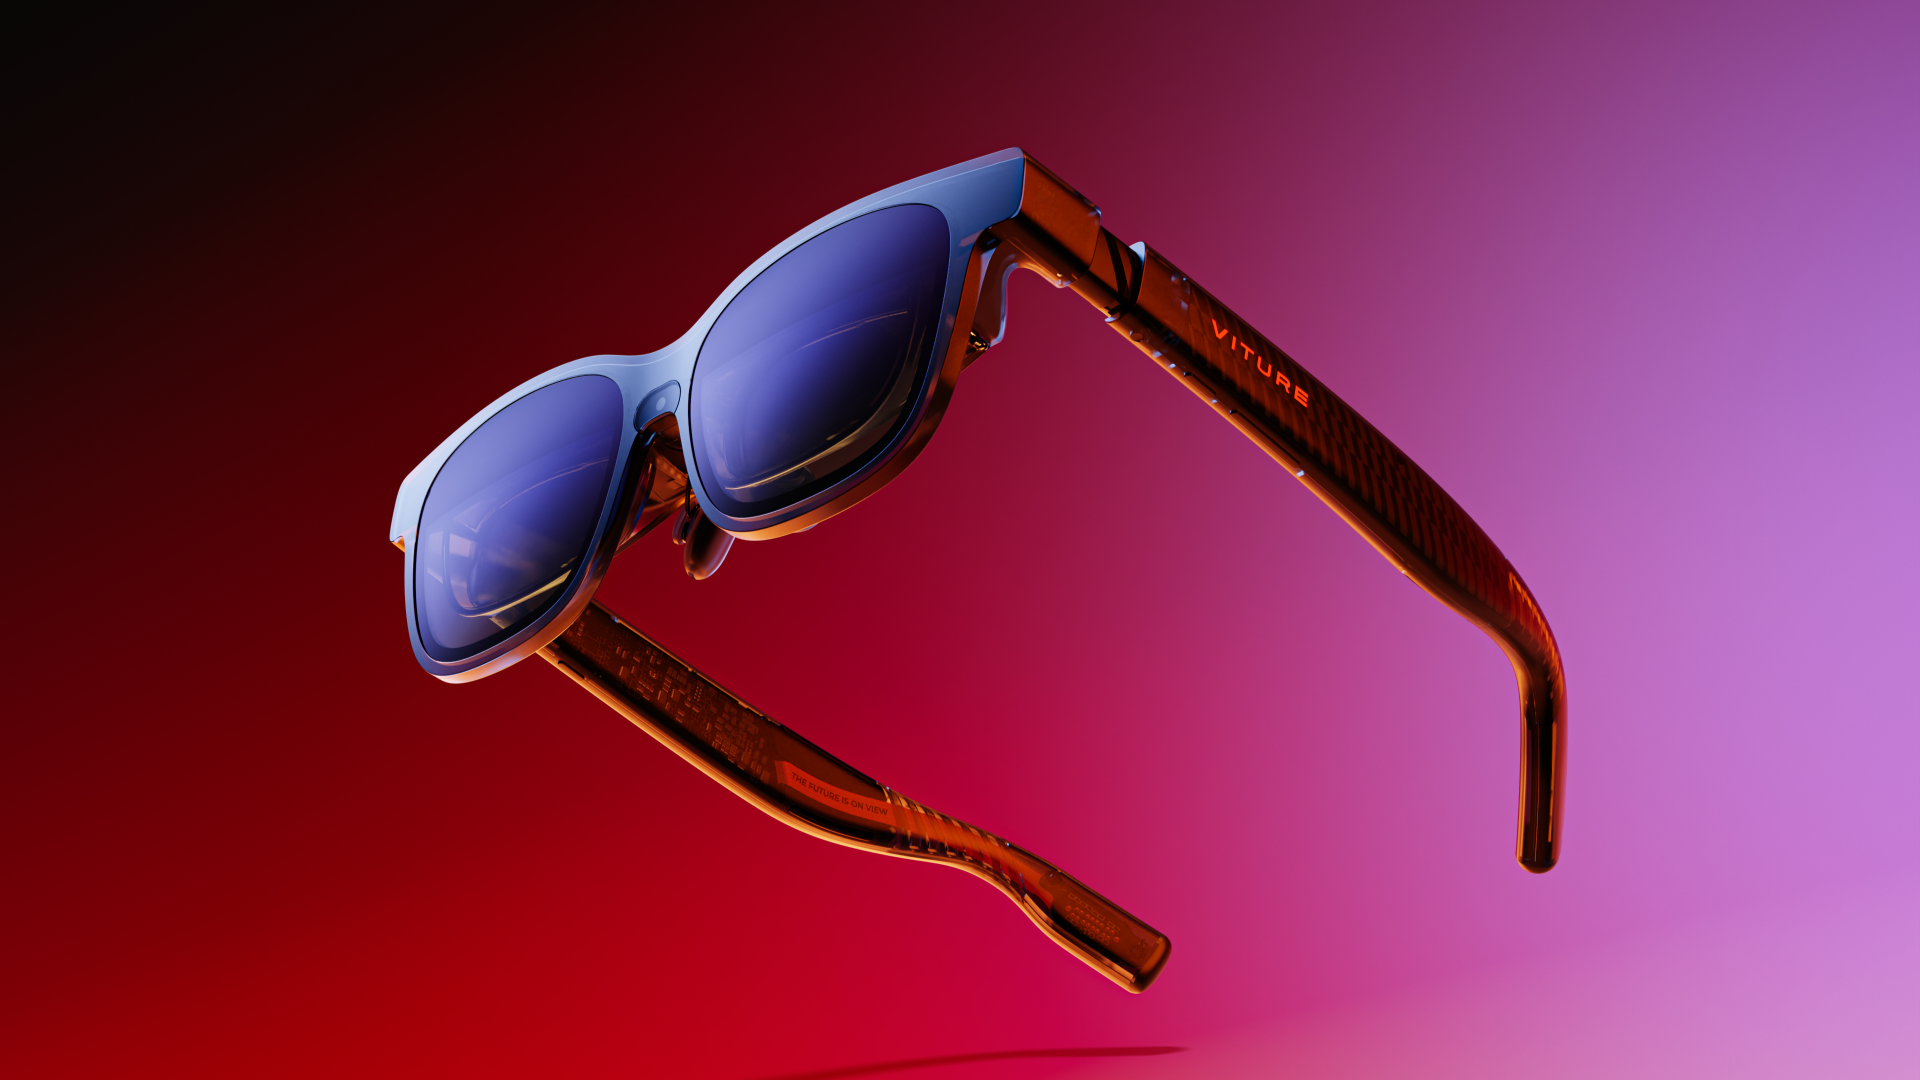
The flagship of the Luma Series, VITURE Luma Pro XR Glasses offer the perfect fusion of premium design, cutting-edge optics, and all-day comfort — now available in both Regular and Large frame sizes for a better, more personalized fit.
Experience a vivid 152" 1200p virtual display at up to 120Hz, with optical optimizations that deliver 50% more sharpness than the already-stunning VITURE Pro XR Glasses. Thanks to Sony’s enhanced micro-OLED panel and refined screen processing, content looks so sharp and crisp, users often describe it as “4K-like.”
Designed for gaming, movies, productivity, and beyond, the Luma Pro supports 3DoF spatial control via SpaceWalker and comes with HARMAN-tuned audio, dynamic light effects, and a luxurious translucent body that's as functional as it is futuristic.
Key Features
- 4K-like Ultra-Sharp Visuals: Enhanced optical sharpness with edge-to-edge clarity
- 152" 120Hz 1200p Display: Massive screen size with smooth motion
- 3DoF Tracking via SpaceWalker: Unlock spatial awareness in games and productivity
- Dynamic Light Effects: RGB lighting synced to your experience (toggle with a button)
- Electrochromic Film: 1-click light filtering for instant immersion
- Up to -4.0D Myopia Adjustment: Powered by a redesigned optical system
- Two Frame Sizes: Regular and Large for optimal IPD alignment
- HARMAN AudioEFX: Spatial sound for immersive, high-fidelity audio
- Cross-Platform Compatibility: Works across macOS, Windows, Android, and iOS via SpaceWalker
- 9-Level Brightness and Volume Controls: Intuitive onboard interaction
- Premium Translucent Design: Futuristic look with matte finish and smooth edges
- Flexible Arms & Tilt-Adjustable Temples: Improved fit and ergonomic comfort
What's in the Box
- VITURE Luma Pro XR Glasses (Regular or Large)
- USB-C to Magnetic Connector Cable
- Glasses Case
- Nose Pads (3 sizes: 1, 2, and 3)
- Anti-Clip Hair Cover
- Camera Privacy Sticker
- Cleaning Cloth
- Quick Start Guide
- Safety Guidelines
Tip: Try adjusting the temples and nose pads to find your perfect viewing angle.
VITURE Luma XR Glasses
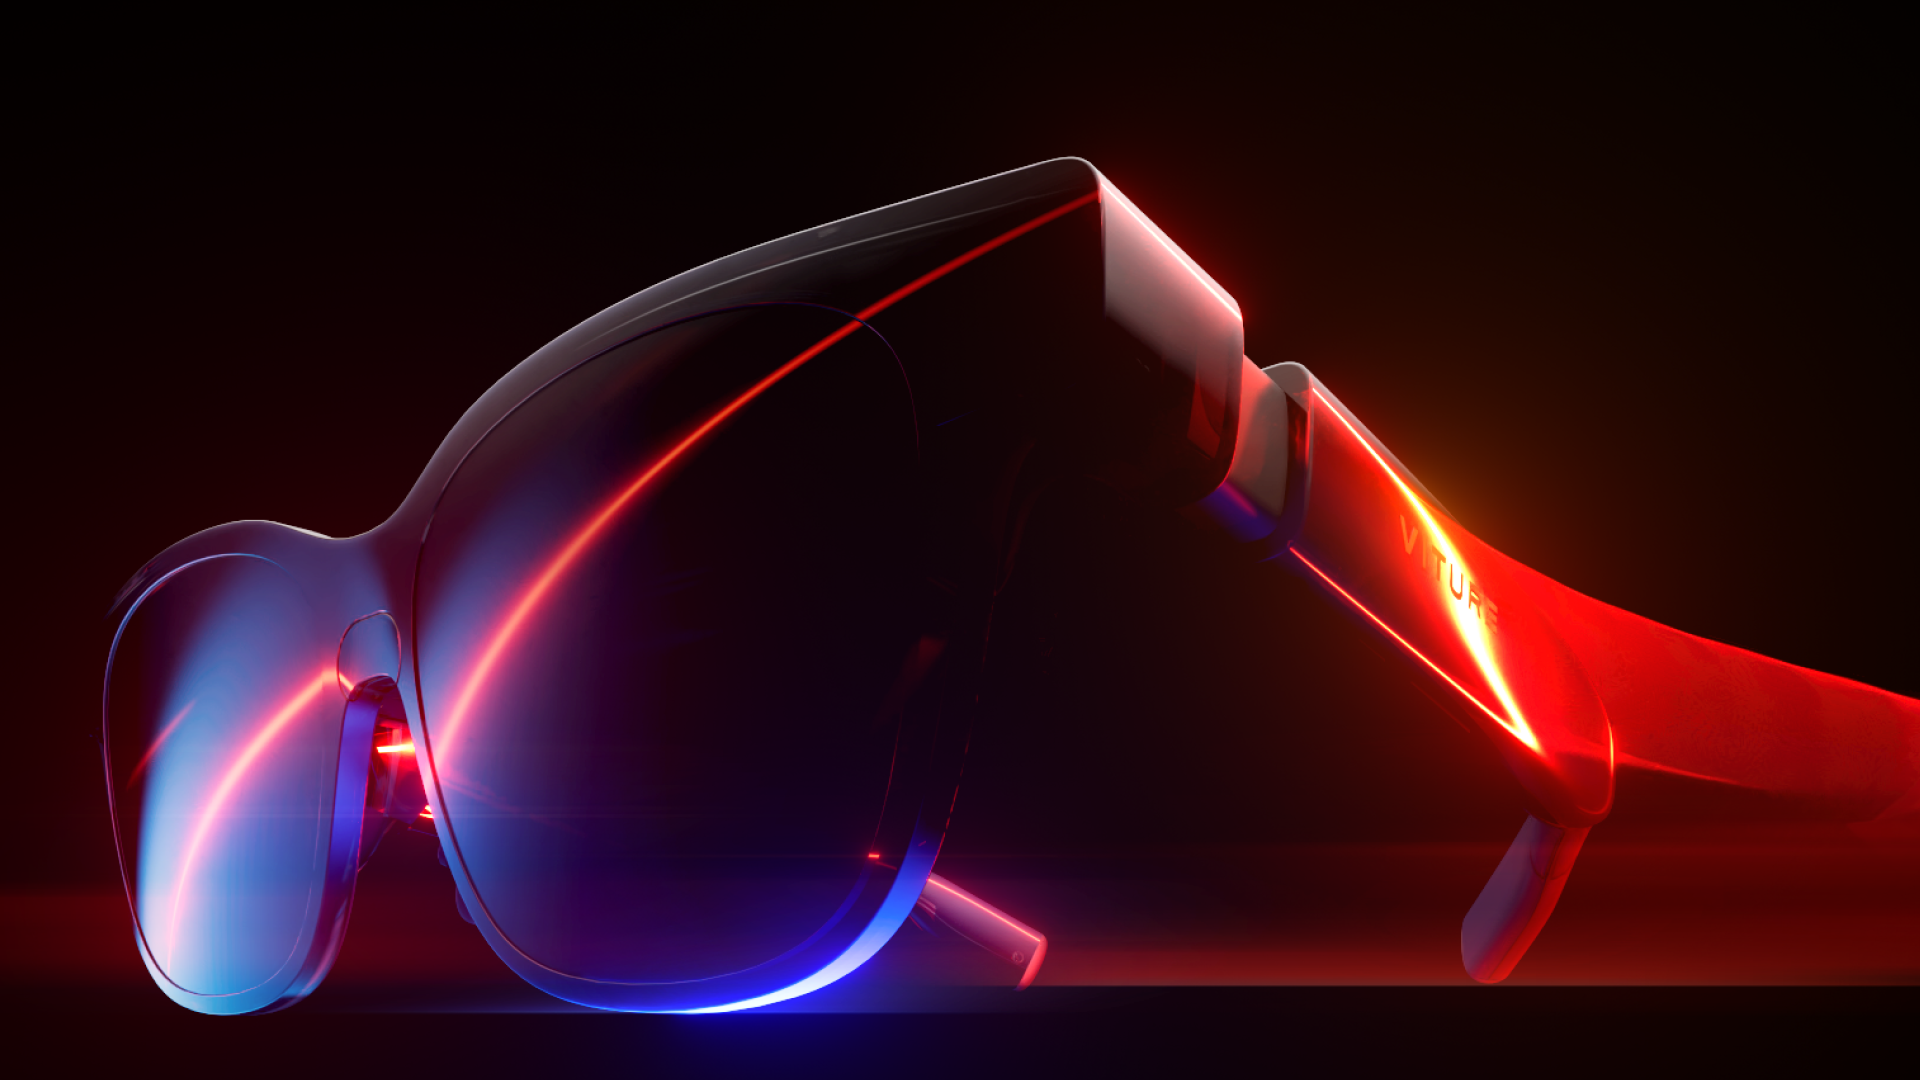
The original Luma reimagined — VITURE Luma XR Glasses feature a stunning 146" 120Hz 1200p display with up to -6.0D myopia adjustment, an AAC acoustic system, and direct USB-C connection to virtually any device.
Enjoy real-time 2D-to-3D magic, 3DoF + multi-screen support, SGS A+ eye care certification, and five selectable color modes. All this wrapped in a futuristic translucent design for ultimate comfort and safety.
Key Features
- 146" 120Hz 1200p Display: Ultra-sharp, ultra-bright screen with high motion fidelity
- Up to -6.0D Myopia Adjustment: Built-in visual tuning for enhanced comfort
- Electrochromic Film: Instant immersion with a single click
- AAC Acoustic Syste: Immersive spatial audio tuned for XR experiences
- Cross-Platform Compatibility: Works across macOS, Windows, Android, and iOS via SpaceWalker
- 9-Level Brightness and Volume Controls: Intuitive onboard interaction
- Featherlight Design: Premium materials with ergonomic contouring for all-day wear
- Flexible Arms: Improved fit comfort
What's in the Box
- VITURE Luma XR Glasses
- USB-C to USB-C Cable
- Glasses Case
- Nose Pads (3 sizes: 1, 2, and 3)
- Cleaning Cloth
- Quick Start Guide
- Safety Guidelines
Tip: Try adjusting the nose pads to find your perfect viewing angle.
Tutorial Video
Buttons & Modes
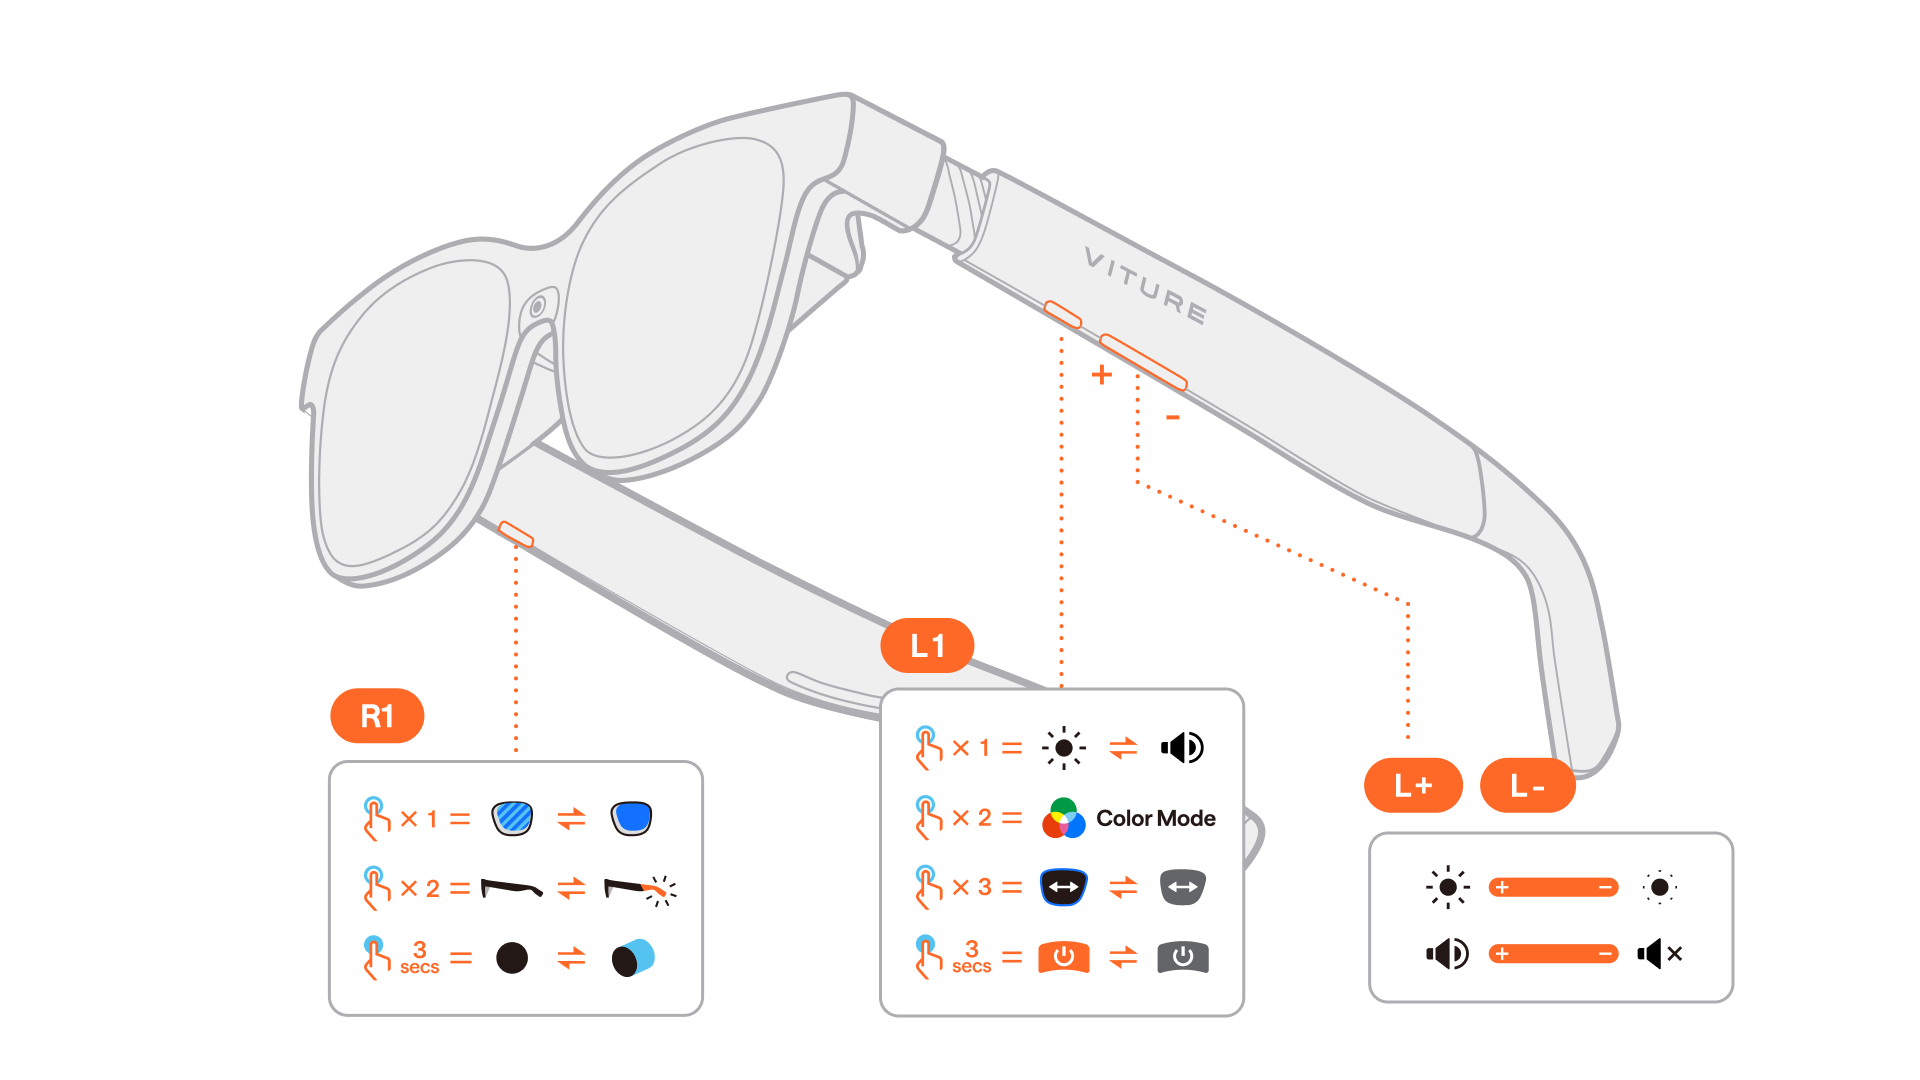
Each model in the VITURE Luma Series features intuitive onboard controls designed to enhance your immersive experience. Note that button layout and function may vary slightly depending on the specific model.
| Control | Description |
|---|---|
| Adjust brightness/volume | Press the L+ / L- button to increase or decrease brightness (default) or volume. |
| Switch between brightness and volume adjustment | By default, the adjustment controls brightness. Press L1 to switch to volume. |
| Turn electrochromic Film on/off | Press R1 to enable or disable the light-blocking film (supported on all models). |
| Turn Dynamic Light on/off (Luma Pro & Luma Ultra only) |
Double-press R1 to toggle dynamic light effects. |
| Switch between 2D and 3D modes | Press and hold R1 to switch between 2D and 3D display modes. |
| Cycle through color modes | Double-press L1 to enter the color mode menu. Use L+ / L- to switch between modes. |
| Adjust eye axis | Triple-press L1, then use the L+ / L- buttons to align the visual axis. |
| Enable 6DoF mode (Luma Ultra only) |
Launch SpaceWalker and connect to a compatible 6DoF-enabled device. |
| Turn off the screen | Press and hold L1 to turn off the screen. Press any button again to wake it. |
Make sure your glasses are running the latest firmware for full compatibility. Update here
Choose the Right Nose Pad
When wearing VITURE XR Glasses, the virtual screen should be unobstructed and centered in your line of sight. Try nose pads sizes 0, 1, 2 and 3 (or no nose pads at all) to find the best fit.
If none of the four nose pads fit perfectly, gently bend or spread size #3's stems to find the fit that allows you to see the full display. Refer to this video for instructions.
To remove nose pads:
- Hold the XR Glasses upright with one hand, so that the temples are away from you.
- With your other hand, put your thumb between the lenses, touching the metal wire pad arms.
- Push forward with your thumb until the nose pads come off.
To install the nose pads:
- With one hand, rotate and hold the nose pads with the size facing you and the number upright.
- With your other hand, hold the XR Glasses upright so that the temples are close to you.
- Slide the nose pads into the bridge of the XR Glasses until you hear a click.
Myopia Adjustment
Luma Series XR Glasses have built-in support for adjusting the virtual image up to -6.0D (600 degrees, there are differences between models) for users with myopia (nearsightedness).
Adjust the rotary knobs on the top of your XR Glasses until the image is sharp and clear.
For users with severe astigmatism or myopia prescriptions of -6.0D and beyond, the Prescription Lens Frame allows you to attach your own prescription lenses to VITURE XR Glasses and experience the same immersive virtual entertainment as everyone else.
Connect to Your Devices
To connect your XR Glasses to a laptop, smartphone, or tablet, follow these steps:
- Clip the USB-C to Magnetic Connector Cable (included) to the magnetic port on your XR Glasses. Then, plug the USB-C end of the cable into your device.
- Turn on and unlock your device. The XR Glasses will power on automatically.
If there is no display on your XR Glasses, try disconnecting any other external displays connected to your device. Some device models support only one external display. Alternatively, connect to a different USB-C port on your device and try again.
To adjust mirror settings, access your device's system settings:
- On MacBooks, go to System Settings > Displays, choose VITURE, and modify the "use as" settings from the dropdown menu.
- On iPads, go to Settings > Display & Brightness > Displays > Arrangement.
- On PCs, go to Settings > Display.
To confirm compatibility with VITURE XR Glasses, refer to your device's manufacturer specifications. Look for keywords such as DisplayPort over USB-C, DP Alt Mode, Alt DP over USB-C, or Thunderbolt 4.
Please check this list for VITURE-certified supported mobile devices.
See also: Connect the Neckband to the XR Glasses
Change Display Refresh Rate
This feature is available on VITURE Luma, Luma Pro, Luma Ultra and Luma Cyber Glasses.
Supports Refresh Rate:
- 120Hz
- 90Hz
- 60Hz
Windows PC
- Open the Start menu and select Settings.
- Navigate to System > Display.
- Under "Advanced display," select your VITURE display.
- From the "Choose a refresh rate" dropdown menu, select your desired refresh rate.
MacBook
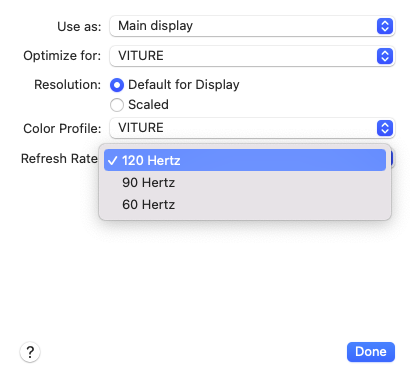
- Open the Apple menu and select System Settings (or System Preferences).
- Click on Displays.
- Choose your VITURE display.
- Click the "Refresh Rate" pop-up menu and select your desired refresh rate.
SpaceWalker for Desktop (Mac & Windows)
SpaceWalker for Mac and Windows allows you to select a refresh rate (120Hz, 90Hz, or 60Hz) every time you launch the app with XR Glasses.
SpaceWalker app will remember the last refresh rate you selected for your VITURE XR Glasses and use it by default when you launch the app again.
Learn more:
Selecting A Refresh Rate - SpaceWalker for Desktop
SpaceWalker for iOS
To unlock refresh rate selection on iOS, you'll need both Pro XR Glasses and the USB-C XR Charging Adapter connected to your iPhone.
Once connected, an option to choose between 120Hz, 90Hz, or 60Hz will appear within the on-screen menu of SpaceWalker app on your iPhone.
The function to switch the refresh rate directly within SpaceWalker is coming soon for Android.
VITURE One Neckband, VITURE Pro Mobile Dock, and VITURE One Mobile Dock only support a 60Hz refresh rate. Adjusting the refresh rate is not supported on these accessories.
Color Tuning
This tool supports VITURE Luma Pro & Luma Ultra XR Glasses. Please ensure that your firmware is updated to the latest version before using this tool.
Note: Use Chrome (Version 98 or later) on a Windows or Mac computer to access the tool. Connect to a full-featured USB-C port that supports DisplayPort Alt Mode.
To customize the color, visit the Color Tuning & Dynamic Light Effect tool.
For the best preview, drag the tool page to your XR Glasses' display.
You can switch between 5 color modes: True Color, Vivid, Film, Warm, and Cold. These modes match the adjustments available directly on the XR Glasses.
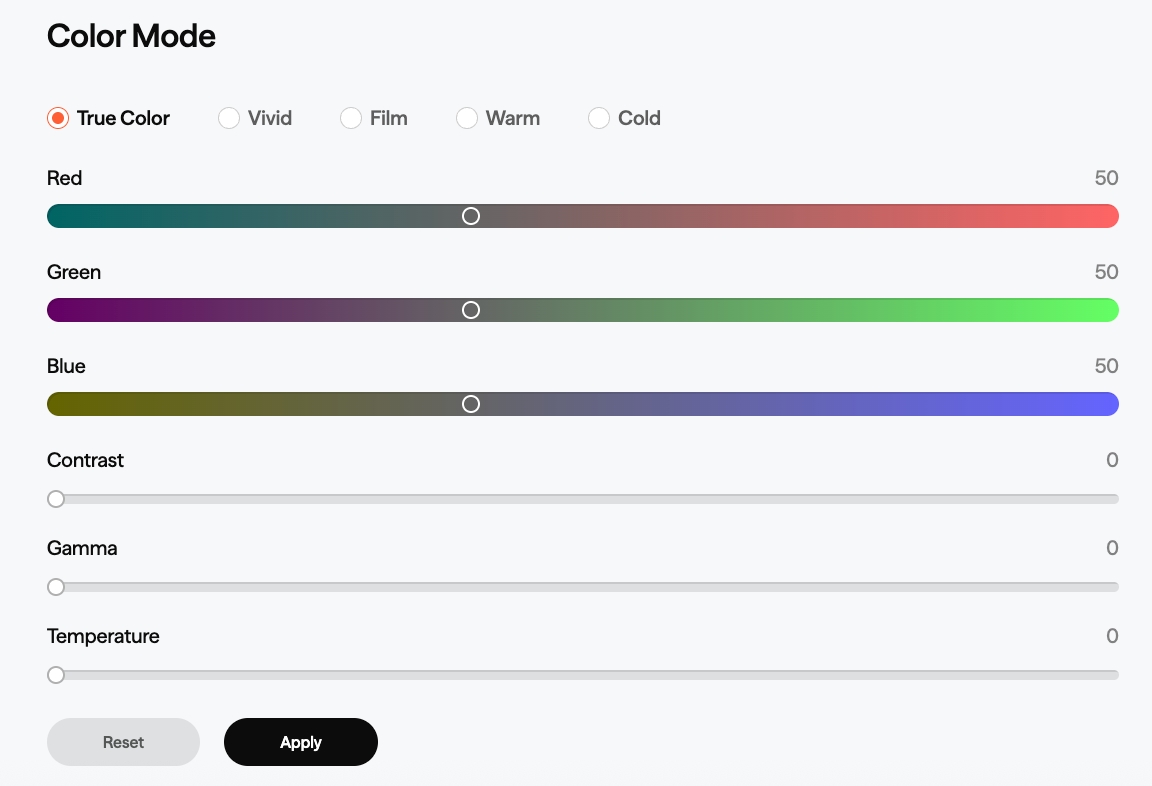
You can adjust the following parameters:
- RGB (Red, Green, Blue)
- Contrast
- Gamma
- Temperature
Changes are previewed in real-time. However, you must apply the changes for them to take effect.
The Reset option restores all settings to their factory configuration.
Dynamic Light Effect
This tool supports VITURE Luma Pro & Luma Ultra XR Glasses. Please ensure that your firmware is updated to the latest version before using this tool.
Note: Use Chrome (Version 98 or later) on a Windows or Mac computer to access the tool. Connect to a full-featured USB-C port that supports DisplayPort Alt Mode.
To customize the dynamic light effect, visit the Color Tuning & Dynamic Light Effect tool.
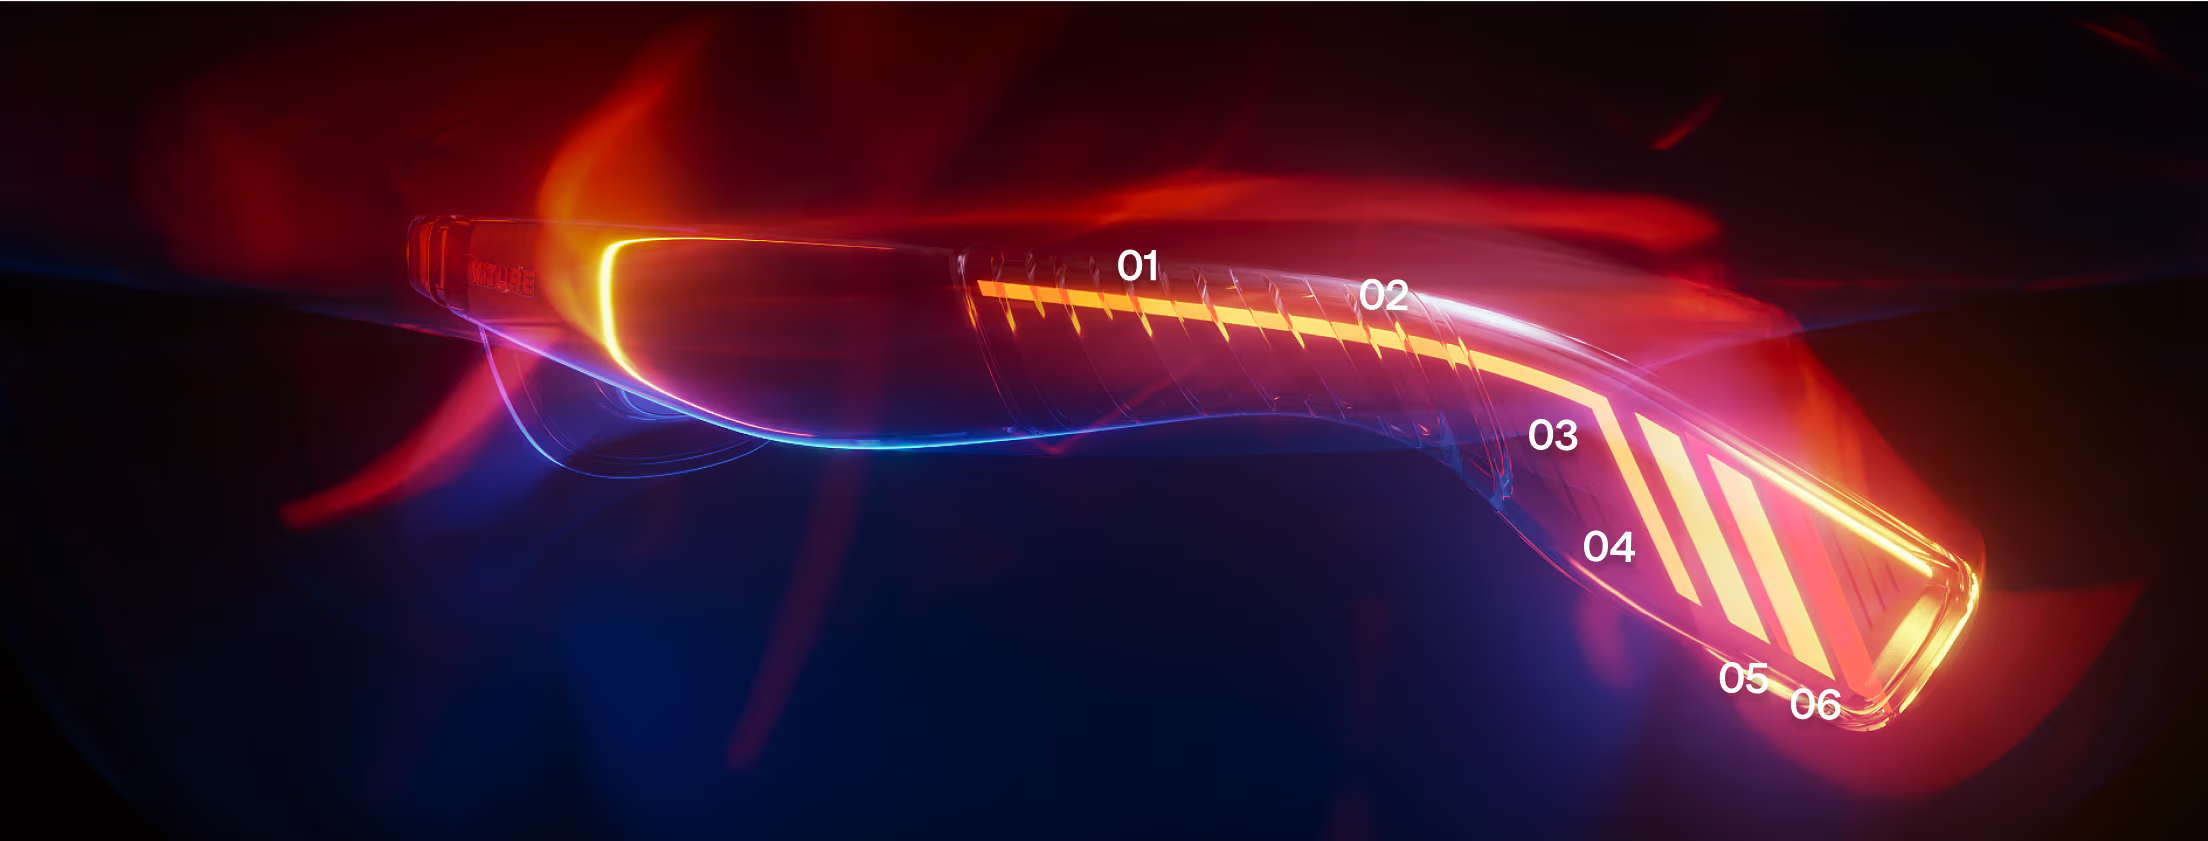
Adjust the brightness of each section of the light strip in a 5-second pattern loop, with individual brightness settings for each second. You can remove your XR Glasses and place them on a stable surface to check the changes.
You only need to apply the entire pattern once, not each second.
Note: Enabling the dynamic light effect increases power consumption. If connected to a laptop, tablet, or mobile device, battery life may decrease more rapidly.
Known Issue: If the light strip is set to maximum brightness for each second and section., it may blink slightly. This is a known issue, and we plan to address it in the next firmware update.
Update Your XR Glasses' Firmware
Before using your XR Glasses, we highly recommend updating the firmware for a better experience and advanced features.
You can update your XR glasses firmware in several ways, including through the web, an Android device, a Mac, or a Windows device.
View the firmware release history here.
Update via Web
Notes:
- Make sure you are using Google Chrome (version 98 or later).
- Before connecting, ensure your device is not being used by other applications.
- To use VITURE Luma Ultra XR Glasses with this tool on Windows, first download SpaceWalker for Windows (driver included).
- Do not unplug the XR Glasses or refresh the page during the update process unless otherwise specified.
- If the update failed, please refer to this page for troubleshooting.
- Unplug the XR Glasses only after you see the Update Successful message.
Update via Android Phones & Tablets
You can use an Android device with a USB-C port to update your XR Glasses' firmware. Even if your Android phone or tablet doesn't support DP Alt Mode, you can still use it for updating the firmware.
- Download the Neckband Remote or SpaceWalker app on Google Play Store.
- At the top left, tap the = icon. Then tap Firmware Update.
- Connect your XR Glasses to your Android device.
- Your device will ask you to allow the app to access the USB device so that it can read the firmware version of your XR Glasses.
- If there is an update available, tap UPDATE NOW, then confirm UPDATE NOW in the pop-up window the start the update process.
- Your device may ask you to allow the app to access the USB device. If so, tap OK to start updating MCU firmware. Do not unplug or disconnect the USB connection during the update process.
- After finishing the MCU firmware update, your mobile device will ask you to allow the app to access the USB device again. A DP firmware update process will start.
If the update process is stuck at MCU 100% and the permission request does not show up within 5 seconds, try unplugging the USB connection and reconnecting. Or, restart the Neckband Remote app then tap UPDATE NOW to go on to update DP firmware.
Update via Mac or Windows
SpaceWalker for Mac and Windows also offers a simple way to update your XR Glasses to the latest firmware.
Click the links for more information on SpaceWalker Desktop.
Calibrate Your XR Glasses' IMU
We recommend calibrating your XR Glasses' IMU after updating the firmware. A calibrated IMU will give you a lower drift rate and higher accuracy. You can also choose to enable/disable Wearer Detection.
Additionally, Luma Ultra XR Glasses doesn't require IMU calibration. This page doesn't support the Luma Ultra XR Glasses.
Immersive 3D
Immersive 3D is the world’s first real-time 2D-to-3D conversion feature built into XR glasses, powered by cutting-edge AI.
This revolutionary technology combines advanced artificial intelligence with VITURE’s proprietary 3D algorithms to transform your digital content into stunning immersive visuals. Whether you're enhancing productivity, enjoying entertainment, or gaming, Immersive 3D offers a whole new level of realism and depth.
By analyzing each frame in real time, the system identifies depth cues and spatial relationships to generate natural, high-quality 3D effects — all with minimal latency.
Immersive 3D is available in two forms:
- As a standalone desktop app on Mac and Windows, it converts your entire screen content into 3D in real time.
- As a built-in feature within the SpaceWalker app for iOS and Android, it transforms your own videos and even online streaming platforms like YouTube into immersive 3D experiences.
Learn more about Immersive 3D:
Watch 3D Movies
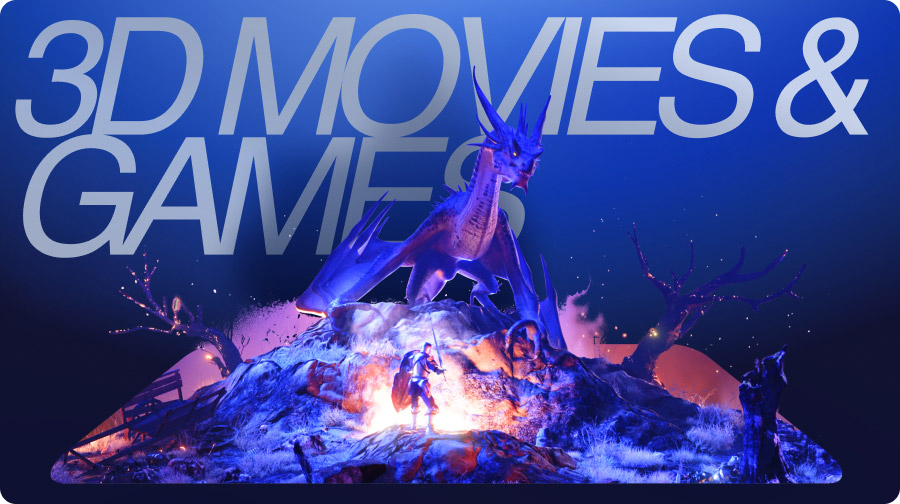
Enable 3D Mode on XR Glasses
VITURE XR Glasses natively support full SBS (Side-by-Side) 3D video at 3840×1080 resolution.
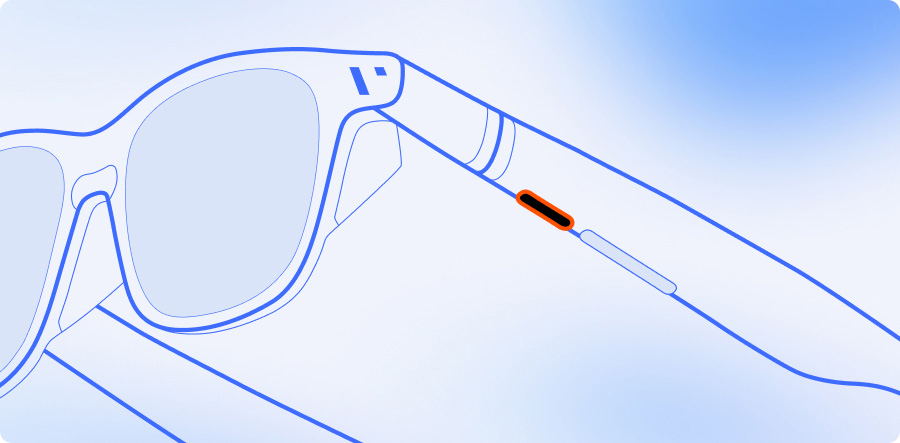
- For VITURE Luma Series: Press and hold R1 to switch between 2D and 3D modes.
Notes: All VITURE glasses currently support only Full SBS (Side-by-Side) format for 3D content. Immersive 3D works without any compatibility concerns. However, when watching videos or playing 3D games, please make sure to select the correct 3D format; choosing the wrong format may result in compatibility issues.
To try 3D Mode in gameplay, play the sample video clip in fullscreen using your XR Glasses:
Explore more Full SBS 3D videos in this YouTube playlist.
Connect to Compatible Devices
You can watch 3D movies by connecting your XR Glasses to a compatible device and using them as an external monitor.
Check the compatible device list.
Note: Some phones support DP Alt Mode but cannot output the resolution required for 3D video. For example, the Google Pixel 8 and 9 series do not support switching to 3D Mode. To ensure compatibility, your device must support video output at 4K resolution or higher.
Follow these steps to play 3D SBS movies on your Android phone using VLC Media Player:
- For Samsung users, please disable Samsung Dex (Settings > Advanced Features > Samsung Dex > Auto start when HDMI is connected).
- Transfer the Movie: Copy the 3D SBS movie file directly to your phone storage. Alternatively, access the movie on a local network storage device using VLC's browsing features.
- Open the Movie in VLC Media Player.
- Enable 3D Mode: Connect your XR Glasses to your phone. Press and hold the Mode button (short button) to enable 3D Mode.
- Adjust Aspect Ratio (optinal): If the image appears distorted, press and hold the Aspect Ratio button (rectangle icon with markers), then select "Fit Screen" for the best viewing experience.
- Sit Back and Enjoy!
When you watch a 3D video on your PC or MacBook, enable 3D Mode on the XR Glasses, and ensure you extend desktop to the XR Glasses. Then open a video and move the media player to the screen of your XR Glasses, and play in fullscreen.
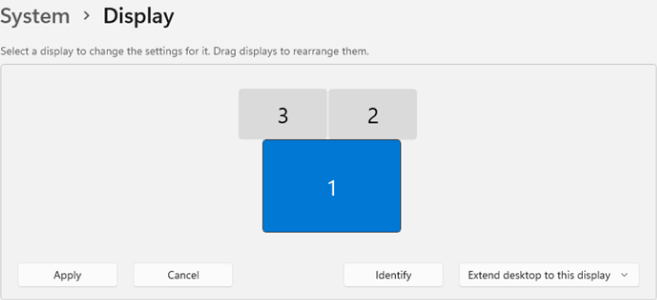
Some Windows PCs do not support 3840 × 1080, if the information is unclear, please contact the manufacturer of the computer you are hoping to use with the XR Glasses.
To experience 3D Mode in movies, please watch the sample video clip in fullscreen on your XR Glasses.
With the Neckband
The Neckband offers enhanced 3D features with auto-detection and side-by-side 3D support - all so you can enjoy your favorite blockbusters the way they were meant to be seen.
Streaming Apps
If you are based in the United States, you can use streaming services like Prime Video, Netflix, YouTube, Vudu, and others to watch 3D movies online.
Local Files
Transfer your 3D videos to the Neckband by connecting the Neckband to your PC/MacBook via USB-C-to-USB-C cable, then open 3D Player app on the Neckband and select a video. Your XR Glasses will automatically switch to 3D Mode when playing a full SBS 3D video.
See also: Transferring Files To Your Neckband
Troubleshooting
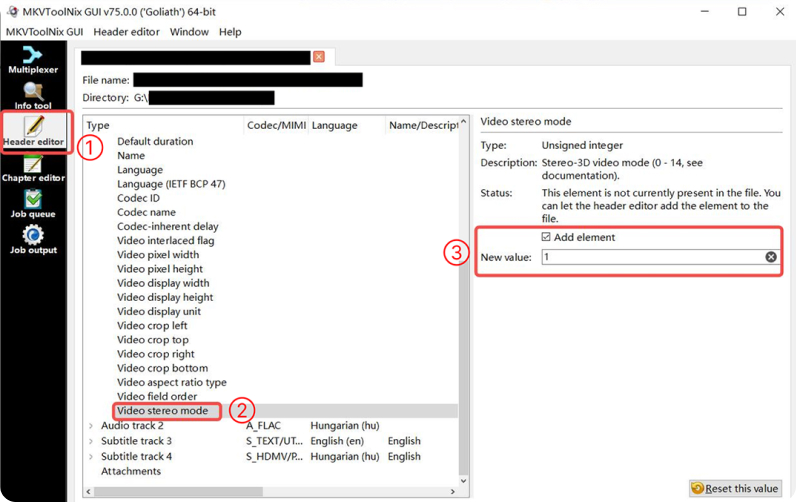
If you attempt to play a SBS 3D .MKV format video, the aspect ratio may not be correct. You can try using MKVToolNix to convert the file and fix this issue. Download MKVToolNix and install.
Click "Header editor," and set "Video stereo mode" to 1. This will allow most SBS 3D videos to play properly.
Play 3D Games with Your PC
Play Games with Immersive 3D
You can play games after launching Immersive 3D for Windows, but please note that this will significantly increase battery consumption and may reduce gaming performance.
We recommend reviewing the system requirements and our benchmark results before enabling this feature.
For the best experience, we suggest playing games only on systems equipped with NVIDIA RTX 4080 or higher graphics cards.
Native 3D Games
You can play native SBS video games by connecting XR Glasses to your PC. Here are some recommended video games that support 3D graphics. To determine whether or not your device supports these games, ensure review the system requirements that are published by the game developers.
List of Native SBS 3D Games
| Title | Platforms | First release year |
|---|---|---|
| Shadow of the Tomb Raider | Windows | 2018 |
| Rise of the Tomb Raider | Windows | 2016 |
| Elite Dangerous | Windows, macOS (OS X) | 2015 |
| Trine 3: The Artifacts of Power | Windows, Linux, macOS (OS X) | 2015 |
| Trine 2 | Linux, Windows, macOS (OS X) | 2013 |
| Crysis 3 | Windows | 2013 |
| Doom 3 BFG Edition | Linux, Windows | 2012 |
See more native 3D games: Native 3D - PCGamingWiki, you can try more games on the list, but we cannot guarantee that every game on the list works well with VITURE XR Glasses.
Reshade + Depth3D
If you want more 3D games on your PC, we strongly recommend using Reshade + Depth3D to play 3D games. It is easy to configure and is able to play many games in 3D Mode. See the game compatibility list of ReShade.
ReShade supports all of Direct3D 9, Direct3D 10, Direct3D 11, Direct3D 12, OpenGL, and Vulkan. A computer with Windows 7 SP1, 8.1, 10 or 11 and .NET Framework 4.6.2 or higher installed is required.
Make sure your PC supports dual monitors and has a USB-C DP 4K port.
Instructions
Download ReShade and launch.
Select a game.
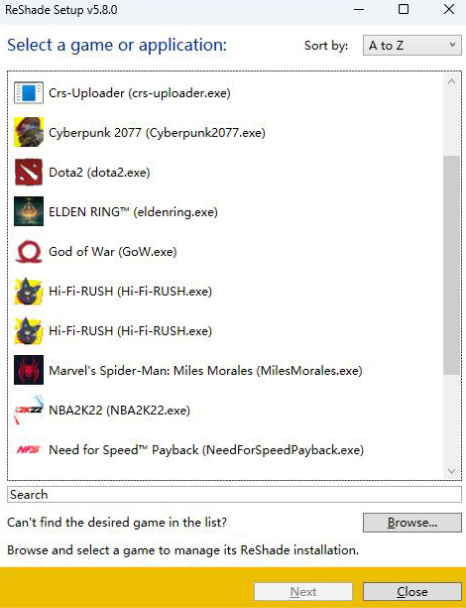
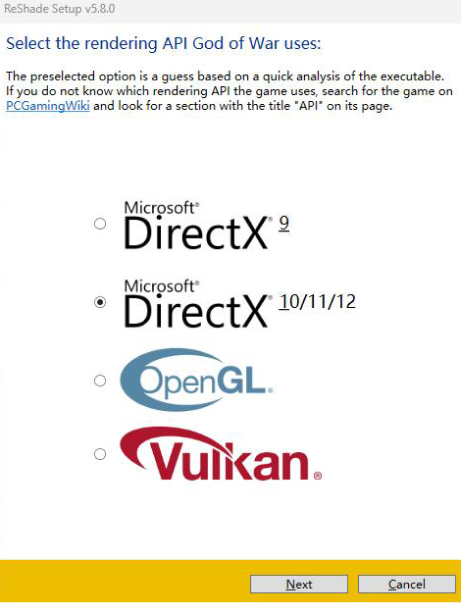
Select the rendering API that the game uses. Click "Next" to continue.
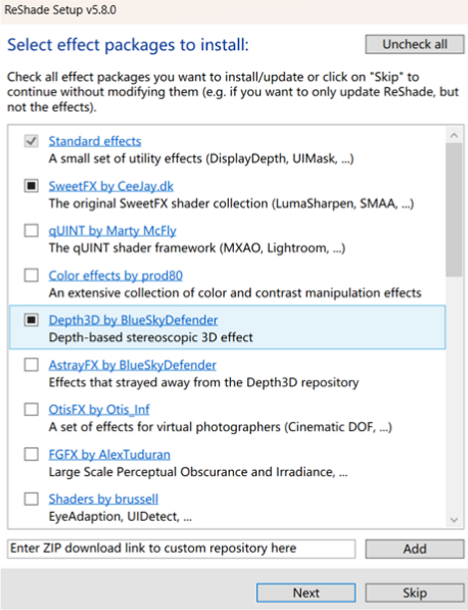
If you are using the latest version of ReShade, check Depth3D to continue. For older versions, you need to download Depth3D and watch this video tutorial.
After downloading the effect packages, start the game and press Home on the keyboard. Select SuperDepth3D on the overlay menu, and press Home again to close the overlay.
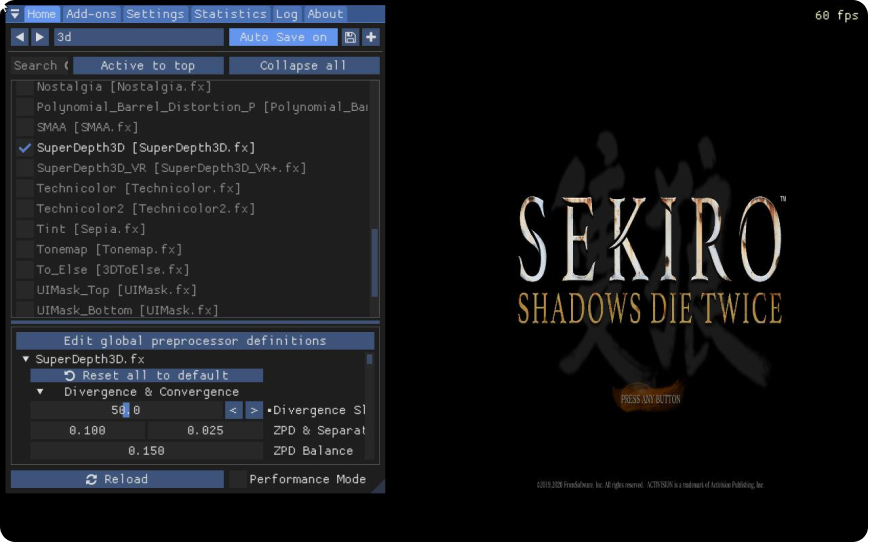
Connect your XR Glasses to your PC, switch to 3D Mode.
Because Half-SBS and Full-SBS use different formats, using Reshade or similar 3D conversion tools may lead to incorrect output on the glasses. To ensure proper Full-SBS rendering, please configure your GPU as follows:
On AMD devices: Set the VITURE display resolution in Windows to 1920 × 1080, then follow AMD’s Custom Resolution instructions to create a 3840 × 1080 logical display mode.
On NVIDIA devices: First set the VITURE display resolution in Windows to 3840 × 1080, then create a 1920 × 1080 custom resolution following NVIDIA’s Custom Resolution guide.
- Enjoy it.
How to Return to Normal Gameplay
Launch a game and press Home on the keyboard, uncheck "SuperDepth3D" and the game will return to normal.
Uninstall ReShade
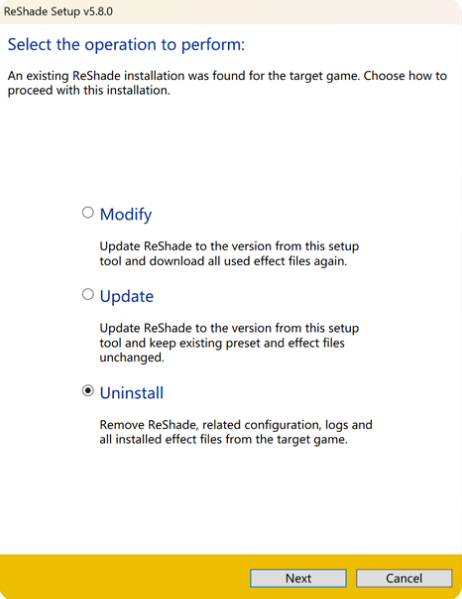
If you want to uninstall ReShade, you can open ReShade and select a game, then select "Uninstall" in this step. All the ReShade effect packages will also be uninstalled.
Streaming (Using Moonlight/Sunshine)
After configuring ReShade and Depth3D on your PC, you can even use Moonlight and Sunshine to play remotely. Navigate to the Store page on the Neckband and download Moonlight. Then install Sunshine on your PC. Watch the video tutorial to get set up. Or refer to the official Sunshine documentation.
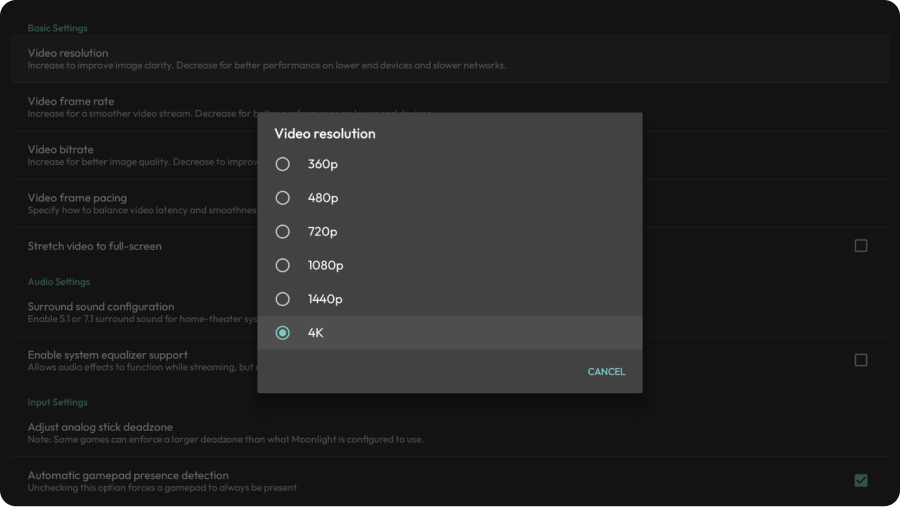
Make sure the video resolution is configured to 4K in the Moonlight settings.
Set the Resolution on Your Console
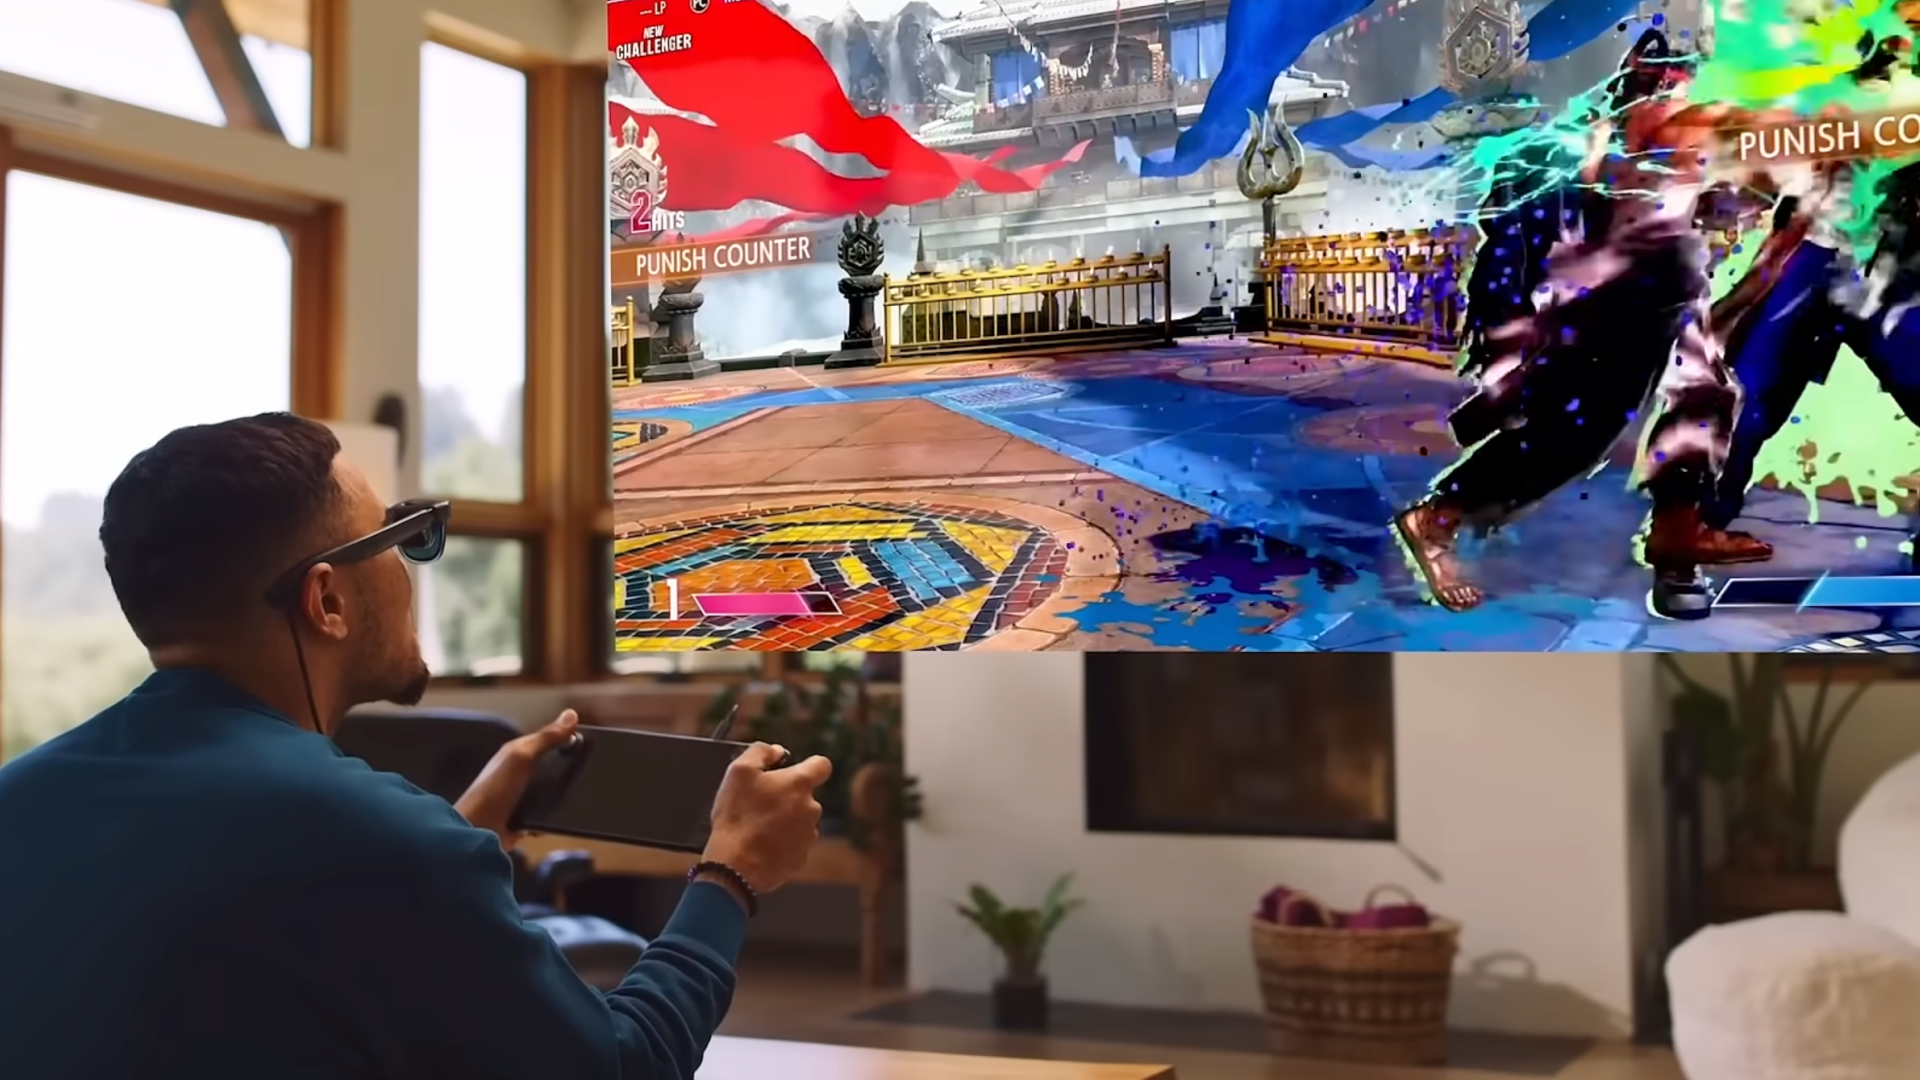
While not strictly necessary for using XR Glasses on handheld consoles like Steam Deck or ROG Ally, adjusting your console's settings can enhance your gaming experience.
External Display Resolution
Connect your XR Glasses to your console.
To optimize your gaming experience on Steam Deck, follow these steps:
- Press the left Steam button on your Steam Deck.
- Navigate to Settings > Display.
- Set the external display resolution to 1920x1080@120Hz.
Tips:
- Set your external display resolution to 1080p (1920x1080) for optimal image quality.
- Pro XR Glasses users: For smoother visuals, enable a 120Hz refresh rate on your external display.
Adjust Game Settings
- Access the properties of the game you want to play by clicking the gear icon.
- Under the Display tab, select "Native" resolution.
Tips:
- Ideally, set the game resolution to 1080p for the best image quality.
- To conserve battery life, you can lower the game resolution, but this might result in a slightly blurred image.
In-game Settings
Configure in-game settings following these steps:
- Launch the game.
- Open the in-game settings or options menu.
- Change the resolution to 1920x1080.
- Consider disabling VSync for potential performance gains.
- Adjust FPS to 120fps (For VITURE Pro XR Glasses users).
Enable 3DoF on Steam Deck
You only need to directly connect XR Glasses and Steam Deck to use the native IMU data of XR Glasses to enable 3DoF functionality. To achieve a better fixed-position screen effect, you need to install Decky Loader and the XR Gaming plugin on Steam Deck.
Install Decky Loader
This installation can be done without an admin/sudo password set.
- Prepare a mouse and keyboard if possible.
- Press the STEAM button and open the Power menu.
- Select "Switch to Desktop".
- Navigate to the GitHub page on a browser of your choice.
- Download the installer file. (If using Firefox, it will be named deckyinstaller.desktop.download. Rename it to deckyinstaller.desktop before running it)
- Drag the file onto your desktop and double click it to run it.
- Either type your admin password or allow Decky to temporarily set your admin password to Decky! (this password will be removed after the installer finishes)
- Choose the version of Decky Loader you want to install. Pre-releases are unlikely to be fully stable but contain the latest changes. But we recommend installing Pre-releases to get the latest features of the plugin.
- Open the Return to Gaming Mode shortcut on your desktop.
There is also a fast install for those who can use Konsole. Run
curl -L https://github.com/SteamDeckHomebrew/decky-installer/releases/latest/download/install_release.sh | sh
and type your password when prompted.
For more information about Decky Loader, please refer to this GitHub project: GitHub - decky-loader
Install XR Gaming Plugin
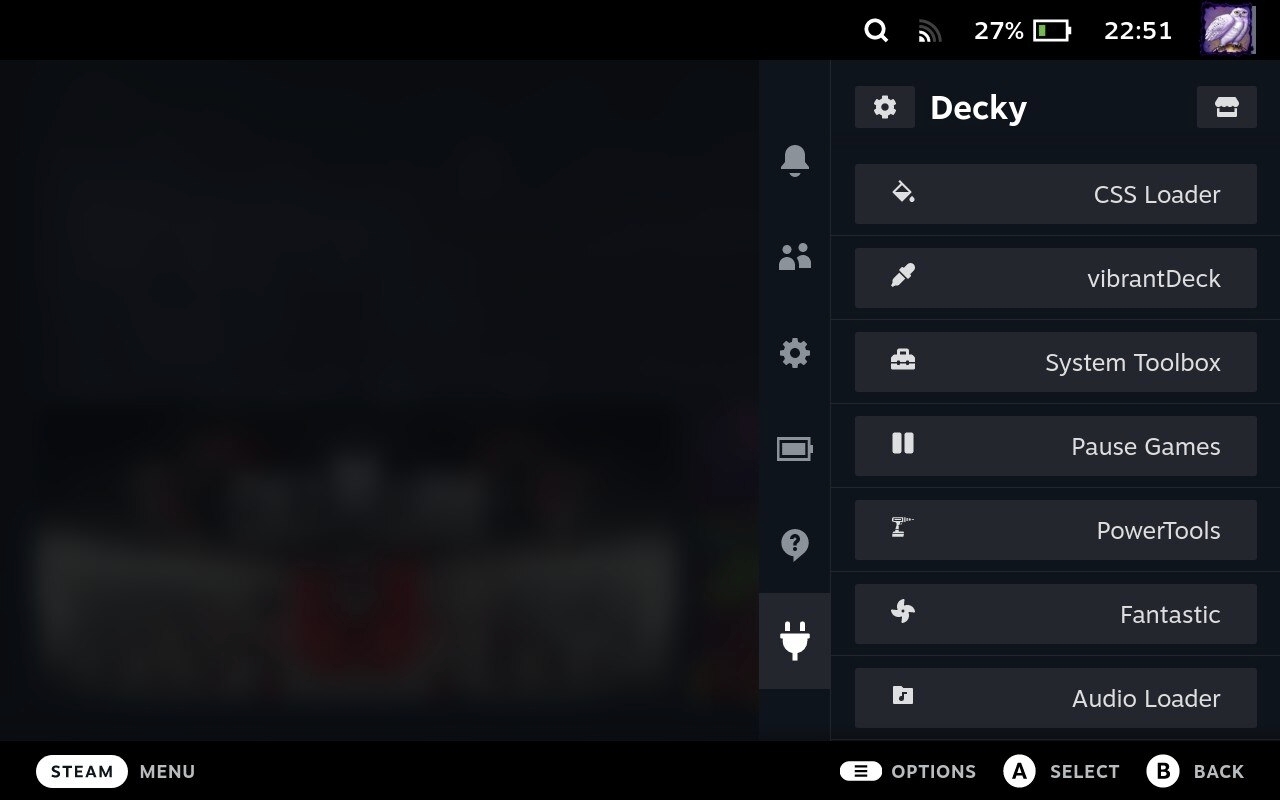
- Press the … button and navigate to the plugin icon. This is the Decky menu used for interacting with plugins and the loader itself.
- Select the store icon to open the Plugins Browser.
- In the search field, enter XR Gaming, select the "Install" button on the XR Gaming plugin.
Enable 3DoF on Steam Deck
- Before using XR Gaming, you need to connect VITURE XR Glasses (including VITURE Pro XR Glasses, VITURE One XR Glasses, and VITURE One Lite XR Glasses) to Steam Deck.
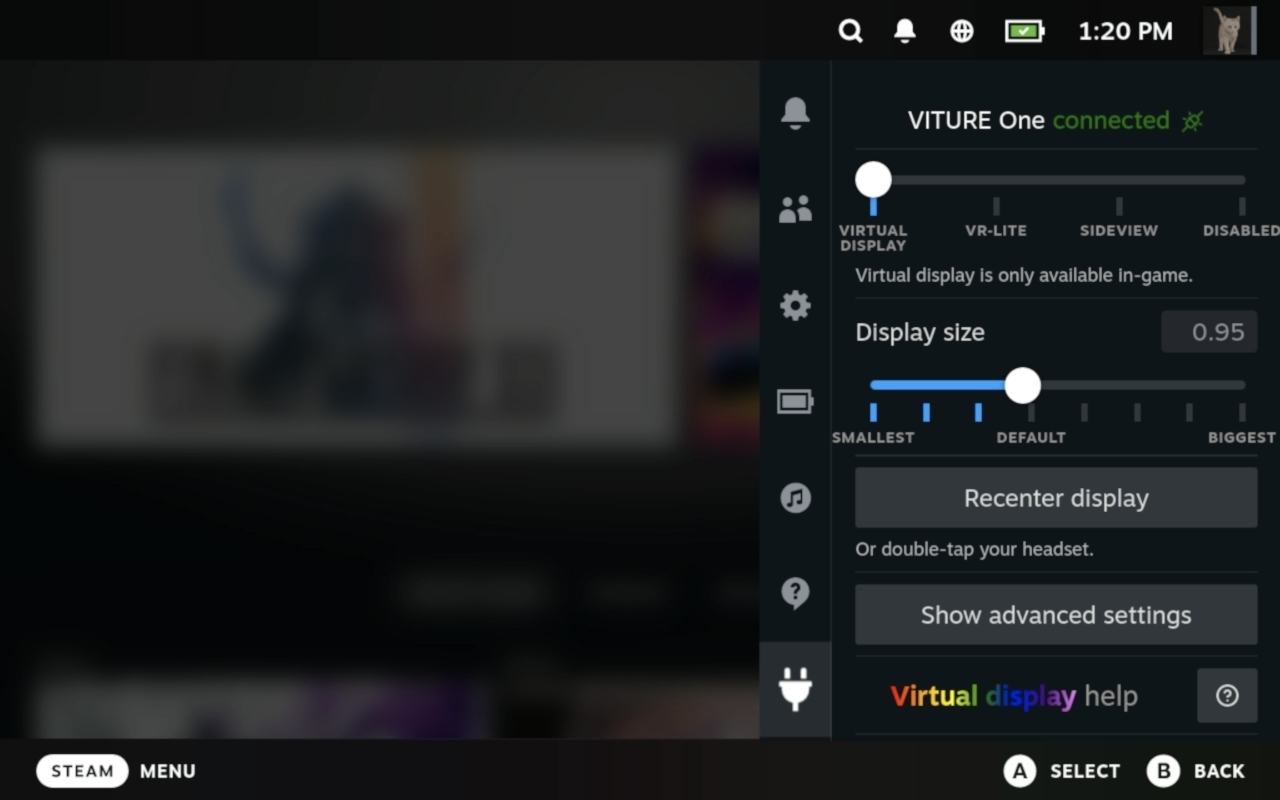
- After connecting the XR Glasses, click the … button, navigate to the Plugin icon, and open XR Gaming in Decky to access XR Gaming settings.
- The VIRTUAL DISPLAY option represents 3DoF, where a display will be rendered in a fixed position, allowing you to move your head to look at different parts of the screen.
- You can customize the screen size here. If the screen position is offset, you can click Recenter display to reset the screen to the center of your field of view.
- If you encounter significant offset during use, you can click Show advanced settings, expand it, and click Recalibrate headset to recalibrate XR Glasses.
Unleash the Power of XR Gaming Plugin
The XR Gaming plugin unlocks a suite of features designed to enhance your gaming experience:
Virtual Display: Pin your game screen in a virtual space, keeping it fixed in your view regardless of head movements. Perfect for strategy games or menus.
Side-by-Side 3D (Advanced feature for compatible games): Enable this mode to control the virtual screen distance and render games in stunning 3D (requires game support).
VR-Lite: Control the in-game camera (mouse look) using your head movements in first-person or third-person games. No VR setup needed!
Sideview: Discreetly display your game in a corner of your vision, allowing you to stay partially aware of your surroundings.
See what the developer are saying about XR Gaming on Reddit: Steam Deck VITURE support is ready! - Reddit
Visit this GitHub project to learn about the latest features and common issues of XR Gaming: GitHub - Decky-XRGaming
Adapters
USB-C XR Charging Adapter Ultra
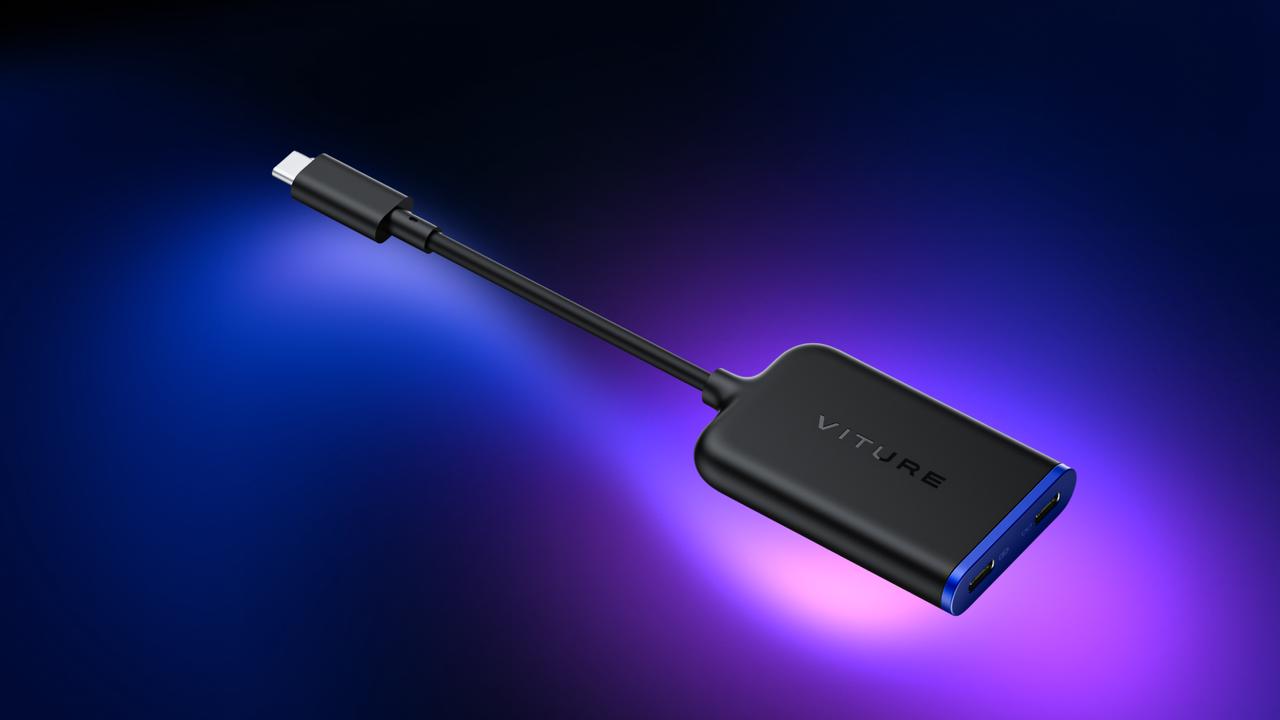
Now compatible with all VITURE XR Glasses, including Luma Ultra and The Beast, the Adapter Ultra delivers the advanced SpaceWalker experience on iOS: multi-screen, 3DoF head-tracking, 1-click 3D, spatial video, and VR video. The first VITURE adapter with full Nintendo Switch 2 support, plus Steam Deck, ROG Ally, and other USB-C handhelds. Up to 65W PD passthrough charging — and unlocks ROG Ally Turbo Mode.
One adapter. The whole VITURE ecosystem. Play without limits.
Important: iPhone 16e and iPhone Air are not compatible with VITURE XR Glasses.
To compare adapter capabilities, see the feature comparison of adapters
USB-C XR Charging Adapter
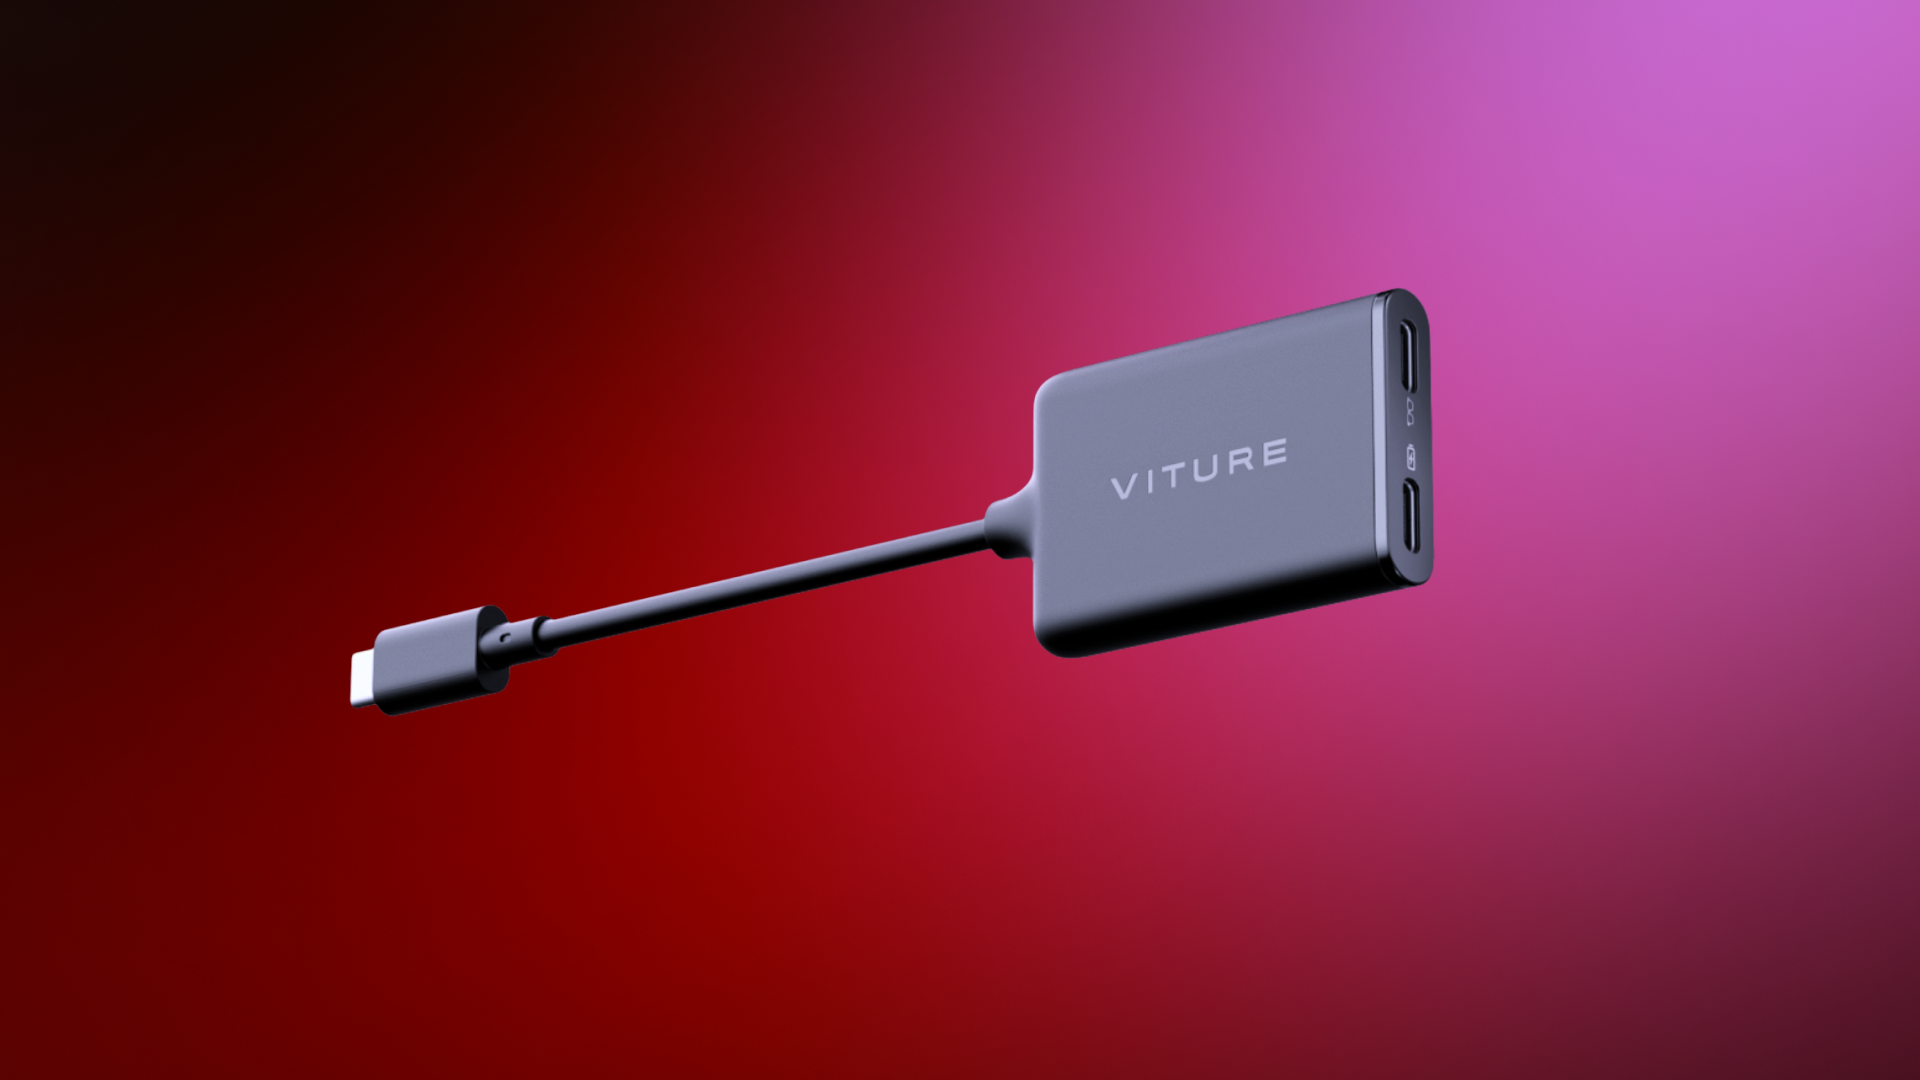
iPhone 15 and later models can connect directly to VITURE XR Glasses for standard SpaceWalker features. But with the USB-C XR Charging Adapter, you unlock multiple virtual screens, Immersive 3D, Spatial Video support, and VR video playback — all while keeping your phone charged!
With the USB-C XR Charging Adapter, you get enhanced 3DoF tracking, VR capabilities, and multiscreen support on iPhones with a USB-C port.
Compatibility: All VITURE XR Glasses models except Luma Ultra Important: iPhone 16e & Air is not compatible with VITURE XR Glasses.
Get the USB-C XR Charging Adapter.
For further information, refer to USB-C XR Charging Adapter
HDMI XR Adapter
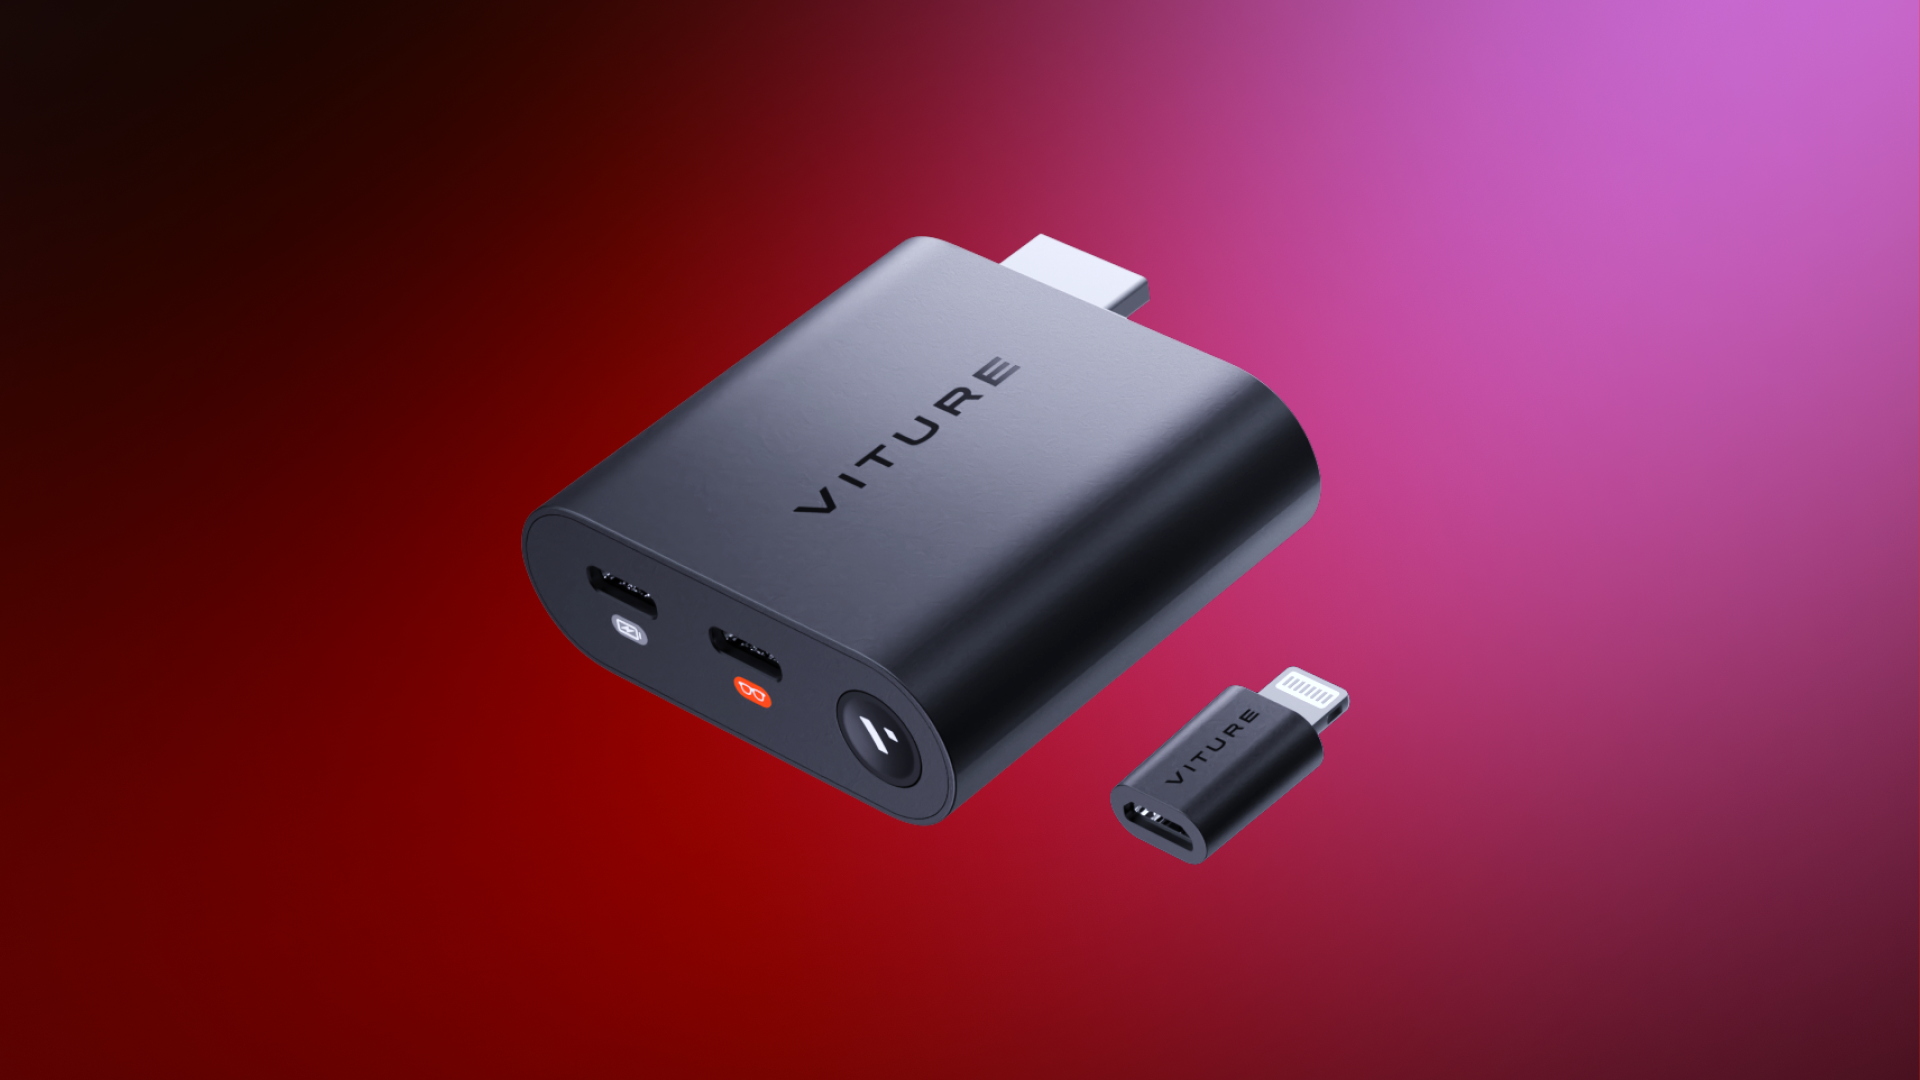
With the HDMI XR Adapter you can transform your iPhone 14 or earlier model into a portable XR workstation with multiple virtual screens, built-in VR video support, and a mobile cinema experience on XR Glasses' giant virtual display.
Designed for compatibility with the official Apple Lightning Digital AV Adapter. (The Apple Lightning Digital AV Adapter is available from Apple and must be purchased separately. Third-party adapters may be not compatible with the HDMI XR Adapter.)
This adapter is also great for gamers — a streamlined way to connect to your HDMI-compatible game consoles for a more immersive gaming experience on your XR Glasses.
Compatibility: All VITURE XR Glasses models except Luma Ultra
For further information, refer to HDMI XR Adapter.
Charging Adapter
Don't let a dead battery get in the way of your gaming — the USB-C to Glasses Charging Adapter is a must-have accessory that allows you to connect your device to your XR Glasses and charge up at the same time. Perfect for staying energized for hours of nonstop, uninterrupted immersion.
Compatibility: All VITURE XR Glasses models
Get the USB-C to Glasses and Charging Adapter.
| Color | Black |
|---|---|
| Weight | 22.5g |
| Dimensions | 160.0 × 35.0 × 10 (mm) |
| Connectors | USB-C |
| USB-C Video Output | 1920×1080 @ 60Hz, 3840×1080 @ 60Hz |
| USB Type | USB 3.2 Gen 1 (5Gbps) |
| Charging Power | 45W (5V~3A, 9V~2A, 12V~2A, 15V~3A) |
Cables
USB-C to Magnetic Connector Cable
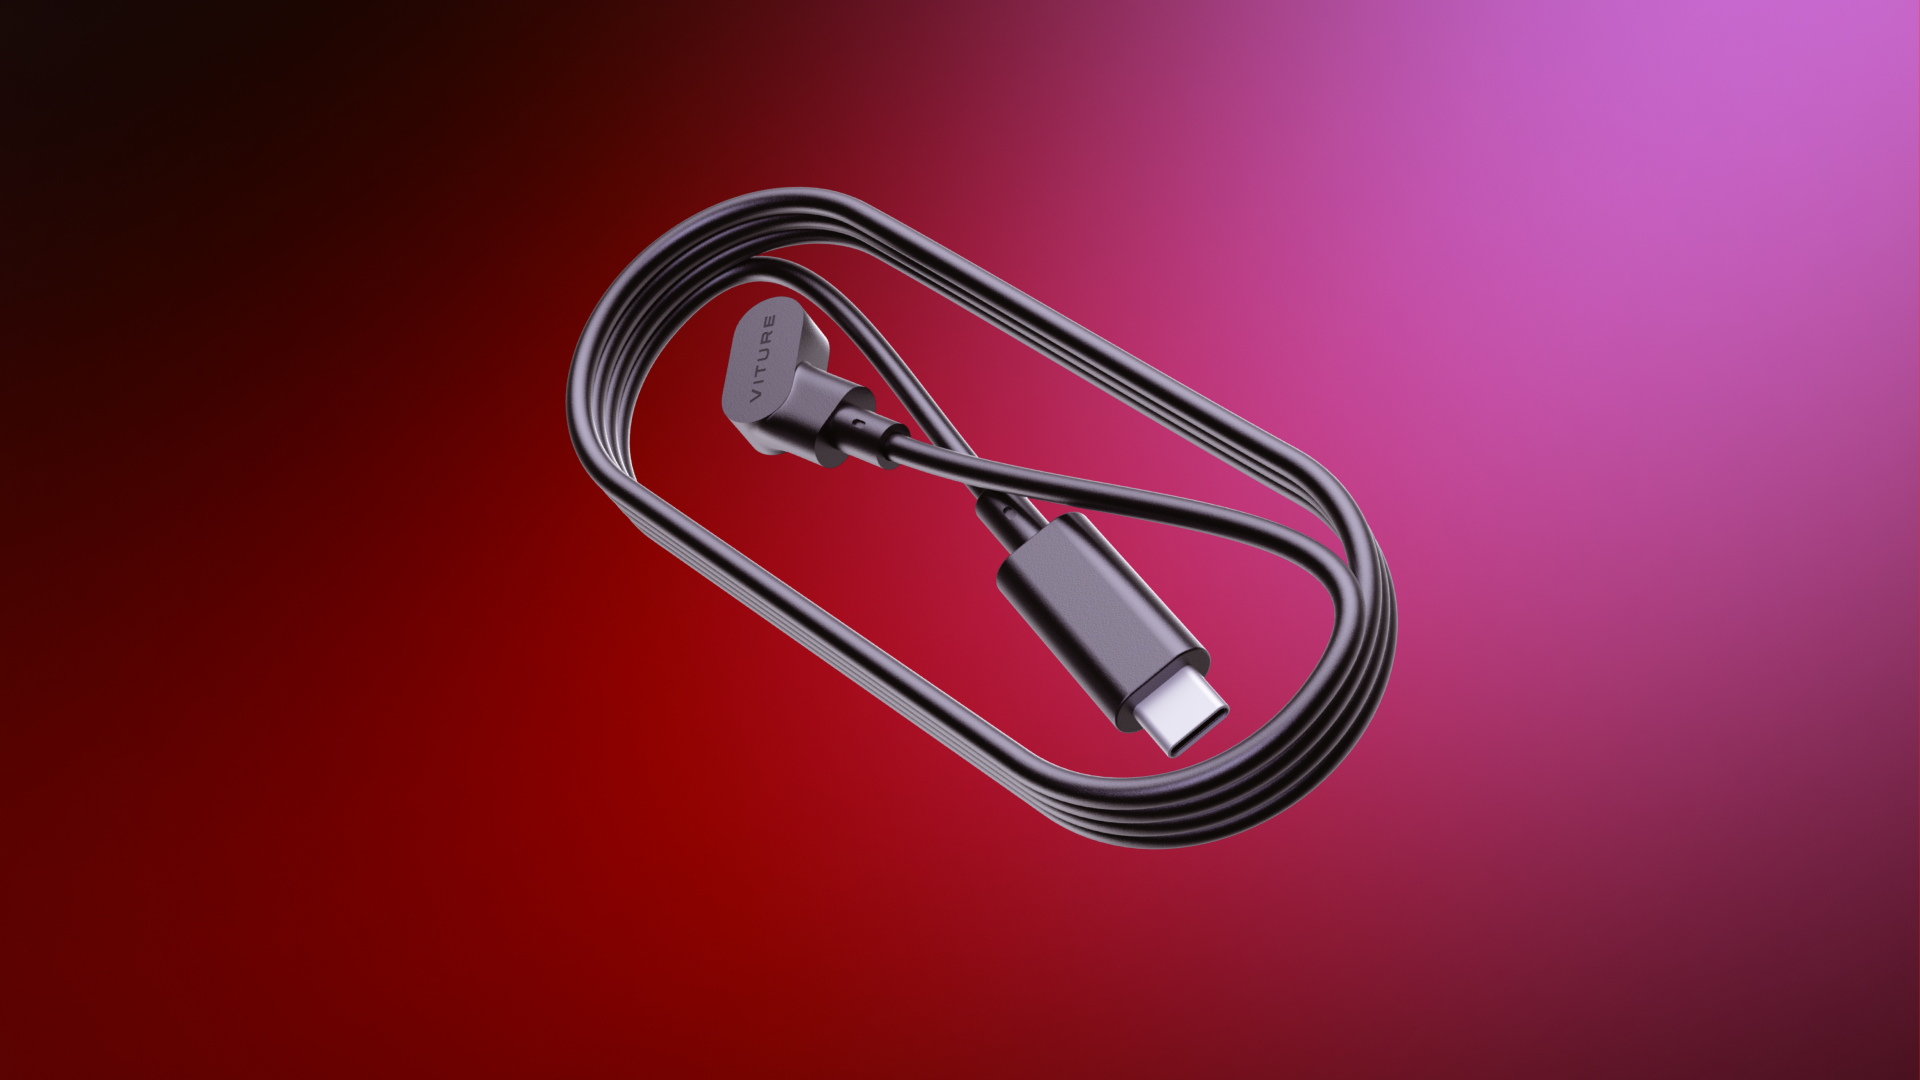
This USB-C to Magnetic Connector Cable is great for having a little extra leeway to connect your VITURE Pro XR Glasses & VITURE One XR Glasses to compatible USB-C devices. With this cable, it's easy to connect, throw your device in a backpack, and keep moving without interrupting your favorite show or logging out of the game you just can't put down right now.
Compatibility: VITURE XR Glasses with magnetic connector.
Get VITURE XR Glasses USB-C to Magnetic Connector Cable.
| Color | Black |
|---|---|
| Weight | 29.8g |
| Length | 120cm |
| Connectors | USB-C, Magnetic Connector |
| USB Type | USB 3.2 Gen1 |
| Data Transfer Rate | 10Gbit/s |
| Power | 20W (12V~1.65A, 9V~2A, 5V~3A) |
50cm USB-C Extension Cable
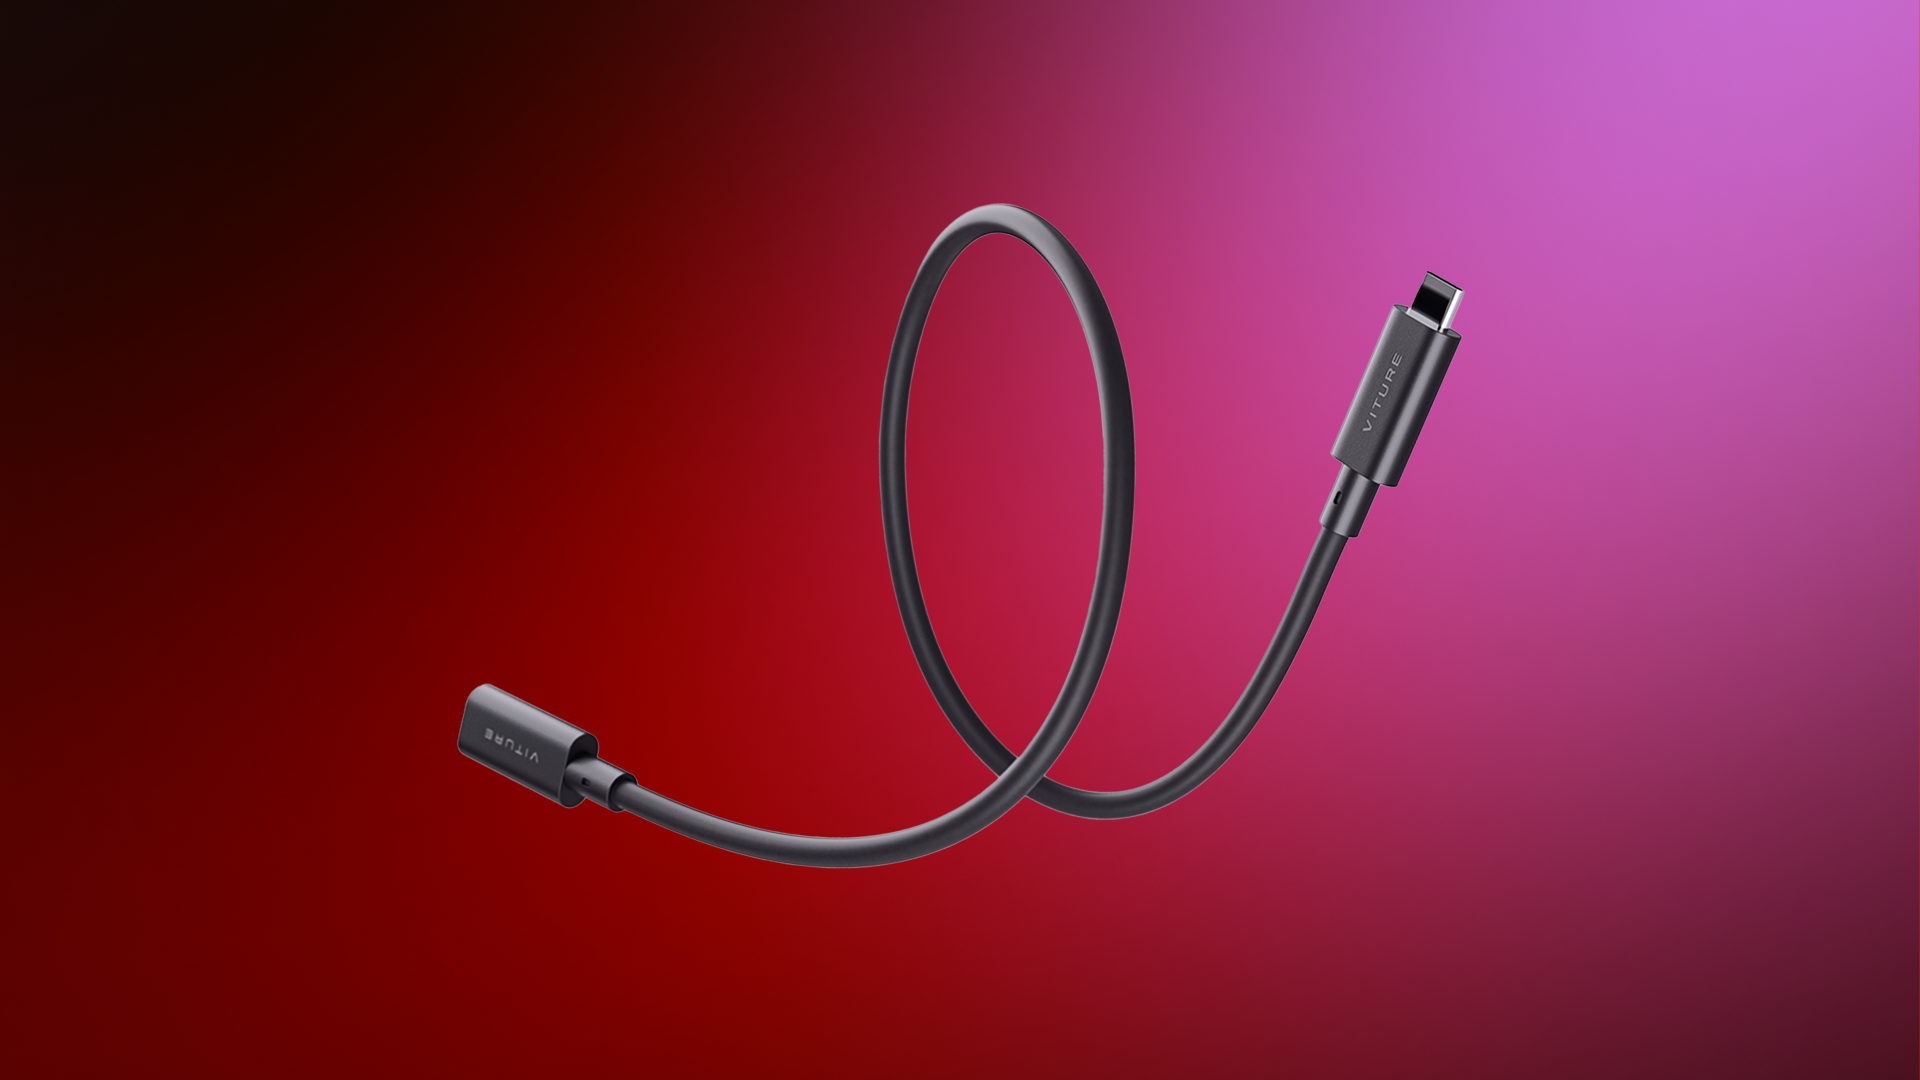
The USB-C Glasses Extension Cable provides extra length for using your XR Glasses.
This cable is compatible with any USB-C device compatible with VITURE XR Glasses, including many Android phones/tablets, PCs, MacBooks, iPads, Steam Deck, and more. Plug the USB-C end of the cable into any compatible device, and then connect to your XR Glasses via the magnetic connector.
Compatibility: All VITURE XR Glasses models
Get the 50cm USB-C Extension Cable.
| Color | Black |
|---|---|
| Weight | 18g |
| Length | 50cm |
| Connectors | USB-C |
| USB Type | USB 3.2 Gen1 |
| Data Transfer Rate | 10Gbit/s |
| Power | 20W (12V~1.65A, 9V~2A, 5V~3A) |
VITURE Luma Prescription Lens Frame
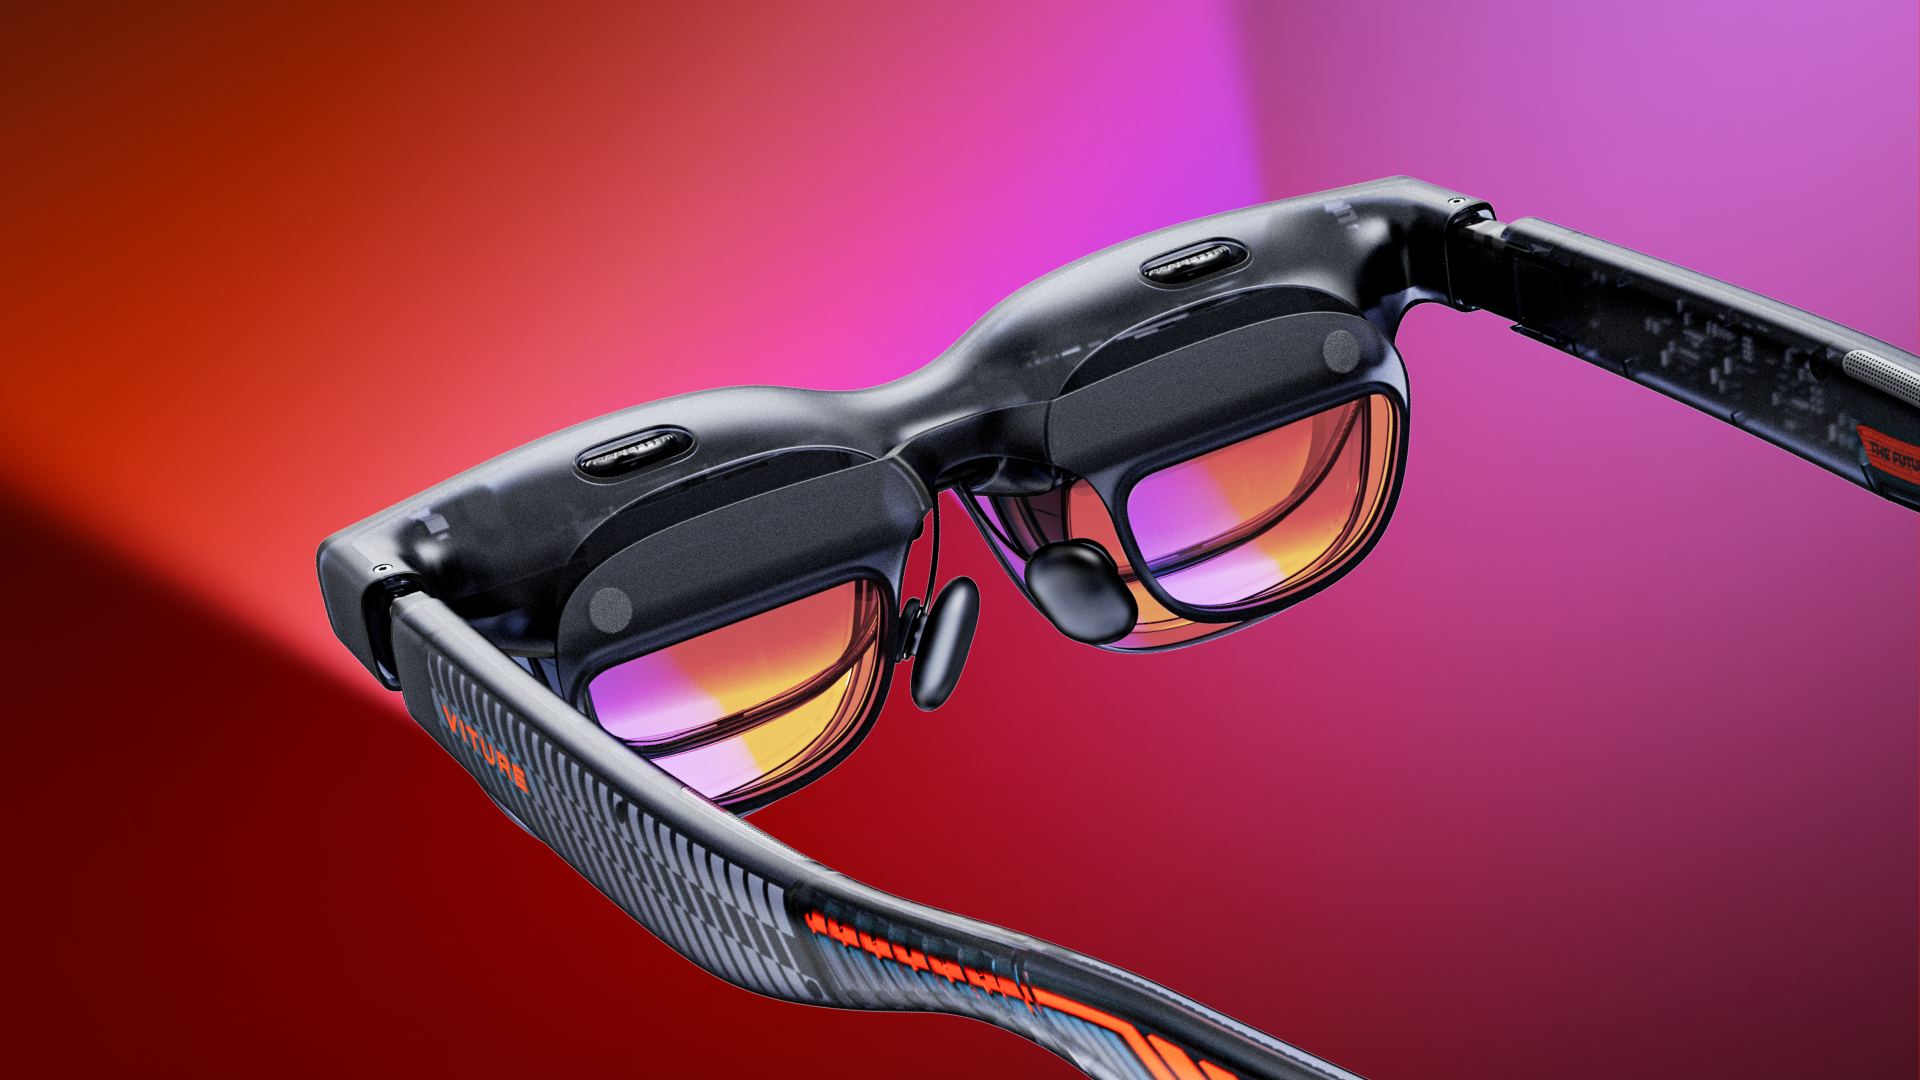
The VITURE Luma Prescription Lens Frame is a dedicated accessory for the VITURE Luma XR Glasses series, designed to provide a clear, distortion-free visual experience for users with custom optical prescriptions.
This accessory is especially helpful for users with:
- Myopia beyond the built-in adjustment range
- Over -6.0D on VITURE Luma XR Glasses
- Over -4.0D on VITURE Luma Pro and Luma Ultra XR Glasses
- Astigmatism, which is not supported by the built-in adjustment The Prescription Lens Frame supports custom lenses tailored to your specific optical needs.
Compatibility: VITURE Luma Pro, Luma Ultra, and Luma XR Glasses
| Color | Premium Translucent Black |
|---|---|
| Dimensions (Regular) | 114.1 × 35.4 × 9.1 mm |
| Dimensions (Large) | 118.4 × 35.4 × 9.1 mm |
| Weight (Regular) | 2.44g |
| Weight (Large) | 2.45g |
| Material | TR90, PC |
Size Selection
The frame is available in two sizes: Regular and Large. Be sure to select to correct size that matches your XR Glasses. Using the wrong size may result in an improper fit, reduced visual clarity, or incompatibility.
| Model | Frame Size Needed |
|---|---|
| Luma Pro (Regular) | Regular |
| Luma Pro (Large) | Large |
| Luma Ultra | Regular |
| Luma | Regular |
Instructions
To Attach the Frame:
- Identify the magnetic side of the frame — this side attaches to your XR Glasses.
- Hold the frame by the top and bottom edges, near the inside of the XR Glasses.
- Gently bring it close and let the magnets snap it into place.
To Remove the Frame:
- Hold the frame by the top and bottom edges.
- Pull the frame away from the XR Glasses to detach it.
Update Failed
Luma Ultra XR Glasses
If the screen is blank and the electrochromic film is unresponsive:
Press and hold the L+ and L- buttons.
While holding the buttons, connect the XR Glasses to your computer (see diagram below).
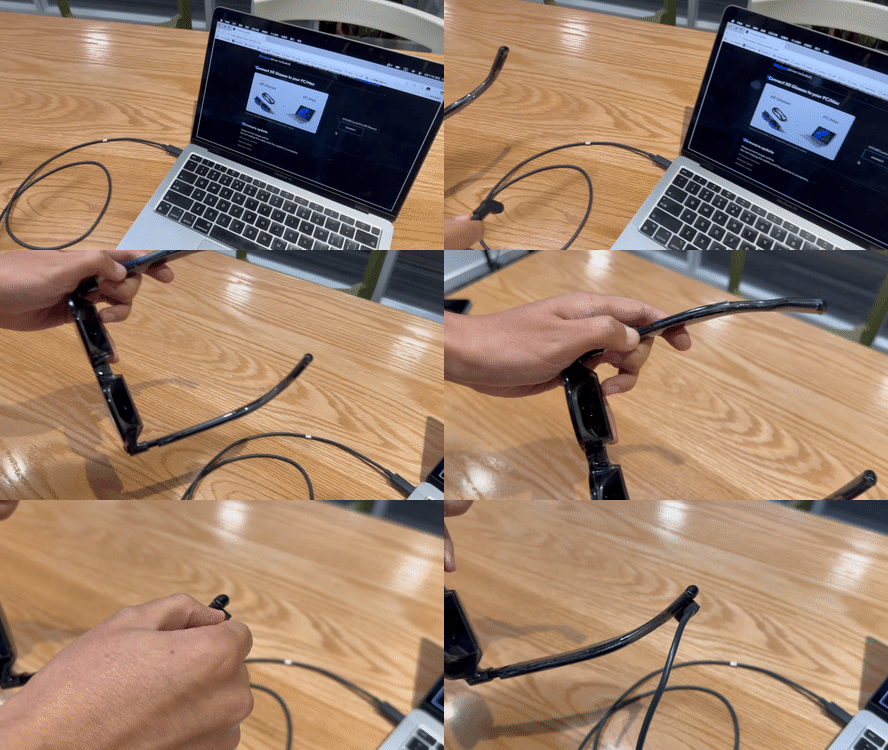
Once connected, release the buttons.
If you are using Windows (if you are using macOS, skip to Step 5):
4.1 Download and open Zadig.
4.2 Select the Luma Ultra XR Glasses and click Install Driver. If Luma Ultra XR Glasses does not appear, repeat Steps 1–3 and try again.
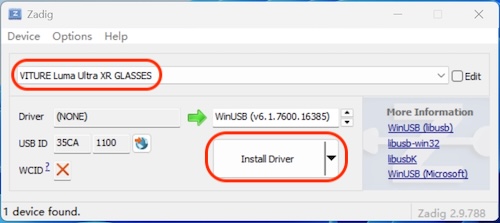
4.3 Wait until the installation is complete.
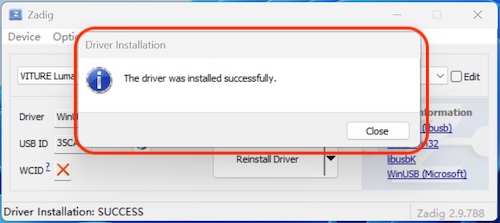
Return to the firmware update page.
Select Luma Ultra XR Glasses from the list and click Connect. If Luma Ultra XR Glasses does not appear in the list, repeat Steps 1–3 and try again.
Once connected, click Update and wait until the update process is complete.
If the screen is blank but the electrochromic film is responsive:
Go to the firmware update page, connect XR Glasses normally, and perform a standard update.
Luma Pro XR Glasses
If the screen is blank:
Go to the firmware update page and follow the standard update process. Since there are multiple modules that need to be updated, you may need to repeat the update 1 to 3 times (Need to plug and unplug devices) depending on the issue. We apologize that this process isn't automated at this time. After a maximum of 3 attempts, please check to see if the issue has been resolved.
Important Note: If you are using a Windows computer with a Qualcomm chip, you may experience update issues. We recommend using a different computer for the update.
Troubleshooting For Handheld Consoles
Steam Deck
If you experience no sound from the XR Glasses after connecting them to the Steam Deck, press the STEAM button, go to Settings > Audio > Output Device, and select 'External device'.
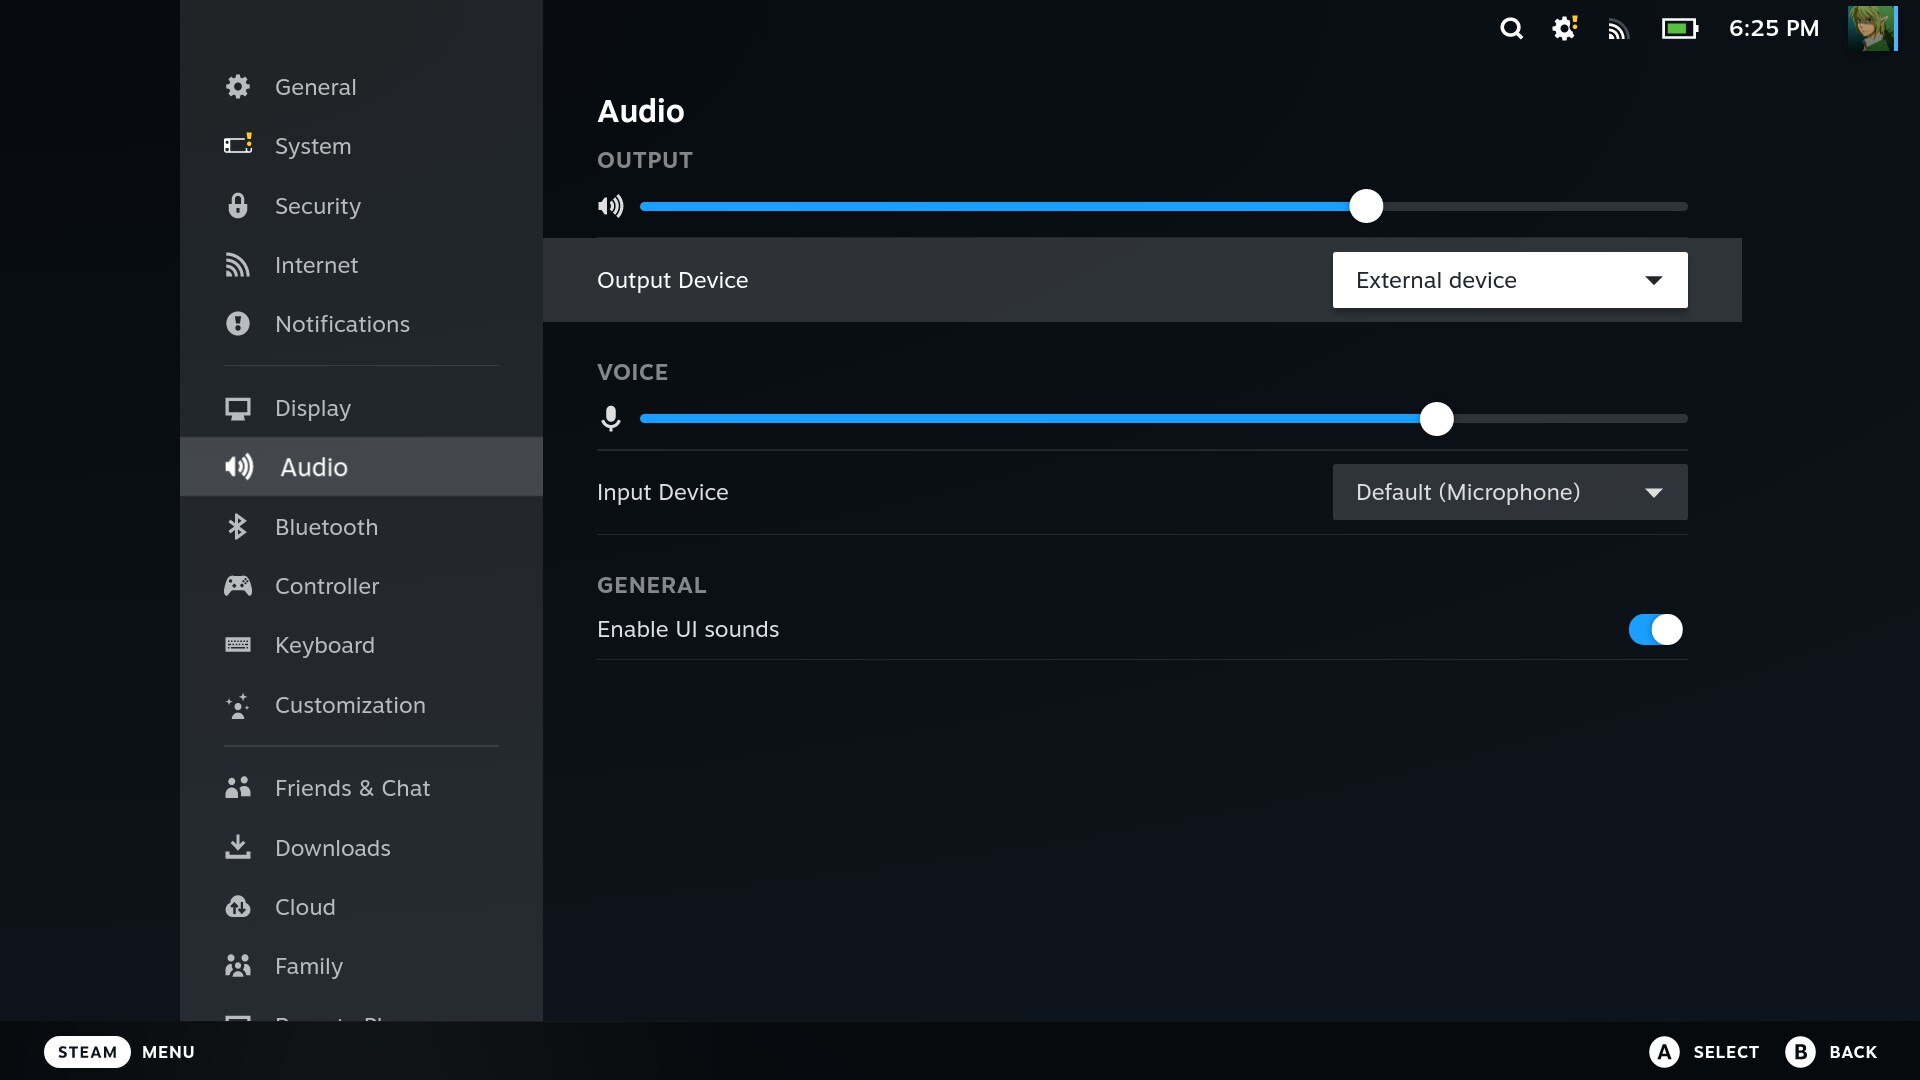
ROG Ally
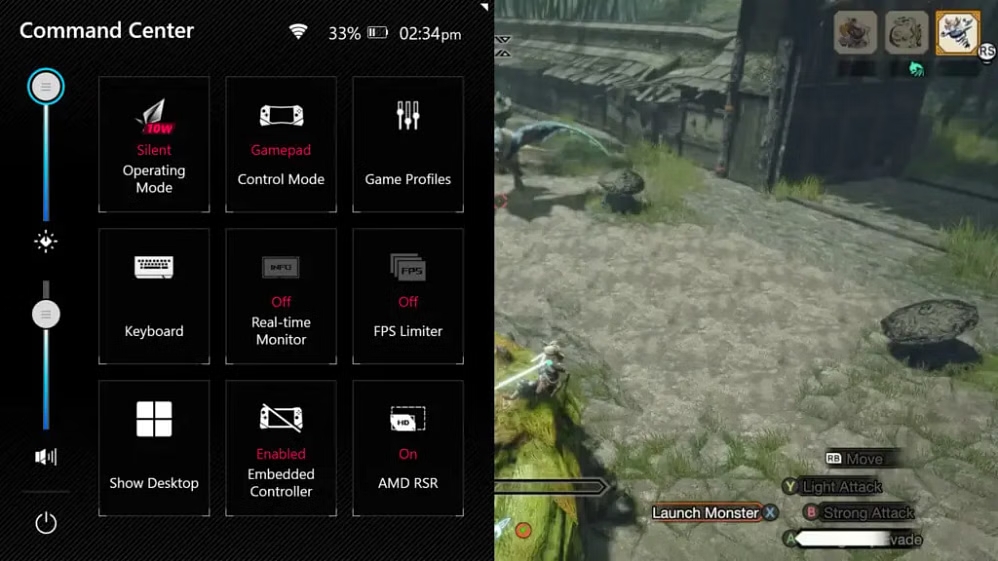
If you are unable to control the gamepad on the ROG Ally after connecting to the XR Glasses, go to Command Center, enable the Embedded Controller and switch the Control Mode to Gamepad.
Tech Specs Comparison
| Feature | Luma Cyber | Luma Pro | Luma Ultra | Luma |
|---|---|---|---|---|
| Display Size | 152" at 4 meters | 152" at 4 meters | 152" at 4 meters | 146" at 4 meters |
| Resolution | Up to 1200p. 1920 × 1200 per eye, 3840 × 1200 combined | Up to 1200p. 1920 × 1200 per eye, 3840 × 1200 combined | Up to 1200p. 1920 × 1200 per eye, 3840 × 1200 combined | Up to 1200p. 1920 × 1200 per eye, 3840 × 1200 combined |
| Refresh Rate | Up to 120Hz | Up to 120Hz | Up to 120Hz | Up to 120Hz |
| FOV | 52° | 52° | 52° | 50° |
| Brightness (Perceived) | 1500 nits | 1000 nits | 1500 nits | 1000 nits |
| Contrast Ratio | ≥100,000:1 | ≥100,000:1 | ≥100,000:1 | ≥100,000:1 |
| IPD | 58.0-70.0 mm | 64.0±6.0 mm (Regular) 68.0±6.0 mm (Large) |
58.0-70.0 mm | 56.0-72.0 mm |
| Colors | 108% sRGB | 108% sRGB | 108% sRGB | 108% sRGB |
| Myopia Adjustment | Up to -4.0D | Up to -4.0D | Up to -4.0D | Up to -6.0D |
| Electrochromic Film | 1-Click Immersion, Blocks Almost 100% Light | 1-Click Immersion, Blocks Almost 100% Light | 1-Click Immersion, Blocks Almost 100% Light | 1-Click Immersion, Blocks Almost 100% Light |
| Optical Transmittance | 0.5–40% | 0.5–40% | 0.5–40% | 0.5–40% |
| Haze | < 1% | < 1% | < 1% | < 1% |
| Discoloration Time | 0.1 s | 0.1 s | 0.1 s | 0.1 s |
| 3D Support | Yes | Yes | Yes | Yes |
| 3DoF / 6DoF | 3DoF via SpaceWalker | 3DoF via SpaceWalker | 6DoF + Hand Gestures | 3DoF via SpaceWalker |
| Color Modes | 5 Modes | 5 Modes | 5 Modes | 5 Modes |
| Audio | HARMAN AudioEFX | HARMAN AudioEFX | HARMAN AudioEFX | AAC System |
| Spatial Sound | Yes | Yes | Yes | Yes |
| Brightness & Volume Control | 9 levels | 9 levels | 9 levels | 9 levels |
| Connection | Magnetic Connector | Magnetic Connector | Magnetic Connector | USB-C |
| Wear Detection | Yes | Yes | Yes | Yes |
| Weight | 79g | 79g (Regular) 81g (Large) |
83g | 77g |
| Folded Dimensions* | 150.3 × 50.5 × 53.6 mm | 150.3 × 50.5 × 53.6 mm (Regular) 154.3 × 52.0 × 54.0 (Large) |
150.3 × 50.5 × 53.6 mm | 150.3 × 50.5 × 53.6 mm |
| Case Dimensions | 191 × 85 × 85 mm | 191 × 85 × 85 mm | 191 × 85 × 85 mm | 191 × 85 × 85 mm |
| Case Weight | 286g | 286g (Regular) 288g (Large) |
290g | 284g |
| Suggested Wear Time | 3–4 hrs | 3–4 hrs | 3–4 hrs | 3–4 hrs |
* Please note that dimensions may vary slightly depending on the measurement method.